The other night, you were out for a walk and noticed the moon hanging like a silver coin in the sky. It sparked a curiosity you haven’t felt in ages – wouldn’t it be incredible to see the craters and mountains up close? Maybe even catch a glimpse of Jupiter’s moons or the rings of Saturn? You’re not alone! Many people get that same itch to explore the cosmos, but quickly get intimidated by the perceived price tag. Luckily, diving into astronomy doesn’t have to break the bank.
This guide is here to help you find the best telescopes for beginners under $100 and get you started on your celestial journey. We’ll explore some surprisingly capable models, review their strengths and weaknesses, and arm you with the knowledge you need to choose the perfect entry-level telescope. So, ditch the guesswork, and let’s uncover the wonders of the universe together, one affordable telescope at a time!
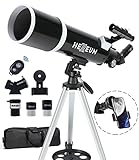
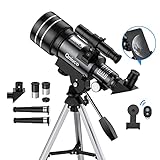
Before we jump into the best telescopes for beginners under $100 review, let’s take a look at these Amazon products:


Last update on 2025-12-12 / Affiliate links / #CommissionsEarned / Images from Amazon Product Advertising API
Reaching for the Stars (Without Breaking the Bank!)
Ever looked up at the night sky and felt a tug of curiosity? A yearning to see just a little bit closer, a little bit clearer? You’re not alone! For centuries, humans have been captivated by the cosmos, and thankfully, you don’t need to be an astronomer with a fancy observatory to join the fun. In fact, getting started with stargazing can be surprisingly affordable.
We’re going to dive into the exciting world of astronomy on a budget, specifically focusing on the best telescopes for beginners under $100. Now, let’s be realistic, you won’t be spotting distant galaxies in breathtaking detail with a telescope in this price range. But you’ll be amazed at what you can see: the craters of the moon, the rings of Saturn (depending on the time of year and seeing conditions), and even a few brighter nebulae are all within reach. Did you know that amateur astronomy is booming, with an estimated 10 million backyard stargazers in the US alone? That’s a lot of people sharing the same wonder you’re feeling right now!
Think of your first telescope as an entry point, a gateway to a lifelong hobby. It’s about learning the constellations, understanding the basics of optics, and experiencing the thrill of discovery. It’s also a great way to spend quality time with family and friends, sharing the magic of the night sky. Choosing the right telescope for your first foray into stargazing can be daunting, so we’ll guide you through the key features to consider and highlight some popular models that fit within your budget.
We’ll help you navigate the jargon, understand the different types of telescopes, and learn how to set realistic expectations for what you can see. By the end of this guide, you’ll be well-equipped to choose one of the best telescopes for beginners under $100 and start your own cosmic adventure. So, grab your blanket, find a dark spot, and get ready to explore the universe!
The Best Telescopes For Beginners Under $100
Gskyer 70mm Aperture 400mm AZ Telescope
Looking for an entry-level telescope that won’t break the bank? The Gskyer 70mm refractor is a solid choice. It’s simple to set up, making it perfect for those eager to start observing the night sky right away. With its 70mm aperture, you’ll be able to get decent views of the moon, planets like Saturn and Jupiter, and even some brighter deep-sky objects under dark skies.
While it won’t rival the performance of more expensive telescopes, the Gskyer 70mm offers good value for the price. The included accessories, such as multiple eyepieces and a finderscope, provide a range of magnifications and help you locate celestial objects. Keep in mind that image quality might not be perfect at the highest magnifications, but it’s a great way to learn the basics of astronomy and get a feel for what you can see with a telescope.
Celestron PowerSeeker 70AZ Telescope
The Celestron PowerSeeker 70AZ telescope is another excellent option for beginners on a budget. Its lightweight and portable design makes it easy to transport and set up in different locations. The alt-azimuth mount is simple to use, allowing you to easily point the telescope up and down, and left and right.
With its 70mm aperture, you can expect to see clear views of the moon’s craters and phases, as well as some of the brighter planets. The PowerSeeker 70AZ also comes with a few eyepieces to provide different magnification levels. It’s a fantastic way to get started in astronomy and explore the wonders of the night sky without a steep learning curve.
Aomekie Telescope for Kids Beginners
This Aomekie telescope is specifically designed with young astronomers in mind. It’s compact, lightweight, and incredibly easy to assemble, making it perfect for children to use with minimal adult supervision. Its bright color scheme and user-friendly design makes learning astronomy engaging and fun.
While it has a smaller aperture compared to other telescopes on this list, it still provides decent views of the moon and some brighter objects. It’s not meant for serious deep-sky observing, but it’s an excellent tool for sparking a child’s interest in astronomy and providing them with a first glimpse of the cosmos.
Emarth Telescope 70mm Astronomical Refractor
The Emarth 70mm Astronomical Refractor telescope provides a good balance of affordability and performance for beginner astronomers. It comes with fully coated optics, which help to enhance image brightness and clarity. The included smartphone adapter allows you to easily capture and share your astronomical observations.
This telescope is easy to set up and use, making it ideal for both kids and adults. It provides clear views of the moon, planets, and some brighter nebulae and galaxies. Its lightweight design and included carrying bag make it easy to transport and store.
SVBONY SV503 80/400 Telescope
While technically an OTA (Optical Tube Assembly) meaning that it does not include an eyepiece or mount, this telescope may be worth considering if you already have these items or plan on upgrading in the future. The SVBONY SV503 features an 80mm aperture, the largest aperture on our list, meaning that it can gather significantly more light than the other telescopes on this list. It also features a doublet lens that greatly reduces chromatic aberration and offers a clearer image.
If you are a more serious beginner or have already spent some time using a smaller beginner telescope, the SVBONY SV503 would be a good option for you. The larger aperture can display much more of the night sky, as well as clearer images of the planets.
Why You Need a Beginner Telescope Under $100
Imagine a crisp, clear night. You’re outside with your family, and your child points up at the sky, wide-eyed, asking about the moon’s craters or the twinkling lights of distant stars. Wouldn’t it be amazing to actually show them? A telescope for beginners under $100 is the perfect way to spark that initial curiosity without breaking the bank. It’s a low-risk, high-reward investment in fostering a love of science and exploration in your children – and perhaps reigniting your own!
These affordable telescopes are designed to be easy to set up and use, even if you have absolutely no experience with astronomy. Forget complex instructions and frustrating assembly; many models are practically ready to go straight out of the box. Think of it as dipping your toes in the vast ocean of the cosmos. You can explore the lunar surface, marvel at the rings of Saturn (albeit faintly), and discover bright nebulae without needing a PhD in astrophysics.
Consider this: instead of another evening glued to screens, you can create unforgettable memories under the stars. A telescope can be a catalyst for family bonding, educational opportunities, and a newfound appreciation for the universe we live in. The best telescopes for beginners under $100 provide a tangible way to connect with something far bigger than ourselves, fostering a sense of wonder and perspective that’s hard to come by elsewhere.
So, why not take the plunge? A small investment in a beginner-friendly telescope can open up a universe of possibilities. It’s about more than just stargazing; it’s about igniting curiosity, fostering family connections, and creating memories that will last a lifetime. For under $100, you can embark on an incredible journey of discovery – are you ready to explore the cosmos?
Understanding Telescope Magnification and Aperture
Think of magnification and aperture as teamwork. Magnification makes the image bigger, but aperture – the diameter of the telescope’s lens or mirror – is what gathers the light to make that image clear and bright. Imagine trying to read a tiny sign far away. Magnification is like squinting really hard to make the letters bigger. But if it’s dark, squinting alone won’t help! You need a flashlight (aperture) to illuminate the sign so you can actually see it.
For beginners, it’s tempting to chase high magnification numbers. However, a telescope with a small aperture and high magnification will only give you a blurry, dim image. It’s like zooming in too much on a digital photo – it just gets pixelated. A smaller aperture can still provide pleasing views of the Moon, planets, and brighter deep-sky objects, but don’t expect Hubble-quality images.
Most telescopes under $100 are going to have a limited aperture. So, focus on finding one with decent optics within that aperture range, rather than worrying about massive magnification. A smaller, sharper image is far more rewarding than a large, blurry one. Remember, seeing is believing, and you want to actually see something!
Consider the types of objects you’ll likely observe. The Moon, for instance, can be easily seen with lower magnification but benefits from a good aperture to reveal its craters and features. Planets like Jupiter and Saturn can also be observed, but again, image brightness and sharpness are more crucial than just zooming in. A good rule of thumb is to prioritize aperture over magnification in this price range.
Assembling and Setting Up Your Telescope
Let’s face it, nothing’s more frustrating than getting a new toy and not being able to figure out how to put it together. Telescopes, especially inexpensive ones, can sometimes come with cryptic instructions and confusing parts. So, before you even think about looking at the stars, take your time with assembly. Find a well-lit area and lay out all the components.
Most beginner telescopes come with a tripod. Ensure that the tripod is stable and level before attaching the telescope tube. An unstable tripod will cause vibrations, making it difficult to focus and observe. Think of it like trying to take a picture on a shaky bridge – the image will always be blurry.
Once the tripod is set up, carefully attach the telescope tube, following the instructions provided. Double-check that all screws are tightened properly but not overtightened. Overtightening can damage the components. Also, pay attention to the finderscope – a small, low-power telescope attached to the main telescope that helps you locate objects.
After assembly, practice using the telescope during the day to get familiar with its controls. Point it at distant objects like trees or buildings to practice focusing and aiming. This will make it much easier to find celestial objects at night. Consider it like practicing driving in an empty parking lot before hitting the highway.
Understanding the Night Sky and Finding Objects
Stargazing is a rewarding hobby, but it can be daunting at first. The night sky is vast and complex, and finding specific objects can seem like an impossible task. Don’t worry, though; there are plenty of resources available to help you navigate the cosmos. Start with a basic star chart or a stargazing app on your smartphone.
Stargazing apps can be particularly useful for beginners. They use your location and the time of day to show you a real-time map of the stars, planets, and constellations visible in your area. Some apps even use augmented reality, allowing you to point your phone at the sky and see the names and positions of celestial objects overlaid on the screen.
Before heading out for a night of stargazing, check the weather forecast. Clear skies are essential for good viewing. Also, find a location away from city lights to minimize light pollution. Light pollution can significantly reduce the visibility of fainter objects. Think of it like trying to hear a whisper in a crowded room – the surrounding noise makes it difficult to discern.
Start with easy-to-find objects like the Moon and planets. The Moon is a bright and obvious target, and it’s a great place to begin your observing journey. Planets like Jupiter and Saturn are also relatively easy to spot, and they can be quite impressive through a telescope. Over time, you can start to explore fainter objects like nebulae and galaxies.
Maintenance and Care for Your Telescope
Just like any other piece of equipment, your telescope needs regular maintenance to keep it in good working condition. This doesn’t have to be complicated or time-consuming, but it’s important to take a few simple steps to protect your investment. Think of it like taking care of your car – regular oil changes and tire rotations will extend its lifespan.
The most important thing is to keep the lenses and mirrors clean. Dust and fingerprints can degrade the image quality. Use a soft brush or a specialized lens cleaning cloth to gently remove any dirt or smudges. Avoid using household cleaners or paper towels, as these can scratch the delicate surfaces.
When you’re not using your telescope, store it in a dry and dust-free environment. A carrying case is ideal, but a closet or storage room will also work. This will protect it from moisture, dust, and accidental damage. Just as you would protect other valuables, you need to shield your telescope from potential harm.
Finally, check the telescope’s collimation (the alignment of the mirrors) periodically. Collimation is essential for achieving sharp images. Many telescopes come with instructions on how to collimate them. If you’re not comfortable doing it yourself, you can take it to a local astronomy club or telescope store for assistance. Consistent maintenance ensures your telescope remains a valuable tool for exploration.
Best Telescopes For Beginners Under $100: A Buying Guide
So, you’re looking to explore the cosmos without breaking the bank? That’s awesome! Getting into astronomy is an incredible journey, and starting with a telescope under $100 is totally doable. While you might not see distant galaxies in stunning detail at this price point, you can absolutely get a taste of the night sky and observe the Moon, planets, and brighter deep-sky objects. This guide will walk you through everything you need to consider before buying one of the best telescopes for beginners under $100, ensuring you get the most bang for your buck and don’t end up with a frustrating experience. Let’s dive in!
Aperture: The Bigger, The Better (Within Reason!)
Think of aperture as the telescope’s “eye.” It’s the diameter of the primary lens or mirror that collects light. The larger the aperture, the more light it gathers, and the fainter objects you’ll be able to see. With a small telescope, you will be able to see things like the moon, planets, and some brighter stars. Aperture is your number one most important metric for determining the quality of your viewing.
When searching for the best telescopes for beginners under $100, you’ll likely find apertures ranging from 50mm to 70mm. While 70mm is preferable, don’t dismiss a good quality 60mm telescope. Look for models that clearly state the aperture size. Remember that aperture is king, but other factors contribute to the overall experience. A slightly smaller aperture with excellent optics might outperform a larger aperture with poor-quality lenses.
Magnification: More Isn’t Always Merrier
Beginners often get caught up in magnification, thinking that higher magnification is better. This isn’t necessarily true! Magnification is simply the telescope’s ability to make objects appear larger, but it doesn’t add more detail. In fact, excessive magnification can make the image blurry, dim, and shaky, especially with lower-quality telescopes.
Magnification is calculated by dividing the telescope’s focal length by the eyepiece’s focal length. Telescopes often come with multiple eyepieces, each offering a different magnification. For the best telescopes for beginners under $100, focus on getting a few good-quality eyepieces rather than a huge range of magnification. Aim for a maximum useful magnification that’s roughly twice the aperture size in millimeters. Anything beyond that will likely result in a disappointing view. For example, a 70mm telescope’s maximum useful magnification is around 140x.
Mount Type: Stability is Key
The mount is what holds the telescope and allows you to point it at different parts of the sky. A wobbly, unstable mount can make even the best telescope frustrating to use. Imagine trying to look at the moon and seeing it jump around because your mount can’t stay still.
There are two main types of mounts you’ll encounter: alt-azimuth and equatorial. Alt-azimuth mounts move up and down (altitude) and left to right (azimuth), which is intuitive for beginners. Equatorial mounts are designed to track the movement of the stars as the Earth rotates, but they can be more complicated to set up. For the best telescopes for beginners under $100, an alt-azimuth mount is generally a better choice due to its simplicity. Prioritize a sturdy, well-built mount that minimizes vibrations.
Optical Quality: Look for Coated Optics
The quality of the lenses or mirrors is crucial for image clarity. The best telescopes for beginners under $100 will feature coated optics. Coatings reduce reflections and increase light transmission, resulting in brighter and sharper images.
Look for terms like “fully coated” or “multi-coated” in the telescope’s specifications. Avoid telescopes that don’t mention coatings, as they likely use uncoated optics, which will significantly degrade image quality. Even with coatings, you might still encounter some chromatic aberration (false color fringing), especially on brighter objects, but coatings will help minimize this effect.
Ease of Use: Keep it Simple, Stargazer!
As a beginner, you want a telescope that’s easy to set up and use. A complicated telescope with confusing instructions can quickly lead to frustration and discouragement. You don’t want to get so bogged down in the technical details that you miss out on the fun of observing the night sky.
The best telescopes for beginners under $100 are typically designed with simplicity in mind. Look for models with clear instructions, intuitive controls, and minimal assembly required. Features like a simple finder scope (a small aiming device) can also make it easier to locate objects in the sky.
Portability: Take Your Telescope on Adventures
Consider how portable you want your telescope to be. If you plan to use it primarily at home, a larger, heavier model might be fine. But if you want to take it camping or stargazing in dark-sky locations, a smaller, lighter telescope is a better choice.
The best telescopes for beginners under $100 are generally relatively lightweight and compact, making them easy to transport. Look for models that come with a carrying case or can be easily disassembled for storage and transport. A smaller telescope also cools down faster, meaning you can start observing sooner after setting it up.
Included Accessories: What Else Do You Get?
Pay attention to the accessories that come with the telescope. Eyepieces are essential, as they determine the magnification. A finder scope helps you locate objects in the sky. A Barlow lens can increase the magnification of your eyepieces, but be cautious about overdoing it.
While some telescopes may boast a plethora of accessories, focus on the quality of the included items. Two or three decent eyepieces are better than a dozen low-quality ones. Look for a sturdy tripod and a user-friendly finder scope. Don’t be swayed by gimmicky accessories that you’re unlikely to use. Consider if a smartphone adapter is useful for astrophotography. While you won’t capture stunning photos, it can be a fun way to share your experience. Always check reviews to determine the overall value of the included accessories alongside the telescope itself before deciding which is the best telescopes for beginners under $100.
FAQs
What kind of objects can I realistically see with a telescope under $100?
Don’t expect to see the rings of Saturn in incredible detail like you would with a more expensive telescope! However, you can absolutely see some amazing things. With a telescope in this price range, you can generally expect to see the Moon’s craters and lunar features very clearly. You’ll also likely be able to spot Jupiter and its four largest moons as bright dots. Depending on how dark your skies are, you might even be able to glimpse some brighter nebulae and galaxies, like the Orion Nebula or the Andromeda Galaxy, but they’ll appear as faint, fuzzy patches of light.
Think of it as an introduction to the wonders of the night sky. It’s a great way to get your feet wet and learn about astronomy without a huge investment. As you gain experience and your skies get darker, you’ll be surprised what you can find! It’s all about learning how to find these objects and understanding their faint nature, as you can always upgrade later.
Is it difficult to set up and use a telescope in this price range?
The good news is that most telescopes under $100 are designed with beginners in mind, so the setup is usually quite straightforward. They typically come with clear instructions and don’t require any complex tools or assembly. You might have to attach the tripod legs and the telescope tube, but it’s usually a matter of a few screws or bolts.
As for using the telescope, there will definitely be a learning curve, but nothing too daunting! You’ll need to learn how to focus the telescope and how to find objects in the sky using the finder scope or a basic star chart. Don’t get discouraged if you don’t see anything right away; it takes practice. Online resources and astronomy apps can be incredibly helpful for learning the basics and locating celestial objects. Remember, everyone starts somewhere, and the more you practice, the easier it will become!
What is the difference between refractor and reflector telescopes, and which is better for beginners?
Refractor telescopes use lenses to gather and focus light, while reflector telescopes use mirrors. For beginners on a budget, refractors are often the more user-friendly choice. They tend to be more durable, require less maintenance, and produce sharper images with higher contrast, which can be helpful when observing bright objects like the Moon and planets.
Reflectors, on the other hand, can offer larger apertures (light-gathering ability) for the same price, which is beneficial for observing fainter objects like nebulae and galaxies. However, they typically require more maintenance (like collimation, which is aligning the mirrors), and the image can sometimes be a bit softer. For a first telescope, the simplicity and ease of use of a refractor often make it a better starting point.
How important is the aperture of the telescope?
Aperture is the diameter of the telescope’s main lens or mirror, and it’s arguably the most important factor in determining how much light the telescope can gather. The larger the aperture, the more light the telescope collects, which means you’ll be able to see fainter objects and more detail.
While telescopes under $100 might not have huge apertures, even a small increase in aperture can make a noticeable difference. Look for the largest aperture you can find within your budget. A telescope with a larger aperture will provide brighter and sharper images, especially when observing deep-sky objects. Don’t get caught up in magnification alone; aperture is key!
What does magnification mean, and is higher magnification always better?
Magnification refers to how much larger the telescope makes an object appear. It’s determined by the telescope’s focal length divided by the eyepiece’s focal length. While it’s tempting to think that higher magnification is always better, that’s actually not the case!
In fact, too much magnification can make the image blurry, dim, and shaky, especially with a smaller telescope. The atmosphere also plays a role; on nights with poor seeing conditions, high magnification will just amplify the atmospheric turbulence. It’s usually better to start with lower magnification to get a brighter, clearer image, and then gradually increase the magnification as needed. A telescope in this price range will do well to have eyepieces to provide a range of low to moderate magnification, as this will give you more to view without sacrificing image quality.
What accessories should I consider buying with my telescope?
While the telescope itself is the main component, a few accessories can significantly enhance your observing experience. A good starting point is to consider additional eyepieces. Most telescopes come with one or two eyepieces, but having a wider range of focal lengths will allow you to experiment with different magnifications.
A Barlow lens is another useful accessory. It effectively doubles or triples the magnification of your existing eyepieces without having to buy more. A red dot finder can also be a helpful upgrade to your finder scope as it’s easier to align. Finally, consider a simple planisphere or star chart to help you locate objects in the night sky. These tools are inexpensive and can make a big difference in your ability to find and identify celestial objects.
What should I do if I can’t see anything through my telescope?
First, double-check that you’ve properly assembled the telescope and that all the components are securely attached. Then, make sure you’ve removed the dust caps from both the telescope and the eyepiece. It sounds obvious, but it happens!
Next, try focusing the telescope by slowly adjusting the focus knob until the image becomes sharp. Start with a bright object like the Moon or a distant street light during the day. Once you’ve got it focused, try aiming at your target object. If you’re still having trouble, make sure your finder scope is properly aligned with the telescope. This allows you to aim the telescope accurately by looking through the finder scope. Finally, be patient and persistent! It takes time to get used to using a telescope, but don’t give up.
The Bottom Line
Choosing your first telescope can feel a little daunting, but remember, the journey to understanding the cosmos starts with that very first look. Armed with the information we’ve covered about the best telescopes for beginners under $100, you’re well-equipped to make a smart choice. Focus on what excites you most – is it the moon’s craters, distant planets, or maybe even a glimpse of a nebula? Let your passion be your guide, and don’t be afraid to start small. The universe is waiting to be explored, and you’re holding the key!
Think of this telescope as your entry ticket to a lifetime of astronomical discovery! You don’t need to break the bank to begin unveiling the mysteries above. With the right expectations and a spirit of adventure, even one of these best telescopes for beginners under $100 can reveal wonders you never imagined. The night sky is a vast, ever-changing canvas – get out there, start observing, and most importantly, have fun!