The sun is shining, and you’re probably thinking about sunscreen, maybe a picnic, or even just soaking up some vitamin D. But have you ever wondered what’s really happening up there, on the surface of our closest star? Forget those blurry sunspots you might’ve seen through a regular telescope (with a dangerous filter, hopefully!). We’re talking about seeing prominences erupt, watching solar flares dance, and witnessing the dynamic energy of our sun in breathtaking detail. This is where solar telescopes come in, opening up a whole new world of astronomical observation.
Choosing the right equipment can feel overwhelming, especially when safety is paramount. That’s why we’ve put together this comprehensive guide to the best solar telescopes. We’ve researched, reviewed, and compiled everything you need to know to safely and effectively explore the sun’s fascinating features. Prepare to discover the best solar telescopes available, learn about the crucial safety features to look for, and find the perfect scope to unlock the wonders of our solar system’s powerhouse.
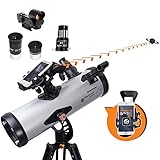
Before we jump into the best solar telescopes review, let’s take a look at these Amazon products:


Last update on 2025-11-30 / Affiliate links / #CommissionsEarned / Images from Amazon Product Advertising API
Gazing at Our Star: A Journey into Solar Observing
Ever looked up at the sun (briefly, of course! Never stare directly!), and wondered what incredible activity is happening on its surface? The sun, our nearest star, is a dynamic and ever-changing ball of plasma, constantly erupting with flares, prominences, and sunspots. Imagine being able to witness these events in real-time, from the comfort of your backyard! That’s where solar telescopes come in.
But unlike regular telescopes, you can’t just point any old telescope at the sun. Doing so without proper filters is incredibly dangerous and can cause irreversible eye damage. Solar telescopes are specially designed to safely observe the sun, often using advanced filtering techniques to block out harmful wavelengths of light and allow you to view specific features. Think of it like specialized sunglasses for your telescope, only far more sophisticated!
So, how do you choose the right instrument to explore our closest star? That’s where our guide to the best solar telescopes comes in. In this article, we’ll delve into the exciting world of solar observing, exploring the different types of solar telescopes available and highlighting some of the top-rated models on the market. The global solar telescope market, valued at approximately USD 90 million in 2023, is expected to continue growing as more and more astronomy enthusiasts discover the wonders of daytime observing.
Whether you’re a seasoned astronomer or just starting your journey into the cosmos, understanding the features and capabilities of different solar telescopes will help you make an informed decision and unlock the incredible spectacle of our sun. Prepare to be amazed by the sheer power and beauty of our star, safely and clearly revealed through the lens of the best solar telescopes.
Top 5 Best Solar Telescopes
Lunt Solar Systems LS60THa
The Lunt LS60THa is a fantastic entry point into hydrogen-alpha solar observing. It provides incredibly detailed views of prominences leaping off the Sun’s surface, as well as filaments and active regions on the solar disk. The 60mm aperture offers a good balance between portability and light-gathering ability, making it a versatile choice for both beginners and experienced observers. It’s also relatively easy to set up and use, which is a major plus for those who are new to solar telescopes.
However, it’s important to note that this is a dedicated solar telescope, meaning it can only be used to observe the Sun. It also has a relatively narrow field of view, which might limit your ability to observe larger solar features. But if your primary interest is in observing the dynamic features of the Sun in hydrogen-alpha light, the LS60THa is an excellent choice.
Coronado SolarMax III 70mm
The Coronado SolarMax III 70mm delivers impressive views of the Sun in hydrogen-alpha, showcasing brilliant prominences, active regions, and surface details. Its larger aperture compared to the LS60THa allows for brighter and more detailed observations, especially when seeing conditions are favorable. The included RichView tuning system lets you fine-tune the views, bringing out subtle details in prominences and on the solar surface.
While it is an exceptional instrument, the SolarMax III 70mm comes with a higher price tag. The bigger aperture also means it’s a bit less portable than smaller solar telescopes. It’s an investment, but one that provides incredible solar observing experiences for those who are serious about exploring our closest star.
Daystar Filters Quark Chromosphere
The Daystar Quark Chromosphere is a unique and versatile solar filter designed to work with existing refractors. It essentially transforms your nighttime telescope into a dedicated solar instrument for hydrogen-alpha viewing. This clever design makes it a cost-effective option if you already own a suitable refractor. The Quark offers stunning views of prominences, flares, and surface details, rivaling those of dedicated solar telescopes.
Keep in mind that the performance of the Quark depends heavily on the quality of the refractor you use it with. Chromatic aberration and other optical imperfections in the telescope will be magnified, impacting the quality of the solar image. It also requires a stable mount to handle the weight and balance of the filter. But if you have a good quality refractor, the Quark Chromosphere is an excellent way to unlock the wonders of solar observing.
Lunt Solar Systems LS50FHa Pressure Tuned Filter with B600 Blocking Filter
The Lunt LS50FHa Pressure Tuned Filter is a great upgrade for existing telescopes, giving them solar viewing capabilities. It works by filtering out all light except for a narrow band around the hydrogen-alpha wavelength, revealing the dynamic features of the Sun’s chromosphere. The pressure tuning system allows for precise adjustments to the wavelength, optimizing the views and bringing out subtle details.
The LS50FHa needs a separate blocking filter to be safely used, like the B600 blocking filter. It’s important to ensure proper compatibility and safe usage by using it with the specified blocking filter. This two-part system gives users flexibility. It is a bit more involved compared to stand-alone solar telescopes, but it offers a lot of bang for your buck.
Explore Scientific AR102 Doublet with Solar Filter
The Explore Scientific AR102 Doublet refractor telescope is a good starting point. It has a decent aperture for beginner astronomers. The Explore Scientific AR102 comes bundled with a white light solar filter. The solar filter lets you safely view sunspots and solar eclipses.
Remember, the included solar filter is designed for white light observation, meaning you’ll primarily see sunspots and the overall structure of the Sun. This is a much different experience than observing in hydrogen-alpha, which reveals the dynamic features of the Sun’s chromosphere. Also, double check and make sure the solar filter is properly installed before viewing.
Why Invest in a Solar Telescope?
Have you ever looked up at the sun and wondered about the dynamic activity happening on its surface? Sure, we all know it provides light and warmth, but without proper equipment, we’re missing out on a spectacular show. Investing in a solar telescope allows you to safely observe sunspots, solar flares, and prominences – features that are constantly changing and evolving, offering a unique and ever-changing cosmic spectacle. Imagine showing your kids the fiery eruptions dancing across the sun’s surface; that’s a far more captivating science lesson than any textbook!
Think of it like this: you might know your neighborhood from driving through it, but you really see it when you take a walk. A standard telescope isn’t designed for the intense light of the sun and can cause severe damage. Solar telescopes are specifically engineered with filters and other safety features that block harmful radiation, allowing you to observe the sun directly without risk. It’s like having a pair of specialized sunglasses for your telescope, letting you witness the sun’s activity in stunning detail.
What about the cost? While some may seem pricey, consider it an investment in knowledge, exploration, and potentially a lifelong hobby. The “best solar telescopes” offer exceptional clarity and resolution, revealing intricate details you simply can’t see with cheaper, less specialized equipment. Think about hobbies like photography or gaming; people invest in quality equipment to enhance their experience. Observing the sun through a high-quality solar telescope is no different – it’s about maximizing your enjoyment and unlocking a deeper understanding of our nearest star.
Ultimately, a solar telescope is more than just a piece of equipment; it’s a gateway to a new perspective. It’s an opportunity to witness the raw power and beauty of the sun, share those wonders with others, and connect with the universe in a tangible way. Instead of just reading about solar activity, you can witness it firsthand, making astronomy come alive and sparking curiosity for generations to come. So, why buy a solar telescope? Because you deserve to see the sun in all its glory, safely and clearly.
Understanding Solar Filters and Safety
Solar observing is an incredibly rewarding experience, but it’s absolutely crucial to prioritize safety. Unlike observing at night, looking at the sun directly, even for a fraction of a second, can cause permanent eye damage. Think of it like looking directly at a welding arc without protection – it’s simply not worth the risk. A proper solar filter is your shield against the sun’s harmful rays.
There are two main types of solar filters: white light filters and narrowband filters, such as Hydrogen-alpha (H-alpha) filters. White light filters typically show you sunspots and granulation on the solar surface, providing a relatively “quiet” view of the sun. Imagine watching the slow dance of sunspots across the solar disk, like islands drifting across a fiery ocean.
H-alpha filters, on the other hand, reveal the dynamic and active solar chromosphere, the layer of the sun’s atmosphere just above the visible surface. This is where you’ll see prominences leaping off the edge of the sun, solar flares erupting, and filaments snaking across the disk. It’s like watching a constant fireworks show!
Always ensure that any solar filter you purchase is ISO certified and specifically designed for use with a telescope. Never use homemade filters or filters designed for other purposes, such as welding glass. Your eyesight is precious, and it’s not worth taking any chances when it comes to solar observing. Double-check the filter is securely attached to the telescope before observing and be sure to supervise children closely.
Choosing the Right Aperture for Solar Viewing
The aperture of a solar telescope, which is the diameter of its primary lens or mirror, plays a significant role in the detail you’ll be able to observe. A larger aperture gathers more light, allowing you to see finer details on the sun’s surface or in its atmosphere. Think of it like this: a small window lets you see a small part of the scene, while a large window lets you see more.
For white light observing, a smaller aperture (60-80mm) can be perfectly adequate for viewing sunspots and granulation. The bright solar surface doesn’t require a massive light-gathering capability. However, if you’re aiming for high-resolution images or want to push the limits of what you can see, a larger aperture (90mm or greater) will be beneficial. It’s like using a zoom lens on a camera; more aperture helps bring out the details.
When it comes to H-alpha observing, aperture becomes even more important. The faint light emitted by the solar chromosphere requires a telescope with sufficient light-gathering power to reveal prominences, filaments, and flares. Smaller H-alpha telescopes may only show brighter features, while larger ones can reveal a wealth of subtle detail. Imagine comparing a small black-and-white TV to a large, high-definition color screen; the latter simply shows you more.
Ultimately, the ideal aperture for solar viewing depends on your budget, observing goals, and portability requirements. A larger aperture will generally provide better views, but it will also be more expensive and less portable. Consider your priorities carefully and choose an aperture that strikes the right balance for your needs.
Understanding Solar Telescope Mounts
The mount is often overlooked, but it’s absolutely essential for a comfortable and stable viewing experience. It’s the foundation upon which your telescope rests, and a shaky mount can ruin even the best optics. Imagine trying to take a picture with your phone while jogging; the resulting image will likely be blurry and indistinct. A good mount provides stability and allows you to precisely track the sun’s movement across the sky.
There are two main types of mounts: Alt-Azimuth (Alt-Az) and Equatorial mounts. Alt-Az mounts move in two directions: altitude (up and down) and azimuth (left and right). They’re simple to use and intuitive, making them a good choice for beginners. Think of it like panning and tilting a camera on a tripod.
Equatorial mounts, on the other hand, are designed to compensate for the Earth’s rotation. They have one axis aligned with the Earth’s axis, allowing you to track the sun with a single, slow-motion control. This is particularly useful for long-exposure photography, as it prevents stars from appearing as streaks in the image. It’s like having a special device that automatically keeps your camera pointed at the same object as the Earth spins.
For solar observing, either type of mount can work, but an equatorial mount is generally preferred for higher magnifications and astrophotography. It allows for smoother tracking and reduces the need for constant adjustments. However, Alt-Az mounts are often lighter and more portable, making them a good choice for grab-and-go observing sessions. Choose a mount that is sturdy, easy to use, and appropriate for your level of experience and observing goals.
Capturing Solar Images: Astrophotography
Solar astrophotography allows you to capture stunning images of the sun’s features, preserving them for posterity and sharing them with others. It’s a way to document the ever-changing solar landscape and reveal details that might be difficult to see with the naked eye. Think of it like creating your own solar time capsule.
To get started with solar astrophotography, you’ll need a few key pieces of equipment: a solar telescope, a suitable camera (either a dedicated astronomy camera or a DSLR/mirrorless camera), and a computer to capture and process the images. You might also want to invest in a Barlow lens to increase the magnification of your telescope.
The process involves capturing a series of short video clips or still images of the sun. These images are then stacked and processed using specialized software to reduce noise, enhance detail, and bring out the faintest features. It’s like combining multiple exposures to create a single, high-quality image, similar to the HDR feature on your smartphone but on a much grander scale.
Solar astrophotography can be challenging, but it’s also incredibly rewarding. With practice and patience, you can capture breathtaking images of the sun that reveal its beauty and complexity. Imagine the satisfaction of capturing a stunning solar flare or a delicate prominence dancing on the sun’s edge, and sharing that image with the world.
Buying Guide: Finding the Best Solar Telescopes
Hey there, future solar observer! So, you’re thinking about getting a solar telescope? Awesome! Peering at our closest star in all its fiery glory is an absolutely incredible experience. But with so many options out there, figuring out which solar telescope is right for you can feel a bit overwhelming. Don’t worry, I’m here to guide you through the process. This buying guide will break down everything you need to consider, so you can confidently choose the perfect telescope to explore the sun safely and effectively. Let’s dive in!
Safety First: Understanding Solar Filters
Seriously, I can’t stress this enough – NEVER look directly at the sun without proper filtration. Doing so will cause irreversible eye damage in a matter of seconds. Always prioritize safety above all else! Solar telescopes are specifically designed with built-in filters, but it’s crucial to understand the types and what they do. We’re talking about your eyesight here; there’s absolutely no room for error.
There are two main types of solar filters: white light filters and narrowband filters. White light filters show the sun’s photosphere, the visible surface. They allow you to see sunspots, which are cooler, darker areas on the sun’s surface. Narrowband filters, particularly Hydrogen-alpha (H-alpha) filters, are what unlock the truly spectacular views of the sun’s chromosphere – the layer above the photosphere. These filters reveal prominences (huge eruptions of plasma), filaments (dark, snake-like features), and plages (bright, active regions). Remember, different filters reveal different aspects of the sun!
Aperture Matters: Size Isn’t Everything, But It Helps
Aperture, the diameter of the telescope’s lens or mirror, is a crucial factor in any telescope, and solar telescopes are no exception. It determines the amount of light the telescope can gather and, therefore, the detail you can see. Generally, larger apertures will provide brighter and more detailed images of the sun.
However, with solar telescopes, aperture isn’t quite as straightforward as it is with nighttime telescopes. Because you’re using specialized filters, the amount of light is already significantly reduced. A larger aperture can still gather more light and provide better resolution, especially for faint details like small prominences. But don’t feel like you need the biggest, most expensive telescope to get started. Even a smaller aperture solar telescope, properly filtered, can provide amazing views. It’s about finding the balance between aperture, cost, and portability.
Filter Type: White Light vs. H-alpha
As we briefly touched on earlier, choosing between a white light filter and an H-alpha filter is a pivotal decision. They offer vastly different viewing experiences, so understanding the differences is key to picking the right telescope.
White light filters are typically more affordable and show the sun’s photosphere, allowing you to observe sunspots. They’re great for beginners or those interested in tracking the sunspot cycle. On the other hand, H-alpha filters offer breathtaking views of the sun’s chromosphere, revealing dynamic features like prominences and filaments. These filters are significantly more expensive but provide a far more visually striking and engaging observing experience. Think of it like this: white light filters show the sun’s “surface,” while H-alpha filters reveal its “atmosphere” – the exciting, ever-changing plasma surrounding the sun. For truly the best solar telescopes, many experienced astronomers prefer H-alpha filters.
Telescope Type: Refractor vs. Reflector
The age-old debate! Refractors use lenses to focus light, while reflectors use mirrors. For solar observing, refractors are generally preferred for lower to mid-range solar telescopes, especially those with dedicated H-alpha filters.
Refractors tend to offer sharper, higher-contrast images, which is beneficial when observing subtle details on the sun. They also require less maintenance than reflectors, as the lenses are sealed and less prone to dust or misalignment. Reflectors, on the other hand, can offer larger apertures for a lower price, which can be advantageous for white light solar observing. However, they may require more frequent collimation (alignment of the mirrors) and can be more susceptible to stray light. Ultimately, the best choice depends on your budget, desired aperture, and observing goals.
Mount and Stability: Keeping it Steady
No matter how fantastic your telescope is, if it’s wobbling around on a shaky mount, you won’t enjoy the view. A stable mount is essential for comfortable and effective solar observing. A good mount provides a steady platform for your telescope, allowing you to focus on the details without constant vibrations or image blurring.
There are two main types of mounts: alt-azimuth (alt-az) and equatorial (EQ). Alt-az mounts move up-and-down (altitude) and left-to-right (azimuth), making them intuitive to use for terrestrial viewing and casual astronomy. Equatorial mounts, on the other hand, are designed to compensate for the Earth’s rotation, making it easier to track celestial objects as they move across the sky. For solar observing, either type can work, but an EQ mount is generally preferred, especially for longer observing sessions or astrophotography. The smoother tracking makes maintaining the sun in your field of view much easier. Whichever mount you choose, make sure it’s sturdy enough to support the weight of your telescope and accessories.
Budget: Finding the Sweet Spot
Let’s face it, price is a major factor for most of us. Solar telescopes range in price from a few hundred dollars to several thousand, so it’s important to set a realistic budget before you start shopping. Knowing how much you can comfortably spend will help you narrow down your options and avoid overspending.
Remember, the best solar telescopes aren’t necessarily the most expensive. Consider what features are most important to you and prioritize those. For example, if you’re primarily interested in observing sunspots, a smaller, less expensive white light telescope might be perfectly adequate. If you’re passionate about seeing prominences and filaments, you’ll likely need to invest in an H-alpha telescope. Don’t forget to factor in the cost of accessories like eyepieces, filters, and a sturdy tripod. A little planning can go a long way in ensuring you get the most bang for your buck.
Portability: Taking the Sun on the Road
Think about where you’ll be using your solar telescope most often. Will you be observing from your backyard, or do you plan to take it on trips to dark sky locations? The size and weight of the telescope will play a significant role in its portability.
A larger telescope with a heavy mount can be challenging to transport and set up, while a smaller, more compact telescope is much easier to take on the go. Consider the trade-offs between aperture and portability. A larger aperture will provide better views, but it will also be heavier and less portable. If you plan to travel frequently with your telescope, prioritize a lighter, more compact model, even if it means sacrificing some aperture. There are even dedicated “solar binoculars” that are ultra-portable and perfect for quick solar observations on the fly.
Frequently Asked Questions
What exactly IS a solar telescope, and why can’t I just use my regular telescope with a filter?
A solar telescope is specifically designed to observe the sun safely and effectively. They typically incorporate special filters that block out almost all of the sun’s intense light and harmful UV and infrared radiation. This allows you to view solar features like sunspots, prominences, and flares without damaging your eyes or your equipment.
While it might seem like a regular telescope with a filter could do the trick, it’s really not that simple. Many inexpensive solar filters that attach to the eyepiece can actually crack or fail due to the concentrated heat of the sun, potentially causing permanent eye damage. Dedicated solar telescopes, or high-quality objective lens filters, are manufactured with much more robust materials and are designed to handle the heat and radiation safely. Think of it like using the right tool for the job – it’s safer and you’ll get much better results!
I’m worried about safety. How can I be absolutely sure I’m not going to hurt my eyes?
That’s a very valid concern, and safety should always be your top priority when observing the sun! The key is to use properly designed and certified solar observing equipment. Look for telescopes with built-in, permanently mounted filters or purchase high-quality, reputable filters that are specifically designed for your telescope’s objective lens (the large lens at the front). Always double-check that the filter is securely attached before observing.
Never, ever look at the sun through a regular telescope, binoculars, or camera lens without a certified solar filter. Even a brief glance can cause permanent eye damage. If you’re unsure about the safety of your equipment, consult with an experienced astronomer or a reputable telescope dealer. It’s always better to be safe than sorry when it comes to your eyesight.
What kind of features can I expect to see with a solar telescope?
That’s a great question! The type of features you can see really depends on the type of solar telescope and the filters it uses. With a white light filter, you’ll mainly observe sunspots – dark areas on the sun’s surface caused by intense magnetic activity. These spots can vary in size and shape, and they’re constantly changing.
If you use a hydrogen-alpha (H-alpha) filter, which is more specialized, you’ll be able to see the sun’s chromosphere – the layer just above the surface. This reveals spectacular prominences (huge loops of gas erupting from the sun), filaments (dark, thread-like features on the sun’s disk), and even solar flares (sudden bursts of energy). H-alpha filters offer a much more dynamic and active view of the sun.
I’m a beginner. Is a solar telescope too complicated for me to use?
Not at all! While solar observing might seem intimidating at first, there are plenty of user-friendly solar telescopes that are perfect for beginners. Look for models that are easy to set up and use, with clear instructions and intuitive controls. Some even come with built-in finderscopes that make it easier to aim at the sun.
Don’t be afraid to start with a simple white light solar telescope to observe sunspots. As you gain experience, you can explore more advanced options like H-alpha telescopes or add-on filters. Remember to take your time, read the instructions carefully, and don’t hesitate to ask for help from experienced observers or online astronomy communities.
How much do solar telescopes typically cost?
The price of solar telescopes can vary quite a bit depending on their size, features, and the type of filters they use. You can find entry-level white light solar telescopes for a few hundred dollars, which are great for observing sunspots. These are usually smaller, simpler models that are easy to use.
For more advanced H-alpha solar telescopes, which allow you to see prominences and other exciting details, you can expect to spend several hundred to several thousand dollars. These telescopes often have more sophisticated filters and optics, providing a much more detailed and dynamic view of the sun. It’s a good idea to set a budget and consider what features are most important to you before you start shopping.
What’s the difference between a dedicated solar telescope and a solar filter that I attach to my existing telescope?
Both dedicated solar telescopes and solar filters allow you to safely observe the sun, but there are some key differences. A dedicated solar telescope is specifically designed and built for solar observing, often with specialized optics and filters integrated into the design. This can result in better image quality and a more optimized viewing experience.
Solar filters, on the other hand, are accessories that you attach to your existing telescope. They can be a more affordable option if you already own a telescope, but it’s crucial to choose a high-quality filter from a reputable manufacturer to ensure safety and optimal performance. Make sure the filter is compatible with your telescope’s objective lens size. The biggest advantage of a dedicated scope is the peace of mind knowing everything is designed to work together safely and effectively.
Do I need any special accessories to get started with solar observing?
While a solar telescope and appropriate filters are the essentials, there are a few accessories that can enhance your observing experience. A sturdy tripod is crucial for stable viewing, especially at higher magnifications. A good quality eyepiece can also make a difference in image clarity and detail.
Depending on your telescope and observing goals, you might also consider things like a solar finder to help you locate the sun more easily, a camera adapter for taking pictures of the sun, or even a comfortable observing chair for longer viewing sessions. These are not essential, especially when starting out, but each will certainly improve your experience!
Final Verdict
Choosing the right tool to explore our nearest star can feel like a big decision, but think of it as embarking on an incredible journey. You now have the knowledge to sift through the noise and pinpoint the best solar telescopes that truly match your observing goals and budget. Whether you’re dreaming of capturing stunning sunspot details or witnessing the ethereal dance of prominences, remember that the universe, even our local star, is within reach.
Now it’s time to take the plunge! Don’t be afraid to explore further, read additional reviews, and visualize yourself behind the eyepiece. Imagine the thrill of sharing your solar observations with friends and family. Armed with the information from this guide, you’re well-equipped to select one of the best solar telescopes and unlock a whole new world of astronomical wonders. The sun awaits!