Ever find yourself staring at a breadboard overflowing with wires, knowing in your heart that this temporary masterpiece deserves a more permanent home? Maybe you’ve got a brilliant LED driver circuit, a clever sensor interface, or a streamlined audio amplifier just begging to be unleashed from its chaotic existence. Taking that leap from breadboard chaos to something more robust is exciting, and it often starts with a trusty prototyping board. But with so many options out there, figuring out which board is the perfect fit for your single-sided designs can feel overwhelming.
That’s where we come in! We’ve done the research and put together a comprehensive guide to help you find the best single-sided pcb prototyping boards for your projects. We’ll walk you through the key features to consider, highlighting the pros and cons of different types of boards, and share our top picks based on factors like ease of use, durability, and value. Get ready to ditch the breadboard blues and bring your electronic dreams to life with the perfect prototyping platform!
Before we jump into the best single-sided pcb prototyping boards review, let’s take a look at these Amazon products:
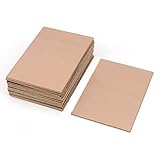

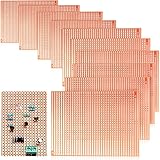


Last update on 2025-12-14 / Affiliate links / #CommissionsEarned / Images from Amazon Product Advertising API
So, You Want to Build Something Awesome? Let’s Talk Single-Sided PCBs!
Ever get that itch to bring an idea to life, to actually make something that solves a problem or just looks cool? That’s where printed circuit boards, or PCBs, come in. Think of them as the nervous system of your electronics projects. But diving right into complex multi-layer boards can be intimidating, and expensive! That’s why so many makers and hobbyists start with single-sided PCBs. They’re simpler to design, easier to manufacture, and perfect for a huge range of projects.
These boards, where all the conductive traces are on one side, offer a fantastic entry point into electronics prototyping. And when choosing where to start, selecting the best single-sided pcb prototyping boards can save you time and frustration. According to recent data, over 60% of hobbyist electronics projects utilize single-sided boards at some point in their development. This speaks to their versatility and cost-effectiveness, especially when iterating through different design versions.
Choosing the right board can significantly impact your project’s success. Factors like board material, size, hole spacing, and ease of soldering all contribute to a smoother prototyping experience. Plus, with the abundance of online resources and tutorials catering specifically to single-sided designs, you’ll be building circuits in no time.
So, whether you’re a student tinkering with Arduino projects, a seasoned maker building a custom gadget, or just curious about electronics, single-sided PCBs are your gateway to turning ideas into reality. This guide will help you navigate the world of prototyping boards and choose the best single-sided pcb prototyping boards for your next endeavor, ensuring you spend more time creating and less time wrestling with your materials.
Top 5 Best Single-Sided Pcb Prototyping Boards
Adafruit Perma-Proto Half-sized Breadboard PCB
The Adafruit Perma-Proto board is a fantastic option for those who want to move a breadboard prototype to a more permanent solution without the hassle of etching a custom PCB. The layout mimics a standard breadboard, with interconnected rows and columns of plated through-holes. This makes transferring components a breeze and minimizes the risk of wiring errors. It’s also conveniently half the size of a standard breadboard, making it ideal for smaller projects or fitting into tight enclosures.
However, keep in mind that, just like a breadboard, connections are dependent on soldering each component. This means that desoldering and making changes can be a bit more involved than on a breadboard. The lack of a silkscreen to indicate row and column numbers can be slightly inconvenient for complex circuits, but once you’re familiar with the layout, it becomes second nature. The high-quality construction and durable plated through-holes make this a great choice for turning your breadboard experiments into robust, long-lasting projects.
BusBoard Prototype Systems Breadboard PC Board
The BusBoard Prototype Systems board is a reliable choice for creating permanent versions of breadboard circuits. It’s meticulously designed to match standard breadboard layouts, allowing for a seamless transition. The pre-tinned pads are easy to solder to, and the board’s sturdy construction will withstand repeated use. The inclusion of power rails along the sides further simplifies prototyping, making it easier to distribute voltage and ground throughout your circuit.
While it perfectly replicates a breadboard layout, it lacks advanced features like integrated components or specialized routing. This simplicity is both its strength and weakness. Those seeking a barebones solution will appreciate the ease of use and direct translation from breadboard, but others who need more complex circuit configurations might prefer boards with more design flexibility.
Elgoo PCB Prototype Board Universal Printed Circuit Board
The Elgoo PCB Prototype Board is a versatile option for general-purpose prototyping, offering a blank canvas for your electronic creations. This board features a standard grid of plated through-holes, giving you the freedom to arrange components as you see fit. The consistent hole spacing is compatible with a wide range of components, and the durable construction ensures reliable connections. It’s a great value for the price and suitable for hobbyists and students alike.
Although it provides flexibility in component placement, it lacks the pre-defined layout of breadboard-style PCBs. This means you’ll need to plan your circuit carefully and manually wire all connections. The absence of power rails or mounting holes might require additional planning for power distribution and securing the board in your project enclosure. However, the affordability and adaptability of this board make it a worthwhile addition to any electronics enthusiast’s workbench.
SunFounder Double Sided Prototype PCB Board Universal Printed Circuit Board
Though technically a double-sided board, the SunFounder PCB Prototype Board is an excellent choice for single-sided projects and offers added flexibility. The double-sided design allows for component placement on both sides, which can be useful for complex projects or maximizing space utilization, even when using only one side. The plated through-holes ensure strong electrical connections, and the consistent grid spacing simplifies component placement and wiring. The board’s overall quality and durability make it a reliable choice for various prototyping needs.
While it’s a great option, those who exclusively work on single-sided projects might find the double-sided feature unnecessary. Also, remember that you’ll need to plan your connections carefully since it doesn’t have a pre-defined layout. However, the added flexibility and potential for more complex designs make this a valuable prototyping tool for hobbyists and professionals alike.
QTEATAK Prototype PCB Board Kit Universal Printed Circuit Board
The QTEATAK Prototype PCB Board Kit offers a comprehensive set of prototyping boards in various sizes, making it an excellent value for the money. This kit caters to a range of projects, from small, simple circuits to larger, more complex designs. The boards feature a standard grid of plated through-holes for easy component placement, and the included hardware, such as standoffs and screws, makes it easy to mount the boards in your projects. The variety of sizes ensures that you’ll have the right board for any application.
Though the kit is great value, the boards are of more basic construction than some of the other options. While perfectly functional for most projects, those requiring exceptionally high durability or specialized features might need to look elsewhere. The lack of pre-defined layouts means more planning for wiring, but the sheer variety of sizes and the included hardware make this kit a worthwhile investment for anyone who frequently prototypes electronic circuits.
Why Choose Single-Sided PCB Prototyping Boards?
Imagine you’re tinkering with a new LED project, a simple sensor circuit, or even a custom controller for your home automation system. Breadboards are great for initial testing, but they can get messy and unreliable, especially when dealing with more complex circuits. That’s where single-sided PCB prototyping boards step in! They provide a stable and organized platform to bring your electronic ideas to life without the hassle of complex, expensive, and time-consuming professionally made boards. You can easily solder components, make secure connections, and visually track your circuit layout, leading to faster debugging and a much more robust prototype.
Consider Sarah, an electronics enthusiast who wanted to build a custom display for her 3D printer’s stats. Initially, she used a breadboard, but the wires kept popping out, and the circuit was constantly malfunctioning. Frustrated, she switched to a single-sided PCB prototyping board. Suddenly, her project became much more manageable! She could neatly solder all the components, ensuring reliable connections and a cleaner, more professional-looking build. She found the “best single-sided pcb prototyping boards” were those with clearly labeled holes and well-spaced pads, which made soldering a breeze and reduced the risk of shorts.
The key benefit of using single-sided PCB prototyping boards lies in their simplicity and affordability. They’re perfect for hobbyists, students, and professionals alike who need a quick and efficient way to validate their designs before investing in more complex and costly double-sided or multi-layered boards. These boards allow you to experiment, iterate, and refine your circuits without breaking the bank. The “best single-sided pcb prototyping boards” are typically pre-drilled with standard hole patterns, making them compatible with a wide range of components and allowing you to easily create custom layouts.
In essence, single-sided PCB prototyping boards offer a bridge between the chaotic world of breadboarding and the commitment of custom-fabricated PCBs. They offer the stability, organization, and permanence needed for intermediate-level prototyping, empowering you to bring your electronic visions to reality with confidence and ease. Choosing the “best single-sided pcb prototyping boards” translates to faster project completion, fewer headaches, and ultimately, more fun in the world of electronics!
Alternatives to Single-Sided PCBs for Prototyping
Let’s be honest, sometimes a single-sided PCB just won’t cut it. You might find yourself running out of space for components, or needing more complex routing to avoid signal interference. That’s where double-sided or even multilayer boards come into play, even for prototyping. Think of it like building a house – sometimes you need more than one floor to fit everything!
For simpler prototypes, breadboards are an excellent alternative. No soldering required, and you can quickly change your circuit as you experiment. However, breadboards can be a bit messy and unreliable for more complex circuits, especially at higher frequencies. Imagine trying to build a miniature radio receiver on a breadboard – it’s doable, but it’ll likely be a tangled mess of wires!
Stripboard, also known as Veroboard, offers a more permanent and organized alternative to breadboards. You solder your components onto the board, creating a more robust prototype. This is great for projects that you might want to reuse or showcase, like a small sensor interface for a home automation project. The downside is that modifications require desoldering, which can be time-consuming.
Another option to consider is outsourcing your PCB fabrication. While it might seem expensive, online PCB prototyping services have become incredibly affordable, especially for small quantities. You can design your circuit in software, upload the files, and have professionally fabricated boards delivered to your door. This is ideal for projects where you need a polished, functional prototype for testing in a real-world environment, like a product demo for potential investors.
Designing Your Single-Sided PCB Layout
So, you’ve decided on using a single-sided PCB for your prototype. Great! Now comes the fun part: designing the layout. Think of it as planning the streets and buildings of a small city, except your roads are copper traces and your buildings are electronic components. A well-designed layout is crucial for a functional and reliable prototype.
Start by placing your components strategically on the board. Group related components together to minimize the length of the traces connecting them. For example, if you’re building a simple LED driver circuit, keep the resistor and LED close to the power source to reduce voltage drops. This is like planning a neighborhood – you want the houses close to the amenities.
Next, route the traces to connect the components. Try to keep traces short, direct, and avoid sharp angles, which can cause signal reflections. Use wider traces for power and ground connections to handle higher currents. Imagine this as designing the highway system of your city – you want efficient and reliable routes for the flow of traffic (electricity).
Finally, double-check your design before sending it off to be fabricated. Make sure all components are connected correctly and that there are no short circuits. A simple mistake can render your entire board useless. This is like a final inspection of your city plan – you want to catch any errors before construction begins. There are many free EDA tools like KiCad or EasyEDA to facilitate this process.
Soldering Techniques for Single-Sided PCBs
Soldering is the art of joining electronic components to the PCB using molten solder. It’s a fundamental skill for anyone working with electronics. Proper soldering techniques are essential for creating reliable connections that will withstand the rigors of testing and use. Think of it as welding the steel beams of a building – strong welds are critical for structural integrity.
Before you start soldering, make sure your soldering iron is clean and properly heated. Apply a small amount of solder to the tip to create a “tinning” effect, which helps the solder flow smoothly. Then, heat both the component lead and the PCB pad simultaneously, and apply solder to the junction. The solder should flow evenly around the lead and the pad, creating a shiny, conical fillet.
Avoid using too much solder, as this can create solder bridges, which can short-circuit adjacent components. Also, avoid overheating the components, as this can damage them. Practice makes perfect, so don’t be afraid to experiment with different techniques. Imagine learning to ride a bike – you might fall a few times, but eventually, you’ll get the hang of it.
After soldering, inspect your work carefully. Look for any solder bridges, cold solder joints (dull and grainy), or insufficient solder. Use a multimeter to check for continuity between the components and the traces. If you find any problems, you can use desoldering braid or a desoldering pump to remove the solder and try again. This is like quality control on a manufacturing line – you want to catch any defects before the product ships.
Troubleshooting Common Single-Sided PCB Prototype Issues
Even with careful design and assembly, things can sometimes go wrong with your PCB prototype. Troubleshooting is the process of identifying and fixing these problems. Think of it as being a doctor, diagnosing and treating a sick patient. A systematic approach is key to finding the root cause of the issue and getting your prototype working again.
Start by visually inspecting the board for any obvious problems, such as broken components, solder bridges, or missing connections. Use a magnifying glass to examine the solder joints closely. Sometimes a visual inspection is all it takes to find the problem. This is like looking for a visible injury before running diagnostic tests.
If you don’t find anything obvious, use a multimeter to check for continuity and voltage levels at various points in the circuit. This can help you identify shorts, open circuits, or incorrect voltage readings. For example, if an LED isn’t lighting up, check the voltage across the LED and the resistor in series with it. This is like using a thermometer and a blood pressure monitor to assess a patient’s vital signs.
Finally, if you’re still stuck, consult the schematic and the datasheet for the components. Double-check your connections and make sure you’re using the correct component values. Sometimes the problem is as simple as a misplaced resistor or a miswired connection. This is like reviewing a patient’s medical history and lab results to get a complete picture of their condition.
Buying Guide: Best Single-Sided PCB Prototyping Boards
Hey there, fellow electronics enthusiast! So you’re looking to dive into the world of PCB prototyping? Awesome! Choosing the right single-sided PCB prototyping board can make a huge difference in your project’s success. It’s all about finding that sweet spot between functionality, ease of use, and, of course, your budget. There are tons of options out there, which can feel overwhelming. That’s why I’ve put together this guide to help you navigate the choices and find the best single-sided PCB prototyping boards for your specific needs. Let’s get started!
Factor 1: Hole Size and Spacing – Making Sure Your Components Fit Comfortably
Alright, first things first: let’s talk about hole size and spacing. This might seem like a small detail, but trust me, it can be a real headache if you overlook it. You want to make sure the holes are large enough to accommodate the leads of your components without forcing them, but not so large that the leads wiggle around loosely. Standard hole sizes typically range around 0.8mm (0.0315 inches), which usually works well for most common through-hole components like resistors, capacitors, and LEDs. However, if you’re planning to use components with thicker leads, like certain connectors or some older parts, you might need a board with slightly larger holes.
Also, pay close attention to the spacing between the holes. A standard 0.1 inch (2.54mm) pitch is generally the most versatile, as it matches the pin spacing of most DIP (Dual In-line Package) ICs and other standard components. Boards with this standard spacing will give you the most flexibility when working on a variety of projects. Trying to force components into a board with the wrong hole size or spacing is just asking for bent leads, damaged components, and a frustrating prototyping experience. Nobody wants that, right? So, do your homework and make sure the board’s hole size and spacing aligns with the components you plan to use most often. It’ll save you time, money, and a whole lot of frustration in the long run.
Factor 2: Board Material and Quality – Investing in Durability and Reliability
Now let’s chat about the actual stuff your prototyping board is made of! The material and overall quality of the board matter a lot, especially if you plan on reusing the board multiple times or if your project involves soldering. Typically, you’ll find prototyping boards made from materials like FR-4 (Flame Retardant 4) or phenolic. FR-4 is the more robust and preferred option. It’s a fiberglass-reinforced epoxy laminate that’s known for its durability, heat resistance, and electrical insulation properties. Phenolic boards are cheaper, but they’re also more brittle and less tolerant of heat, which means they’re more likely to crack or delaminate during soldering.
Beyond the material, pay attention to the overall quality of the board. Look for boards that are clean, with well-defined hole edges and smooth surfaces. A poorly manufactured board might have rough edges, uneven copper traces (if any), or even missing pads. These imperfections can make soldering more difficult, increase the risk of short circuits, and ultimately compromise the reliability of your prototype. So, while it might be tempting to go for the cheapest option, investing in a higher-quality board will pay off in the long run by providing a more stable and reliable platform for your projects. The best single-sided pcb prototyping boards are built to last.
Factor 3: Copper Trace Design – Streamlining Your Connections
Moving on to copper traces! Some single-sided prototyping boards come with pre-etched copper traces, while others are just plain boards with holes. The presence and design of these traces can significantly impact your prototyping workflow. Boards with pre-etched traces, often in the form of a grid or bus layout, can speed up the process of connecting components and building circuits. They provide ready-made pathways for routing signals, reducing the need for extensive wire jumping and soldering. This can be especially helpful for beginners who are still learning the ropes of circuit design.
However, the downside of pre-etched traces is that they can sometimes limit your flexibility. If your circuit design deviates from the grid layout, you might end up having to cut traces or add extra wires to make the necessary connections. So, before choosing a board with pre-etched traces, carefully consider your project’s complexity and whether the trace layout aligns with your design. If you anticipate needing a lot of flexibility, a plain board without traces might be a better option, as it allows you to create custom connections using wires or solder bridges.
Factor 4: Board Size and Shape – Tailoring to Your Project’s Needs
Size matters! When choosing a single-sided PCB prototyping board, think about the size and shape of your project. If you’re working on a small, simple circuit with only a few components, a smaller board might be sufficient. On the other hand, if your project involves numerous components, sensors, or modules, you’ll need a larger board to accommodate everything. It’s always better to have a little extra space than to be crammed for room.
Also, consider the shape of the board. Rectangular boards are generally the most common and versatile, but you might find other shapes like square or circular boards that better suit your specific needs. For example, if you’re building a wearable device, a smaller, irregularly shaped board might be a better fit. The goal is to choose a board that provides enough space for your components while also being compact and convenient to work with. Think about how the board will integrate into your overall project and choose accordingly.
Factor 5: Ease of Use and Modification – Making Prototyping a Breeze
Let’s talk about how easy it is to actually work with the board! A good single-sided PCB prototyping board should be user-friendly and allow for easy modifications. This includes factors like the clarity of the hole markings, the smoothness of the surface for soldering, and the ease with which you can cut or modify the board. Some boards have clear markings that indicate the row and column numbers, which can be incredibly helpful for keeping track of component placement and wiring.
The ability to easily cut or modify the board is also important, especially if you need to fit it into a specific enclosure or adapt it to a particular shape. Boards made from FR-4 can be cut with a saw or rotary tool, while phenolic boards can be snapped or scored with a knife. Just be sure to take safety precautions when cutting any type of board. Ultimately, you want a board that feels comfortable to work with and allows you to make changes without too much hassle. A board that is easy to use will make the entire prototyping process more efficient and enjoyable.
Factor 6: Connectivity and Mounting Options – Integrating Seamlessly
How are you going to connect your board to the outside world? And how are you going to keep it in place? Connectivity and mounting options are key considerations when selecting the best single-sided PCB prototyping boards. Think about what kind of external connections your project will require. Do you need to interface with sensors, displays, or other modules? If so, you’ll want to choose a board that provides easy access to the relevant pins or connectors.
Some boards come with pre-drilled mounting holes, which can be incredibly helpful for securing the board inside an enclosure or onto a mounting surface. These holes allow you to use screws or standoffs to firmly attach the board, preventing it from shifting or moving around during use. If the board doesn’t have pre-drilled holes, you can always drill your own, but this requires extra effort and can increase the risk of damaging the board. Consider the types of connections and mounting options you’ll need for your project and choose a board that makes integration as seamless as possible.
Factor 7: Budget and Availability – Balancing Cost and Convenience
Finally, let’s talk about the bottom line! Budget and availability are always important factors to consider when buying anything, and single-sided PCB prototyping boards are no exception. Prices can vary widely depending on the size, material, quality, and features of the board. It’s important to set a budget beforehand and stick to it as closely as possible. Remember that the cheapest option isn’t always the best in the long run. Investing in a slightly more expensive, higher-quality board can save you time and frustration down the road.
Also, consider the availability of the board. Can you easily purchase it from a reputable supplier? Are there plenty of reviews and documentation available online? Choosing a board that is readily available and well-documented will make it easier to get support and troubleshoot any issues you might encounter. Finding the best single-sided pcb prototyping boards involves balancing your budget with the features, quality, and availability that you need for your project. Good luck, and happy prototyping!
FAQs
What exactly is a single-sided PCB and why would I want to use one?
Single-sided PCBs are the most basic type of printed circuit board. They have all the conductive pathways, meaning the copper traces, on just one side of the board. This design simplicity makes them much easier and cheaper to manufacture compared to more complex boards like double-sided or multi-layer PCBs. Think of it like a one-story house – simple, straightforward, and often all you need for basic living!
You’d choose a single-sided PCB when your circuit is relatively simple and doesn’t require a high density of components or intricate wiring. They’re perfect for hobby projects, educational purposes, or low-cost mass-produced electronics like simple calculators or LED lighting. Using them is also a great way to learn the basics of PCB design before moving on to more complex projects.
What are the key factors I should consider when choosing a single-sided PCB prototyping board?
When picking a single-sided PCB prototyping board, think about your project’s needs. Board size is a big one – make sure it’s large enough to comfortably accommodate all your components without being unwieldy. The thickness of the board matters too, as it affects the overall durability and rigidity. Thicker boards are more robust but can be harder to cut or drill.
Also, consider the material the board is made from. FR-4 is a common and reliable choice. Finally, check the hole sizes and spacing, especially if you’re using through-hole components. You’ll want to ensure the holes align properly with your component leads to avoid any frustrating soldering issues.
What tools and equipment do I need to work with single-sided PCB prototyping boards?
Working with single-sided PCB prototyping boards doesn’t require a ton of specialized equipment, which is great news! You’ll definitely need a soldering iron and solder to attach your components. A multimeter is also essential for testing connections and troubleshooting any issues you might encounter along the way.
Beyond that, a wire stripper, wire cutter, and some needle-nose pliers will be handy for preparing and manipulating wires. For cutting or shaping the board itself, you might want a small hobby saw or a rotary tool like a Dremel. Don’t forget safety glasses to protect your eyes from solder splatter or debris! A good magnifying glass or a lighted magnifier can also be a lifesaver for seeing small details clearly.
Can I etch my own single-sided PCBs at home? What’s involved?
Yes, you absolutely can etch your own single-sided PCBs at home! It’s a rewarding process that gives you complete control over your design. Essentially, you’ll start by creating a design on a computer using PCB design software. Then, you print that design onto a transparency film.
Next, you’ll transfer the design onto a copper-clad board using either a toner transfer method or a photosensitive method. After that, you’ll use an etchant solution (like ferric chloride) to remove the exposed copper, leaving behind the desired traces. It sounds a bit daunting, but there are plenty of online tutorials to guide you through the process, and it becomes easier with practice!
What are some common mistakes to avoid when working with single-sided PCB prototyping boards?
One common mistake is overcrowding the board with too many components. Make sure you have enough space between them for easy soldering and to avoid any accidental short circuits. Plan your layout carefully before you start soldering, and think about how the components will be connected.
Another mistake is not using enough flux when soldering. Flux helps the solder flow smoothly and creates a strong, reliable connection. Also, be careful not to overheat the components or the board while soldering, as this can damage them. Remember, patience is key!
How do I troubleshoot a single-sided PCB that isn’t working?
If your single-sided PCB isn’t working as expected, start by visually inspecting the board for any obvious issues. Look for broken traces, solder bridges (where solder accidentally connects two pads that shouldn’t be connected), or poorly soldered joints. A magnifying glass can be really helpful here.
Then, use your multimeter to check for continuity between different points in the circuit. This will help you identify any open circuits or short circuits that might be causing the problem. Also, double-check your wiring and component placement against your schematic to make sure everything is connected correctly. Don’t be afraid to re-solder joints that look questionable – a fresh solder connection can often solve the problem.
Are there any safety precautions I should take when working with PCB prototyping boards?
Safety is always paramount when working with electronics! First, always wear safety glasses to protect your eyes from solder splatter or flying debris. Work in a well-ventilated area, especially when soldering, as the fumes can be harmful.
When using etchants, wear gloves and eye protection, and follow the manufacturer’s instructions carefully. These chemicals can be corrosive and irritating. Dispose of used etchant properly according to local regulations. Finally, unplug your soldering iron when you’re not using it, and never leave it unattended. A hot soldering iron can easily cause burns or start a fire.
Final Words
Choosing the best single-sided PCB prototyping boards can feel like navigating a maze, right? But hopefully, this guide has given you the map you need! You’ve got the knowledge now; you know what to look for in terms of material, size, and ease of use. Don’t let analysis paralysis freeze you! Consider your project needs, review the highlighted contenders, and take the plunge. Your next innovative creation is waiting to come to life.
Ultimately, the perfect PCB is the one that empowers you to build confidently. Every great invention started with a prototype, often humble beginnings on a simple board. So, pick your champion from the list, grab your soldering iron, and start turning those ideas into reality. There’s a world of exciting possibilities waiting to be explored, and it all starts with that first connection!