Remember that time you excitedly set up your new satellite dish, only to spend the next hour rotating it this way and that, getting absolutely nothing but frustration for your efforts? Maybe you even resorted to shouting instructions at a family member armed with a cell phone, desperately hoping they’d see a signal before your patience completely evaporated. We’ve all been there, struggling to pinpoint that elusive sweet spot in the sky. Thankfully, there’s a better way, a way that doesn’t involve guesswork and strained family relations!
This guide is dedicated to helping you navigate the world of satellite finders without breaking the bank. We’re focusing specifically on the best satellite finders under $50, proving that you don’t need to spend a fortune to get a reliable and accurate signal. We’ll take you through our top picks, highlighting their key features and benefits, and provide a comprehensive buying guide to help you choose the perfect satellite finder for your needs and budget. So, say goodbye to frustrating setup experiences and hello to clear, consistent satellite reception!
Before we jump into the best satellite finders under $50 review, let’s take a look at these Amazon products:


Last update on 2026-03-04 / Affiliate links / #CommissionsEarned / Images from Amazon Product Advertising API
Lost in Space? Finding Your Signal on a Budget
Ever felt like you’re playing hide-and-seek with a satellite? One minute you’re getting a crystal-clear picture, the next you’re staring at static and wondering if you angered some cosmic entity. We’ve all been there. Setting up a satellite dish can be a frustrating process, especially when you’re relying on guesswork or those flimsy signal bars on your TV. You might spend hours tweaking, turning, and tilting, only to end up with a headache and a blurry screen.
But fear not, fellow stargazers (or TV enthusiasts, at least)! There’s a tool that can transform this frustrating dance into a straightforward, almost effortless setup. We’re talking about satellite finders. These handy gadgets are designed to pinpoint the precise location of the satellite you’re trying to connect to, taking the guesswork out of the equation. In fact, studies show that using a satellite finder can reduce setup time by as much as 75% compared to manual alignment. That’s a whole lot of saved time and frustration!
Now, you might be thinking, “Satellite finders? Those must cost a fortune!” And while some high-end models can certainly break the bank, there’s a surprisingly robust market for budget-friendly options. We’re diving deep into the world of affordable satellite signal acquisition to bring you the best satellite finders under $50. These devices prove that you don’t need to spend a fortune to get a strong, reliable signal.
So, if you’re tired of struggling with satellite alignment, stay tuned. We’re about to explore some of the top contenders in the affordable satellite finder category. We’ll break down their features, performance, and overall value to help you find the perfect tool to get you connected without emptying your wallet. Get ready to say goodbye to static and hello to seamless satellite TV!
Top 5 Best Satellite Finders Under $50
Satmeter WS6906 Satellite Finder
The Satmeter WS6906 is a fantastic entry-level satellite finder, and it’s surprisingly feature-packed for the price. It has a bright LCD screen, which makes it easy to see the signal strength even in direct sunlight. It’s simple to use, with straightforward menu navigation and pre-programmed satellite lists. You’ll be locking onto your favorite channels in no time, even if you’re a complete beginner.
Of course, at this price point, there are some limitations. The build quality isn’t the most robust, so you’ll want to handle it with care. Also, while the included satellite lists are comprehensive, they might require some updating over time. However, for the price, the Satmeter WS6906 provides excellent value and a simple path to satellite signal acquisition.
GT Media V8 Finder Meter
The GT Media V8 Finder Meter is a compact and user-friendly option, perfectly suited for those who need a portable and reliable signal finder. Its small size makes it easy to carry around, whether you’re climbing a ladder or working in tight spaces. The bright LED display provides clear signal readings, and the audible alert helps you pinpoint the strongest signal without constantly looking at the screen.
While the battery life is decent, it’s not exceptional, so it’s wise to have a power bank handy if you’re planning a long setup session. Some users have also reported that the initial setup can be a bit fiddly, but once configured, it performs admirably. All in all, the GT Media V8 Finder Meter is a solid choice for quick and easy satellite alignment.
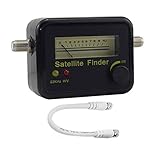
Supersat DSS-SR1 Satellite Signal Finder
The Supersat DSS-SR1 is a simple and effective analog satellite finder. Its no-frills design prioritizes ease of use, making it ideal for those who prefer a straightforward approach. The needle meter clearly displays the signal strength, and the adjustable sensitivity allows you to fine-tune the readings for optimal accuracy. Its reliance on a traditional analog meter makes it exceptionally intuitive to use.
It does lack the advanced features of digital finders, such as satellite identification and spectrum analysis. Also, reading the meter accurately requires a little practice and getting familiar with the optimal signal level, but once you get the hang of it, the Supersat DSS-SR1 is a reliable and budget-friendly tool for satellite alignment.
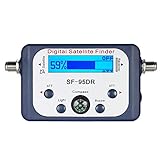
Signstek Digital Satellite Finder Meter
The Signstek Digital Satellite Finder Meter offers a digital solution at an attractive price. The digital display is clear and easy to read, even in bright sunlight. One of its strengths is its ability to detect weak signals, making it useful in challenging environments or for fine-tuning existing installations. The device also includes a built-in speaker that provides an audible tone, increasing in pitch as the signal strength increases.
While the user interface is reasonably straightforward, the included instructions could be clearer. Also, the build quality feels a little plasticky, so it’s best to treat it with care. Still, considering its features and price, the Signstek Digital Satellite Finder Meter represents a solid value for anyone looking for a digital satellite finder.
Freesat V8 Finder BT03
The Freesat V8 Finder BT03 is a budget-friendly option that focuses on simplicity. Its small size and lightweight design make it highly portable, making it a great choice for installers on the move. It features a simple interface, including an easy-to-read LED display that allows you to quickly assess the signal strength, and includes a speaker to allow for audio feedback while aiming your antenna.
It does lack some of the advanced features found in more expensive models, such as spectrum analysis. However, if you’re primarily concerned with quickly and accurately aligning your satellite dish without needing a lot of bells and whistles, the Freesat V8 Finder BT03 is a reliable choice.
Why You Need a Satellite Finder Under $50
Imagine this: you’ve finally set aside a weekend to binge-watch your favorite shows under the stars, but your satellite dish is stubbornly refusing to pick up a signal. Frustration sets in, the sun is going down, and your dreams of entertainment are fading faster than the daylight. This is where a satellite finder under $50 becomes your best friend. It’s the simple, affordable solution to quickly and accurately align your dish, ensuring you get that crystal-clear picture without hours of fiddling and guesswork.
These handy devices take the mystery out of satellite alignment. Forget relying on vague directions or tedious trial and error. A satellite finder provides a real-time signal strength reading, guiding you to the precise sweet spot where your dish is perfectly positioned. Think of it as a GPS for your satellite dish! Whether you’re a seasoned RV enthusiast, a weekend camper, or simply trying to troubleshoot your home satellite setup, it eliminates the frustration and allows you to enjoy your entertainment without delay.
What makes a satellite finder under $50 even more appealing is its accessibility. You don’t need to be a tech expert or spend a fortune to get reliable results. These units are designed for ease of use, often featuring simple interfaces and clear indicators. Plus, at this price point, it’s a small investment that pays off big time in saved time, stress, and potentially expensive service calls. It’s a proactive tool that puts you in control of your satellite viewing experience.
Ultimately, a satellite finder under $50 is about regaining control and enjoying your leisure time. It’s the peace of mind knowing you can quickly resolve signal issues, whether at home or on the road. So ditch the frustration, embrace the convenience, and invest in one of the best satellite finders under $50. You’ll be amazed at how much simpler and more enjoyable your satellite viewing experience becomes.
Troubleshooting Common Satellite Finder Issues
Ever been out in the boonies, antenna pointed skyward, and that little satellite finder is stubbornly refusing to give you a peep? Yeah, it happens. The first culprit is often simple: battery life. Make sure you’ve got a fresh set in there, or that the rechargeable battery is actually charged. Don’t underestimate the humble battery – it’s often the unsung hero (or villain) of a frustrating satellite alignment. Imagine missing the big game because your finder died!
Another common issue? Misconfigured settings. Double-check that your satellite finder is set to the correct satellite and transponder information. Think of it like trying to tune a radio to the wrong frequency; you’ll just get static. Refer to your satellite provider’s website or channel guide for the accurate numbers. This prevents unnecessary frustration during the setup process.
And then there’s the physical connection. Ensure all cables are properly connected and that there are no loose connections or damaged wires. A frayed cable can wreak havoc on your signal strength. It’s like having a kink in your garden hose; the water can’t flow properly. Try using a different cable to rule that out as the source of your problem.
Finally, consider interference. Large trees, buildings, or even heavy rain can block or weaken the satellite signal. Remember, you need a clear line of sight. If possible, try moving your antenna to a location with a less obstructed view of the sky. Imagine trying to see a concert over a tall wall – the same principle applies to satellite signals.
Understanding Signal Strength and Quality
So, your satellite finder is beeping, numbers are flashing, but what do they all mean? Signal strength is essentially how loud the signal is. Think of it like the volume on your radio – a high signal strength means you’re picking up a strong signal from the satellite. However, strength alone isn’t everything. It only indicates the power of the signal, not necessarily its clarity.
Signal quality, on the other hand, tells you how “clean” the signal is. It reflects the accuracy and integrity of the data being transmitted. This is where it gets important. A high signal strength but low signal quality is like listening to a loud but distorted radio station; you can hear it, but you can’t understand anything.
Think about it this way: Imagine two people shouting at you from across a field. One person shouts loudly, but the wind is blowing and their words are garbled (high strength, low quality). The other person speaks clearly and calmly, even though they’re not shouting as loud (lower strength, high quality). You’ll understand the second person much better.
Therefore, when aligning your satellite dish, you’re aiming for the highest combination of signal strength and signal quality. Fine-tune your dish’s positioning until you achieve the best balance of both. Pay more attention to signal quality as this determines the stability of the reception. A high signal quality even at a slightly lower strength is preferable to the opposite.
Tips for Achieving Optimal Satellite Alignment
Okay, let’s assume you’ve got your satellite finder in hand, the weather’s cooperating, and you’re ready to snag that signal. First, know your target. Before you even touch the dish, use a compass or a smartphone app to determine the general direction (azimuth) and elevation of the satellite you’re trying to reach. This gives you a starting point, prevents blind guesses, and saves precious time.
Next, make small, incremental adjustments. Resist the urge to swing the dish wildly around like you’re searching for buried treasure. Satellite alignment is a game of millimeters. Small changes can make a huge difference. Move the dish in tiny increments, both horizontally (azimuth) and vertically (elevation), pausing briefly after each adjustment to allow the satellite finder to register the signal.
Don’t forget to secure the dish temporarily after you think you’ve found the sweet spot. A gust of wind or an accidental bump can easily knock it out of alignment. Once you have a stable signal with acceptable strength and quality, then you can properly tighten all the bolts and fasteners. This also gives you a chance to double check the readings before committing to a permanent setup.
Finally, consider using a satellite alignment app on your smartphone. Many of these apps use your phone’s GPS and compass to show you exactly where the satellite is in the sky in real-time. This can be incredibly helpful, especially if you’re trying to align a dish in a tricky location with obstacles. Combining this with the audible feedback from the satellite finder creates a great partnership for success!
Maintaining Your Satellite Finder for Longevity
Your trusty satellite finder might be under $50, but that doesn’t mean you shouldn’t treat it with care. Think of it like a good pair of hiking boots – with a little TLC, they’ll last you for years. First and foremost, protect it from the elements. These gadgets aren’t usually built to withstand heavy rain, extreme heat, or freezing temperatures. Store it in a dry, cool place when not in use.
Regularly clean the exterior of the satellite finder with a soft, dry cloth. Avoid using harsh chemicals or abrasive cleaners, as these can damage the delicate electronic components. Dust and grime can accumulate over time, potentially affecting the accuracy of the readings or causing buttons to stick. A quick wipe-down after each use will keep it in top condition.
Also, pay attention to the battery compartment. Corrosion can be a real problem, especially if you leave batteries inside for extended periods. If you’re not planning on using the satellite finder for a while, remove the batteries altogether to prevent leakage. If you notice any signs of corrosion, carefully clean the compartment with a cotton swab dipped in white vinegar or baking soda solution.
Finally, avoid dropping or subjecting your satellite finder to excessive shocks. While they’re relatively robust, they’re still electronic devices that can be damaged by impacts. Store it in a protective case or padded bag when transporting it, especially if you’re taking it on a camping trip or other outdoor adventure. A little bit of prevention can go a long way in ensuring that your satellite finder remains a reliable tool for years to come.
Looking Up! Your Guide to the Best Satellite Finders Under $50
Hey there, stargazer (or maybe just satellite TV enthusiast)! Are you tired of blurry channels, constantly adjusting your dish, and missing your favorite shows? Well, you’re in luck! Getting a reliable signal doesn’t have to break the bank. We’re diving into the world of affordable satellite finders – specifically, the best satellite finders under $50 – and helping you choose the perfect one for your needs. Think of this as your friendly guide to navigating the options and landing on a device that will have you enjoying crystal-clear picture in no time. Let’s get started!
Ease of Use: Don’t Get Lost in Space (or Instructions)
Let’s be honest, nobody wants a satellite finder that requires a PhD in astrophysics to operate. Look for models with a clear, easy-to-read display and intuitive controls. You want to spend your time watching TV, not wrestling with a complicated device. Check out online reviews to see what other users are saying about the learning curve. Are they complaining about cryptic instructions or praising the user-friendly design? This is a crucial factor, especially if you’re not particularly tech-savvy.
Imagine trying to set up your satellite dish on a windy day, with the sun beating down, all while trying to decipher a confusing manual. Not fun, right? A simple interface, with straightforward instructions and clear visual cues, can make the whole process a breeze. Look for features like audible signal indicators, which let you know you’re getting closer to the sweet spot without even having to look at the screen. The best satellite finders under $50 should prioritize simplicity above all else, making your life easier, not harder.
Signal Strength Indicator: Is it a Whispering Hint or a Roaring Confirmation?
A satellite finder is only as good as its ability to accurately gauge signal strength. Pay close attention to the type of signal strength indicator the device uses. Some use a simple analog meter, while others offer a digital display with numerical readings. The digital displays are generally more precise and easier to interpret, allowing you to fine-tune your dish alignment with greater accuracy. Also, consider the range of the indicator. Can it detect even the faintest signal, or does it only react when you’re already close to optimal alignment?
Think of it like this: an analog meter is like whispering, while a digital display is like shouting. You want to be able to clearly understand the signal strength, so you can make precise adjustments. The best satellite finders under $50 will provide a clear and easy-to-understand signal strength indication, allowing you to quickly and efficiently locate the satellite signal. A strong, clear signal indicator helps you minimize frustration and get your TV working sooner.
Frequency Range: Does it Cover Your Satellite’s Territory?
This is where things get a little technical, but don’t worry, we’ll keep it simple. Different satellites operate on different frequencies. Make sure the satellite finder you choose covers the frequency range of the satellite you’re trying to locate. This information is usually available on your satellite TV provider’s website or in your receiver’s manual. Buying a finder that doesn’t support the correct frequencies is like trying to unlock a door with the wrong key – it just won’t work.
Imagine purchasing a shiny new satellite finder, only to discover that it can’t even detect your satellite’s signal because it’s operating on the wrong frequencies! That’s a waste of money and a whole lot of frustration. Before you click “buy,” double-check the specifications and ensure that the device supports the frequency range used by your satellite provider. The best satellite finders under $50 provide clear and accurate frequency range information so you can avoid this problem.
Power Source: Batteries Included (or Required)?
Consider how the satellite finder is powered. Some models use batteries, while others draw power directly from the satellite receiver. Battery-powered models offer more flexibility, as you can use them independently of the receiver. However, you’ll need to keep batteries on hand and replace them regularly. Models that draw power from the receiver eliminate the need for batteries, but they can only be used when connected to the receiver.
Picture this: you’re halfway through aligning your dish, and your battery-powered finder suddenly dies. Now you have to scramble around looking for fresh batteries, potentially losing your progress in the process. A model that draws power from the receiver eliminates this hassle, but it may limit your flexibility in terms of where you can position the finder. Think about your typical usage scenario and choose the power source that best suits your needs. The best satellite finders under $50 offer a convenient and reliable power solution, whichever option you choose.
Durability: Can it Withstand the Great Outdoors?
Setting up a satellite dish often involves working outdoors, sometimes in less-than-ideal weather conditions. Look for a satellite finder that is built to withstand the elements. A sturdy casing can protect the device from accidental drops and bumps, while a water-resistant design can prevent damage from rain or moisture. Consider models with rubberized grips for added protection and a more secure hold.
Imagine your satellite finder taking a tumble from your ladder or getting caught in a sudden downpour. A poorly built device might not survive such an ordeal, leaving you with a useless piece of equipment. Investing in a durable satellite finder ensures that it can withstand the rigors of outdoor use and provide reliable performance for years to come. Even the best satellite finders under $50 should demonstrate some level of durability to ensure longevity.
Price vs. Features: Finding the Sweet Spot
While we’re focusing on satellite finders under $50, it’s still important to consider the balance between price and features. Don’t automatically assume that the cheapest option is the best value. Sometimes, spending a few extra dollars can get you a device with significantly better performance, durability, or ease of use. Read reviews carefully and compare the features of different models to find the sweet spot that meets your needs and budget.
Think of it like this: you could buy the absolute cheapest satellite finder on the market, but if it’s unreliable and difficult to use, you might end up spending more time and effort trying to get it to work than it’s worth. On the other hand, you don’t need to splurge on a high-end model with features you’ll never use. The best satellite finders under $50 offer a good balance between price and features, providing you with the essential tools you need to align your dish effectively without breaking the bank.
Customer Reviews: The Voice of Experience
Before making a final decision, take the time to read customer reviews. These reviews can provide valuable insights into the real-world performance of the satellite finder, highlighting both its strengths and weaknesses. Pay attention to comments about accuracy, ease of use, durability, and customer support. Look for patterns in the reviews – if multiple users are reporting the same issue, it’s likely a real problem.
Imagine relying solely on the manufacturer’s description when choosing a satellite finder. You might end up with a device that looks great on paper but falls short in practice. Customer reviews provide a more objective and realistic assessment of the product’s performance, helping you avoid potential pitfalls and make a more informed decision. The best satellite finders under $50 will have consistently positive reviews from satisfied customers who have successfully used the device to align their satellite dishes.
FAQs
What exactly *is* a satellite finder, and why would I need one?
A satellite finder, in its simplest form, is a device that helps you align your satellite dish to receive the best possible signal from a specific satellite. Think of it like a compass, but instead of pointing North, it points towards a satellite orbiting high above us. This is especially useful if you’re setting up a new satellite dish, moving your dish, or experiencing signal loss due to weather or other factors.
Without a satellite finder, you’re essentially guessing where the satellite is, which can be a frustrating and time-consuming process. Imagine trying to tune a radio without knowing the frequency! A satellite finder takes the guesswork out of the equation, allowing you to quickly and accurately pinpoint the satellite’s location, ensuring a strong and stable signal for your TV programming.
Are these “under $50” finders any good? Will they actually work?
That’s a great question, and it’s perfectly reasonable to be skeptical! The truth is, you’re not going to get the same level of precision and features as you would with a professional-grade satellite meter that costs hundreds of dollars. However, for basic satellite alignment, these affordable finders can absolutely do the job.
They’re designed to detect the signal strength and give you an indication when you’re getting closer to the correct alignment. Think of them as a starting point. You might need to fine-tune the dish’s position slightly after using the finder, but they’ll get you in the ballpark much faster than trying to align the dish blindly. Just remember to read the instructions carefully and be patient, and you should be able to achieve a satisfactory result.
Do I need any special tools or equipment besides the satellite finder?
Generally, no, you don’t need a whole arsenal of specialized equipment. However, there are a few things that will definitely make the process easier and safer. First and foremost, you’ll need a wrench or socket set to adjust the bolts on your satellite dish. Make sure you have the right size for your specific dish.
Beyond that, a compass can be helpful for getting a rough initial bearing, and a level is essential to ensure the dish is properly aligned vertically. Safety is also key! Wear appropriate safety glasses to protect your eyes, and if you’re working at any height, be sure to use a sturdy ladder and have someone spot you. A bit of common sense goes a long way in ensuring a smooth and safe satellite dish alignment.
What do all those numbers and settings on the satellite finder mean?
Don’t worry, you’re not alone in feeling a bit overwhelmed by the jargon! The main number you’ll be looking at is the signal strength indicator. This usually ranges from 0 to 100, or some similar scale, and it represents the strength of the signal the finder is detecting. Higher numbers generally mean a stronger signal.
As for the settings, most basic satellite finders have an adjustment knob or dial that controls the sensitivity. This allows you to fine-tune the finder to pick up even weak signals. The trick is to adjust it so the meter gives a reading when you’re close to the satellite, but not so sensitive that it picks up every stray signal in the area. Play around with it a bit to get a feel for how it works – you’ll get the hang of it!
My satellite finder beeps like crazy no matter where I point it. What’s going on?
That constant beeping usually means the satellite finder is picking up a strong signal, but not necessarily the right one! It could be interference from another satellite, terrestrial signals, or even just noise in the environment. The key is to adjust the sensitivity of the finder.
Try turning the sensitivity down using the adjustment knob. This will make the finder less responsive to weaker signals, allowing you to better isolate the desired satellite. Also, make sure you’re pointing the dish in the general direction of the satellite you’re trying to find. A compass or online satellite alignment tool can help you determine the correct azimuth and elevation.
How accurate are these satellite finders really?
While these satellite finders under $50 are helpful, it’s important to remember they aren’t incredibly precise instruments. They’re more like a compass guiding you in the right direction. They’ll help you get the dish aligned to receive a signal, but you might still need to make some small adjustments afterward to optimize the picture quality.
Think of it this way: the satellite finder gets you in the right ballpark, then your TV acts as the final umpire, telling you if you’ve hit a home run with the signal strength. Using the TV’s signal meter, typically found in the setup menu, will allow you to fine-tune the dish for the strongest, clearest picture.
What if I’ve tried everything, and I still can’t get a signal?
Don’t despair! Sometimes, despite your best efforts, you just can’t seem to lock onto a signal. Before throwing in the towel, double-check all your connections. Make sure the cables are securely attached to the dish, the satellite finder, and your receiver. A loose or corroded connection can wreak havoc on your signal.
If the connections are good, consider external factors. Is there anything obstructing the line of sight to the satellite, like trees or buildings? Also, weather conditions can sometimes affect signal strength, especially during heavy rain or snow. If you’ve exhausted all other options, it might be worth calling in a professional installer. They have specialized equipment and experience that can quickly diagnose and resolve even the most stubborn satellite signal problems.
Verdict
So, there you have it! Finding the perfect signal doesn’t have to break the bank. With our reviews and buying guide, you’re now armed with the knowledge to snag one of the best satellite finders under $50 and unlock a world of entertainment. No more frustrating signal hunts or blurry screens! It’s all about getting the right tool for the job, and we’ve shown you some incredible options.
Now, go forth and conquer the cosmos of channels! Don’t let confusing jargon or overpriced gadgets hold you back. Trust your gut, consider your needs, and choose the satellite finder that speaks to you. Adventure awaits, and crystal-clear viewing is just a few tweaks away. You’ve got this!