Remember that time you were cruising down the street, windows down, your favorite song blasting, but the bass just felt…flat? Like it was missing that soul-shaking oomph that truly brings music to life? Yeah, we’ve all been there. The culprit? More often than not, it’s a poorly constructed subwoofer box. And the heart of any great enclosure is the material it’s made from. Choosing the right wood can make all the difference between a muddy, disappointing thump and a clean, powerful rumble that you can feel in your chest.
That’s why we’ve put together this guide to help you navigate the sometimes confusing world of wood and find the best plywood for subwoofer boxes. We’ll break down the different types, their pros and cons, and provide some top-notch reviews to point you in the right direction. Get ready to turn up the volume and experience bass like never before!
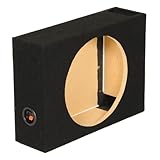
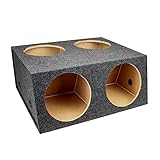
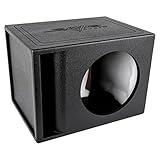
Before we jump into the best plywood for subwoofer boxes review, let’s take a look at these Amazon products:


Last update on 2026-02-17 / Affiliate links / #CommissionsEarned / Images from Amazon Product Advertising API
So, You Want to Shake the Room: Choosing the Right Wood for Your Subwoofer Box
Alright, so you’re ready to build a subwoofer box and unleash some serious bass? Awesome! Building your own sub is a rewarding project, but picking the right materials is crucial. Think of it like this: you wouldn’t build a house with cardboard, right? The same principle applies here. Your enclosure needs to be strong, rigid, and acoustically sound to handle those powerful vibrations and give you the best possible sound quality. This isn’t just about booming bass; it’s about clarity, accuracy, and making your music truly come alive.
One of the most important decisions you’ll make is choosing the best plywood for subwoofer boxes. But with so many types of plywood out there, how do you know which one is right for your project? Don’t worry, it can seem overwhelming, but we’re here to break it down. We’ll navigate the world of wood types, thicknesses, and grades. Remember, a properly built subwoofer enclosure can improve sound pressure levels by upwards of 3dB, a noticeable and substantial improvement in perceived loudness.
Think of your subwoofer enclosure as the silent partner in your sound system. It’s what allows your subwoofer to breathe and properly reproduce those low frequencies. A flimsy or poorly constructed box will rob you of performance, leading to muddy bass, unwanted vibrations, and even potential damage to your subwoofer. Choosing the right plywood provides the necessary structural integrity to withstand the immense pressure generated inside the box.
In the following sections, we’ll dive deep into the different types of plywood and their suitability for subwoofer boxes. We’ll discuss factors like density, void presence, and cost, helping you make an informed decision that will result in a subwoofer enclosure that not only sounds great but also lasts for years to come. Let’s get building!
Best Plywood For Subwoofer Boxes – Reviews
Baltic Birch Plywood
Baltic Birch is like the Cadillac of plywood for subwoofers. Seriously, this stuff is impressive. Forget voids and inconsistencies; you’ll find layer upon layer of uniform, high-quality birch. This means it’s incredibly strong, stable, and holds screws like a champ. Building a subwoofer box with Baltic Birch results in a tight, resonant-free enclosure that’ll let your sub really sing.
While the price point is definitely higher than your average plywood, the performance benefits are undeniable. You’ll notice the difference in sound quality, and the box will last longer too. If you’re serious about your audio and want to build a top-notch subwoofer box, Baltic Birch is worth the investment. It’s the go-to choice for many professionals for a reason.
Marine Grade Plywood
Looking for something that can withstand a little (or a lot) of moisture? Marine grade plywood is your answer. This isn’t just for boats; it’s fantastic for subwoofer boxes that might see some humidity, like those in garages, cars, or even outdoor setups (covered, of course!). It’s built with waterproof glue and typically denser than other types of plywood, making it super durable.
The extra protection against moisture and rot means your subwoofer box will have a much longer lifespan, especially in less-than-ideal conditions. While it can be a bit pricier and slightly heavier, the peace of mind knowing your enclosure is well-protected is worth it. Plus, its strength contributes to a tighter, more controlled bass response.
Medium Density Fiberboard (MDF)
MDF might not be plywood in the strictest sense, but it’s a hugely popular choice for subwoofer enclosures, and rightfully so. It’s incredibly dense and uniform, which translates to excellent acoustic properties. It’s also very affordable, making it a great option for budget-conscious builders. MDF dampens vibrations well, minimizing unwanted resonances that can muddy the sound.
However, MDF is susceptible to moisture damage, so it’s essential to seal it properly. Also, it can be a bit heavier and doesn’t hold screws quite as well as some plywood options, so pre-drilling and using wood glue are crucial. Despite these caveats, its density and cost-effectiveness make it a very compelling choice for many subwoofer projects.
Birch Plywood (Non-Baltic)
If Baltic Birch is a bit out of reach, standard birch plywood offers a great balance of quality and affordability. It’s generally stronger and more stable than softer plywood types like pine or fir, and it has a smooth, attractive surface. This makes it a good option for building subwoofer boxes that look as good as they sound, especially if you plan on applying a finish.
While it might have a few more voids than Baltic Birch, careful selection at the lumber yard can minimize these issues. Be sure to inspect the edges of the sheets before buying. With proper bracing and construction techniques, birch plywood can deliver excellent performance for your subwoofer project without breaking the bank.
Okoume Plywood
Okoume plywood is often used in boat building, and it’s a fantastic option when weight is a primary concern for your subwoofer box. It’s significantly lighter than MDF or even some other plywood types. This makes it ideal for car audio applications or portable sound systems where you want to minimize the overall weight of your setup.
Despite being lightweight, Okoume is surprisingly strong and stable. It also has a beautiful, reddish-brown hue that looks great with a clear coat or varnish. While it may not be as readily available as other options and can be a bit more expensive, its unique combination of lightweight and strength makes it a great choice for specific applications.
Why Plywood is Your Subwoofer’s Best Friend
Imagine cranking up your favorite bass-heavy track, ready to feel the music reverberate through your entire being. But instead, you get a muddy, distorted rumble that sounds more like a washing machine than a concert. The problem? Your subwoofer box might be robbing you of the true bass experience. That’s where plywood comes in, particularly the “best plywood for subwoofer boxes,” as it’s often referred to. It’s not just any wood; it’s specifically engineered to handle the intense vibrations and air pressure that subwoofers generate.
Think of your subwoofer box as an instrument itself. If the box vibrates and flexes, it steals energy from the subwoofer, muddying the sound and reducing the overall impact. The “best plywood for subwoofer boxes” is incredibly rigid and dense, effectively minimizing unwanted vibrations and ensuring that all the subwoofer’s power goes directly into producing clean, powerful bass you can feel. Using cheaper, less dense materials can result in a box that resonates poorly, essentially fighting against your subwoofer and degrading the audio quality.
Building a custom subwoofer box is a worthwhile project that lets you tailor the sound to your specific vehicle and listening preferences. Choosing the right material like “best plywood for subwoofer boxes” becomes paramount. It needs to be sturdy, resist warping, and provide a solid foundation for your subwoofer. Investing in quality plywood not only ensures better sound but also guarantees longevity for your enclosure, so you can enjoy those deep, rumbling basslines for years to come.
In short, upgrading to the “best plywood for subwoofer boxes” isn’t just about building a box; it’s about crafting an acoustic masterpiece. It’s the secret ingredient to unlocking the full potential of your subwoofer, transforming your listening experience from mediocre to mind-blowing. It’s the difference between hearing bass and feeling it, truly immersing yourself in the music. So, ditch the flimsy alternatives and give your subwoofer the sturdy, resonant foundation it deserves. Your ears (and your car’s rearview mirror) will thank you.
Plywood Types: Decoding the Jargon for Bassheads
Navigating the world of plywood can feel like learning a new language, right? Terms like “void-free,” “veneers,” and “plies” get thrown around like confetti. But understanding these basics is crucial for choosing the best material for your subwoofer box. Essentially, plywood is made of layers of wood veneer glued together. The type of wood, the glue, and the number of layers all play a significant role in the final product’s strength, durability, and acoustic properties.
Think about it this way: if you’re building a box for a small, 8-inch subwoofer in your car, you might get away with a less expensive, thinner plywood. But if you’re crafting a behemoth for your home theater with a massive 15-inch driver, you’ll need something significantly stronger and more rigid to handle the pressure and vibrations.
Consider how a shaky foundation affects a house. A weak, flimsy plywood for your subwoofer box will lead to unwanted vibrations, muddied sound, and ultimately, a less enjoyable listening experience. Sturdy plywood acts as a solid foundation, ensuring the woofer’s energy is efficiently converted into clean, powerful bass.
Ultimately, the better you understand these different types of plywood and their characteristics, the easier it will be to make an informed decision and build a subwoofer box that delivers exceptional sound quality and withstands the test of time. Don’t be afraid to ask questions at your local lumberyard!
Essential Tools and Equipment for Plywood Subwoofer Box Construction
Alright, you’ve got your plywood picked out, now what? You can’t just glue it together with Elmer’s and hope for the best! Building a subwoofer box requires a few essential tools to ensure accuracy, clean cuts, and a strong, lasting construction. This isn’t just about hammering things together; it’s about precision.
First up, a good quality circular saw (or ideally, a table saw) is essential for making straight, accurate cuts. Think of it like this: if your cuts are off, your box won’t be square, and that can impact the sound quality. Imagine trying to build a house with crooked walls!
Next, you’ll need a reliable drill and driver combo. These are vital for pre-drilling holes (to prevent splitting the plywood) and driving in screws. A countersink bit is your friend here; it creates a recess for the screw head, ensuring a flush, clean finish. Visualise this: you want the screws to be hidden, not sticking out like sore thumbs.
Finally, don’t underestimate the power of clamps! Clamps hold the pieces together while the glue dries, ensuring a tight, strong bond. Think of them as an extra set of hands that never get tired. Without clamps, your corners might separate, leading to air leaks and a compromised sound. Investing in quality clamps is an investment in the longevity of your subwoofer box.
Sealing and Finishing: Protecting Your Investment and Optimizing Sound
Okay, your box is built, glued, and screwed! But don’t start blasting bass just yet. Sealing and finishing your subwoofer box is crucial for two reasons: protection and sound optimization. Think of it like painting your house; it’s not just about aesthetics, it’s about protecting the wood from the elements.
Sealing the inside of the box is critical for preventing air leaks. Any gaps or cracks will cause unwanted distortion and reduce the efficiency of your subwoofer. A good sealant, like silicone caulk or wood glue, will fill these gaps and create an airtight enclosure. Imagine a balloon with a tiny hole; it won’t hold air effectively, and neither will your subwoofer box if it’s not properly sealed.
Finishing the outside of the box is where you can get creative and customize the look to match your car or home theater. Options range from simple carpet covering to paint, veneer, or even custom graphics. However, the finish also provides a protective layer against moisture and scratches. Imagine spilled drinks or accidental bumps; a good finish will protect your plywood from damage.
The choice of finish can even subtly affect the sound. A thick, dense finish can help dampen vibrations, resulting in a cleaner, more focused bass response. Think of it as adding a layer of sound insulation to your box. Don’t underestimate the importance of this final step; it can make a significant difference in both the appearance and performance of your subwoofer.
Troubleshooting Common Plywood Subwoofer Box Issues
So, you’ve built your subwoofer box, but something doesn’t sound quite right? Don’t panic! Troubleshooting is a common part of the DIY process. Let’s explore some frequent issues and their solutions. Think of it as diagnosing a car problem; you need to pinpoint the symptom before you can fix the cause.
One common problem is unwanted vibrations or rattling. This often indicates loose screws, poorly sealed joints, or even a resonance within the box itself. Tighten all screws, re-seal any suspect areas, and consider adding internal bracing to stiffen the box walls. Visualise it like a wobbly table; tightening the screws usually solves the problem.
Another issue is air leaks. These can cause a noticeable loss of bass and a generally muddy sound. Use a smoke test or even a wet hand to check for air leaks around the seams and speaker mounting points. Apply sealant where needed. Think of it like patching a leaky tire; you need to find and seal the source of the leak.
Finally, sometimes the sound just doesn’t match your expectations. This could be due to incorrect box dimensions, a mismatch between the subwoofer and the box volume, or even poor placement within your car or room. Double-check your calculations, experiment with different placements, and consider consulting online subwoofer box calculators. Remember, building a subwoofer box is a process of learning and refinement. Don’t be afraid to experiment and make adjustments until you achieve the sound you desire.
The Ultimate Guide to Choosing the Best Plywood for Subwoofer Boxes
Hey there, fellow audio enthusiast! Ready to rumble? Building your own subwoofer box is an awesome project, and choosing the right material is half the battle. Think of your subwoofer box as the unsung hero of your sound system – it needs to be strong, stable, and resonate just right to deliver those deep, chest-thumping bass notes you crave. And that’s where the plywood comes in! It’s not just any piece of wood; it’s the foundation of your bass experience.
So, if you’re feeling a bit overwhelmed by all the different plywood options out there, don’t worry! I’m here to be your friendly guide, helping you navigate the world of wood and find the best plywood for subwoofer boxes for your specific needs. Let’s dive in and discover the secrets to building a subwoofer box that will make your neighbors both envious and slightly annoyed (in a good way, of course!).
Thickness: How Thick is Thick Enough?
Choosing the right thickness for your plywood is crucial. Too thin, and your box will vibrate and flex, muddying the sound and robbing you of that clean, powerful bass. Imagine trying to build a house with flimsy walls – it just wouldn’t stand up to the elements, right? The same goes for your subwoofer box.
Typically, for most home audio subwoofer projects, you’ll want to aim for plywood between 3/4 inch (19mm) and 1 inch (25mm) thick. This provides a good balance of rigidity and weight. However, for smaller subwoofers or less demanding applications, you might get away with 1/2 inch (12mm) plywood. Conversely, for really high-powered subwoofers in a car audio setup, you might even consider going thicker than 1 inch to ensure maximum stability. Think about the size of your subwoofer and the amount of power you’ll be feeding it – that’s your starting point.
Wood Species: Hardwood vs. Softwood (and Everything in Between)
The type of wood used to make the plywood plays a big role in its density, strength, and overall acoustic properties. Hardwoods like birch and maple are generally denser and stiffer than softwoods like pine and fir. This translates to a more rigid enclosure that can better handle the vibrations produced by your subwoofer.
Think of it like this: hardwoods are like the bodybuilders of the wood world, while softwoods are more like the yoga instructors. Both have their strengths, but when it comes to handling intense vibrations, you generally want the extra muscle of a hardwood. However, hardwood plywood can be more expensive and sometimes harder to work with. Softwood plywood, on the other hand, is more affordable and easier to cut and shape, but it might require additional bracing to achieve the desired level of rigidity. Considering budget and skill level is paramount.
Veneer Core Quality: Look Inside for the Secret to Success
Plywood isn’t just one solid piece of wood. It’s made up of multiple layers of wood veneer glued together. The quality of these inner layers, or the core, significantly impacts the overall strength and stability of the plywood. Look for plywood with a consistent, void-free core. Voids (empty spaces within the core) can weaken the plywood and lead to unwanted resonances.
Imagine a chocolate cake with a big air pocket in the middle. It might look good on the outside, but it’s going to crumble under pressure, right? The same applies to plywood. A good quality core will be solid and uniform, ensuring that the plywood can withstand the intense vibrations produced by your subwoofer. If possible, inspect the edges of the plywood sheets to get a glimpse of the core quality before buying. This step is paramount when looking for the best plywood for subwoofer boxes.
Density and Weight: Finding the Sweet Spot
The density and weight of the plywood are closely related to its strength and rigidity. Denser plywood is generally stronger and better at resisting vibrations. However, denser plywood is also heavier, which can be a consideration, especially if you’re building a portable subwoofer box.
It’s all about finding the right balance. You want plywood that’s dense enough to provide a solid foundation for your subwoofer, but not so heavy that it becomes a pain to move around. Think about the intended application. Will it be a permanent fixture in your home theater? Or will you be lugging it around to parties? This will help you determine the ideal density and weight for your plywood.
Resonance: Controlling the Rumble
All materials resonate to some degree. When it comes to subwoofer boxes, you want to minimize unwanted resonances that can color the sound and detract from the overall listening experience. Denser, more rigid plywood tends to resonate less than thinner, more flexible plywood.
Think of it like a tuning fork. A poorly constructed subwoofer box can act like a tuning fork, adding its own unwanted frequencies to the sound. By choosing dense, rigid plywood, you can help dampen these unwanted resonances and ensure that you’re hearing the pure, unadulterated bass from your subwoofer. Some builders even apply damping materials to the inside of the box to further reduce resonance.
Workability: Can You Cut It?
While strength and acoustic properties are important, don’t forget about workability! You’ll need to be able to cut, shape, and assemble the plywood to build your subwoofer box. Softer plywood is generally easier to cut and screw into, while harder plywood can be more challenging to work with.
Imagine trying to carve a statue out of granite with a butter knife. It would be nearly impossible, right? The same applies to working with plywood. If you’re a beginner, you might want to opt for a softer plywood that’s easier to cut and assemble. If you have more experience and the right tools, you can tackle the harder stuff. Consider your skill level and the tools you have available before making your choice.
Cost: Balancing Quality and Budget
Of course, price is always a factor. Plywood prices can vary significantly depending on the type of wood, the thickness, and the quality of the veneer core. While it’s tempting to go for the cheapest option, remember that you often get what you pay for.
Think of it like buying a car. You could buy a beat-up old clunker for next to nothing, but it’s likely to break down on you sooner rather than later. Similarly, skimping on the plywood could result in a flimsy, poorly performing subwoofer box that won’t deliver the bass you’re looking for. The best plywood for subwoofer boxes may cost a bit more, but the improved sound quality and durability will be well worth the investment in the long run. Look around, compare prices, and read reviews to find the best balance of quality and cost for your budget.
Frequently Asked Questions
What kind of plywood is actually best for a subwoofer box? I’m seeing so many options!
That’s a great question! It can definitely feel overwhelming with all the different types of plywood out there. Generally speaking, Baltic Birch plywood and Marine Grade plywood are considered top-tier choices. Baltic Birch is loved for its void-free construction, which gives it incredible strength and stability. This is super important for a subwoofer box because you want it to hold up under pressure and not vibrate unnecessarily.
Marine Grade plywood is another excellent option, especially if you’re building a sub box for a car or boat where moisture is a concern. It’s made with waterproof glue and is incredibly resistant to warping and delamination. However, for indoor use, Baltic Birch often offers a better balance of price and performance, making it a popular and reliable choice for many DIYers.
Is there a minimum thickness of plywood I should be using?
Absolutely! Thickness is key to preventing unwanted vibrations and ensuring your subwoofer sounds its best. A general rule of thumb is to go with at least 3/4 inch (19mm) plywood for most subwoofer boxes. This thickness provides a solid, rigid structure that minimizes flexing and resonance.
For larger or more powerful subwoofers, you might even consider using 1-inch (25mm) thick plywood, especially for the baffle (the front panel where the subwoofer is mounted). While it may seem like overkill, the extra thickness provides a more stable mounting surface and helps to contain the powerful sound waves inside the box, leading to cleaner and more accurate bass.
I’m on a budget. Are there cheaper alternatives to Baltic Birch or Marine Grade?
Of course! While Baltic Birch and Marine Grade plywood are excellent choices, they can be a bit pricey. Fortunately, there are some more budget-friendly options that can still work well for your subwoofer box. Look for quality hardwood plywood, such as Maple or Oak plywood. These can offer a good balance of strength and affordability.
Just be sure to check the plywood carefully for voids or defects before you buy it. You might also consider using Medium Density Fiberboard (MDF) for certain parts of the box, like the sides or back, as it’s generally less expensive than plywood and provides a dense, vibration-dampening surface. Just keep in mind that MDF is not as strong as plywood and is not suitable for areas that need to support a lot of weight or stress.
How important is it to seal the plywood before building the box?
Sealing the plywood is definitely important, and here’s why: it protects the wood from moisture, which can cause warping and delamination over time. Even if you’re building a subwoofer box for indoor use, humidity can still affect the wood. A good sealant will create a barrier that prevents moisture from penetrating the plywood.
More than that, sealing the edges and surfaces helps to create an airtight enclosure. An airtight enclosure is crucial for optimal subwoofer performance because it ensures that the sound waves are contained within the box and directed properly. Even small leaks can significantly impact the sound quality and reduce the efficiency of your subwoofer. So, take the time to seal your plywood properly—you’ll be glad you did!
What kind of glue should I use when assembling the subwoofer box?
Choosing the right glue is crucial for building a strong and durable subwoofer box! You want something that can handle the vibrations and pressure that the box will be subjected to. A high-quality wood glue, such as Polyurethane glue or a good-quality PVA (Polyvinyl Acetate) glue, is generally recommended.
Polyurethane glue is particularly strong and waterproof, making it a great choice for subwoofer boxes that might be exposed to moisture, like those used in cars or boats. PVA glue is also a good option, especially for indoor applications. Make sure to choose a PVA glue that is specifically designed for woodworking and has a high bond strength. Whichever glue you choose, be sure to apply it liberally and clamp the pieces together tightly while it dries to ensure a strong and long-lasting bond.
I’ve heard about bracing the inside of the box. Is that really necessary?
Bracing the inside of your subwoofer box can make a HUGE difference in sound quality! Think of it like adding extra support beams to a building. When your subwoofer is pumping out those powerful bass frequencies, it creates a lot of pressure and vibration inside the box. Without proper bracing, the walls of the box can flex and vibrate, which can muddy the sound and reduce the overall clarity.
Bracing essentially ties the walls together, making the box more rigid and resistant to flexing. This helps to minimize unwanted vibrations and resonance, resulting in a cleaner, tighter, and more accurate bass response. Even just a few strategically placed braces can significantly improve the performance of your subwoofer. So, if you want the best possible sound, definitely consider adding bracing to your subwoofer box!
How can I make sure I’m cutting the plywood accurately? Any tips?
Accuracy is key when cutting plywood for a subwoofer box! Even small errors can add up and affect the overall sound quality. First and foremost, invest in a good quality measuring tape and a sharp pencil. Double-check your measurements before you cut, and always cut just outside the line, then sand down to the line for a perfect fit.
For straight cuts, a circular saw with a sharp blade is your best friend. Consider using a guide, like a straight edge or a commercial cutting jig, to ensure perfectly straight cuts. If you’re making curved cuts, a jigsaw is a good option. Remember to use a slow and steady hand to avoid splintering the plywood. Most importantly, take your time! Rushing the cutting process can lead to mistakes and frustration.
Final Verdict
So, there you have it! Armed with knowledge about the best plywood for subwoofer boxes, from understanding the nuances of density to the importance of void-free construction, you’re now well-equipped to make the perfect choice for your next audio project. Don’t let the abundance of options intimidate you; think about your budget, desired sound qualities, and the complexity of your build. Every project is a learning opportunity, and this knowledge will serve you well in future audio adventures.
Now, go forth and build! Your dream sound system awaits, and the right choice of the best plywood for subwoofer boxes is the foundation for sonic bliss. Don’t be afraid to experiment, tweak, and refine your creation. The journey of building something with your own two hands is just as rewarding as the thumping bass you’ll ultimately enjoy. Crank up the tunes and let the vibrations of your awesome DIY project fill the room!