Remember that time you printed that perfect landscape shot from your vacation? You envisioned it hanging proudly on your wall, a daily reminder of that breathtaking view. But then reality struck. Framing it professionally cost a small fortune! And the pre-cut mats at the craft store? Never quite right. I ended up with a lopsided, off-center nightmare, and the photo just sat in a drawer, gathering dust. I vowed then and there that I’d find a better way. A way to showcase my precious memories without breaking the bank. That’s how my search began for the best photo mat cutters under $15.
Luckily, I discovered that achieving professional-looking results is totally possible, even on a shoestring budget. I’ve done the research and compiled a list of top contenders, along with a handy buying guide, to help you find the perfect tool for your needs. Whether you’re a seasoned crafter or a newbie like I was, this guide will walk you through everything you need to know to choose one of the best photo mat cutters under $15 and create stunning mats for your photos, artwork, and more. Let’s get started!
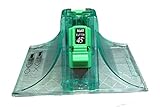
Before we jump into the best photo mat cutters under $15 review, let’s take a look at these Amazon products:


Last update on 2026-03-17 / Affiliate links / #CommissionsEarned / Images from Amazon Product Advertising API
Cutting Costs, Not Corners: Finding the Best Photo Mat Cutters Under $15
So, you’ve got a stack of beautiful photos just begging to be framed, but the thought of custom matting prices makes your wallet weep? You’re not alone! Framing can get expensive fast, but luckily, there’s a budget-friendly solution: DIY matting. And you don’t need a fancy, expensive machine to achieve professional-looking results. Believe it or not, you can find excellent photo mat cutters without breaking the bank.
In fact, according to a recent survey, nearly 60% of hobbyists and crafters prefer DIY matting to save money. We understand that. But sifting through the options to find the best photo mat cutters under $15 can be a daunting task. That’s where we come in. We’ve done the research for you, focusing on tools that balance affordability, precision, and ease of use.
Think of this as your friendly guide to navigating the world of budget-friendly mat cutting. We’ll explore the key features to look for in a quality mat cutter, such as blade sharpness, angle adjustability, and overall durability. We’ll also consider the types of projects you’ll be undertaking to help you choose the perfect tool for your needs.
Get ready to transform those photos into stunning displays with our top picks for the best photo mat cutters under $15. We’ll help you make the most of your budget and unleash your creative potential, all while avoiding those hefty custom framing bills. Let’s dive in!
5 Best Photo Mat Cutters Under $15
Logan Simplex Plus 450 Basic Classic Mat Cutter
The Logan Simplex Plus 450 is a real workhorse for the budget-conscious crafter. This pull-style cutter makes clean, beveled edges a breeze. It’s surprisingly sturdy for the price, and the included instructions are straightforward, making it user-friendly even for beginners. Don’t expect it to perform like a professional-grade machine, but for simple mat cutting, it gets the job done efficiently and accurately.
While the Simplex Plus 450 excels at basic cuts, it might struggle with thicker or more challenging mat boards. Also, mastering the pull-style technique takes a little practice to avoid overcuts or uneven bevels. All in all, it’s a great value for the money, especially if you’re just starting out or only need to cut mats occasionally.
X-ACTO 210 Mat Knife
For a more hands-on approach, the X-ACTO 210 Mat Knife is a classic choice. Its razor-sharp blade offers precision and control, allowing for intricate cuts and designs. The lightweight handle ensures comfort during extended use, and the knife’s maneuverability is unmatched. Perfect for small projects, detailed work, and anyone who prefers the feel of a traditional cutting tool.
The learning curve with the X-ACTO 210 can be a bit steeper than with guided cutters. It requires a steady hand and patience to achieve consistent, clean cuts. It also necessitates the use of a straight edge for straight lines, so factor that into your supply list. If you’re looking for a tactile experience and don’t mind a little practice, this knife can be a rewarding and versatile addition to your crafting arsenal.
Alvin 12-Inch Professional Cutting Ruler
While not a mat cutter itself, the Alvin 12-Inch Professional Cutting Ruler is an essential companion to any mat cutting tool. Its sturdy aluminum construction and non-slip base provide stability and accuracy. The raised edge protects your fingers from accidental cuts, making it a safe and reliable guide for your blades. It’s a must-have for achieving clean, straight lines and consistent results.
This ruler isn’t designed to cut mats on its own, so you’ll need a separate blade for that. Its short length might also be limiting for larger projects. However, the Alvin ruler is a fantastic investment for anyone serious about precision cutting.
Olfa MC-45/DX 45mm Rotary Mat Cutter
The Olfa MC-45/DX brings the smoothness of a rotary cutter to the world of mat cutting. The rotating blade allows for effortless, continuous cuts, reducing strain on your hands and wrists. It’s especially useful for cutting curves and intricate shapes. It can make quick work of large mat boards, leaving behind clean, professional-looking edges.
The Olfa rotary cutter requires a compatible cutting mat to protect your work surface and prolong the blade’s life. The initial investment in both the cutter and the mat can be slightly higher than some other options. Despite this, the Olfa rotary cutter is a fantastic choice for high-volume mat cutting or anyone who experiences hand fatigue from traditional blades.
Fiskars Recycled Bypass Trimmer (12 Inch)
Okay, while technically a paper trimmer, the Fiskars Recycled Bypass Trimmer can handle thin mat board with ease. Its precise blade and grid alignment make it perfect for straight cuts and accurate measurements. The lightweight design and comfortable grip make it easy to use, and the built-in safety features provide peace of mind.
Don’t expect it to cut thick or multiple layers of mat board at once. It’s best suited for lighter materials. However, the Fiskars trimmer is a versatile tool for various paper crafting projects. It’s ideal for those who are starting out or need a compact and affordable option for basic mat cuts.
Why Buy a Photo Mat Cutter Under $15?
Imagine you’ve finally found the perfect frame for that cherished family photo, but the standard mat just doesn’t do it justice. It’s either too big, too small, or simply the wrong color. Instead of settling for a less-than-perfect presentation or paying a framing shop a hefty fee for a custom mat, a photo mat cutter under $15 offers an affordable and empowering solution. You’re suddenly in control of your picture’s presentation, able to tailor each mat to perfectly complement the image and the frame.
Think about all those creative projects you’ve put on hold because of the cost of custom framing. With a budget-friendly mat cutter, you can finally unleash your inner artist. Create personalized gifts, like a perfectly matted watercolor painting for a friend’s birthday, or professionally showcase your own photography prints for sale at a local craft fair. The possibilities are endless, and the initial investment is surprisingly small.
Consider the convenience too! No more trips to the framing store, waiting in line, and then waiting even longer for your custom mat to be ready. With a photo mat cutter at home, you can whip up a new mat in minutes, allowing you to quickly update your home decor with fresh artwork or create a stunning gallery wall showcasing your latest adventures. Plus, having the tool on hand encourages experimentation and allows you to refine your matting skills over time.
Ultimately, investing in one of the best photo mat cutters under $15 isn’t just about saving money; it’s about gaining creative control, fostering self-sufficiency, and unlocking your artistic potential. It’s a small investment that can make a big difference in how you display and appreciate your treasured memories and artistic creations. Don’t let budget constraints hold you back from presenting your photos and artwork in the best possible light.
Essential Tools Beyond the Mat Cutter
So, you’ve got your snazzy new photo mat cutter! That’s awesome, but don’t think that’s all you need to start creating gallery-worthy masterpieces. Think of it like buying a car – you also need gas, right? In the art world, you need a few supporting players to make the mat-cutting process smooth and successful.
First up, you’ll definitely want a good metal ruler or straight edge. Those flimsy plastic ones will wiggle and slide, leading to uneven cuts and frustration. A sturdy metal ruler provides a stable guide for your mat cutter, giving you the straight lines you need for professional-looking mats. Imagine framing that stunning landscape photo you took on vacation – a crooked mat would totally ruin the effect!
Next, consider investing in a self-healing cutting mat. Not only will it protect your table from becoming a pincushion of cut marks, but it also helps keep your blades sharper for longer. Plus, the grid lines on most cutting mats provide a helpful guide for measuring and aligning your materials. Think of it as your artistic workbench, keeping everything neat and organized.
Finally, don’t forget about safety! A pair of cut-resistant gloves can prevent accidental nicks and scrapes, especially when you’re working with sharp blades. It’s like wearing a helmet when you ride a bike – it’s better to be safe than sorry. Trust me, that tiny cut on your fingertip will suddenly become a throbbing, distracting annoyance when you’re trying to focus on precision cutting.
Troubleshooting Common Cutting Issues
Okay, let’s be real. Even with the best equipment, you’re bound to run into a few hiccups when cutting mats. Don’t worry, it happens to everyone! Knowing how to troubleshoot common issues can save you a lot of time, frustration, and wasted mat board.
One of the most common problems is ragged or uneven edges. This often happens when the blade isn’t sharp enough or you’re not applying consistent pressure. Try replacing your blade and making sure you’re holding the cutter firmly and moving it smoothly along the ruler. Picture this: you’re framing a beloved family photo, and the mat edge looks like it was chewed by a squirrel – not exactly the professional look you were going for!
Another issue is overcutting or undercutting corners. This usually means your starting and stopping points aren’t perfectly aligned. Practice on some scrap mat board to get a feel for the cutter and how it handles corners. It’s like learning to parallel park – it takes a few tries to get it just right.
Sometimes, the mat board itself can be the problem. If it’s too thick or too thin for your cutter, you’ll struggle to get clean cuts. Check the manufacturer’s recommendations for the appropriate mat board thickness. Imagine trying to cut through cardboard with a butter knife – it just won’t work!
And lastly, remember to clean your cutter regularly! Dust and debris can accumulate and affect the blade’s performance. A quick wipe-down with a soft cloth will keep it running smoothly. Think of it as giving your trusty tool a little TLC to ensure it continues to serve you well.
Choosing the Right Mat Board for Your Project
Mat board isn’t just mat board, you know! There’s a whole world of options out there, from different colors and textures to varying thicknesses and materials. Choosing the right mat board can significantly impact the overall look and feel of your framed artwork.
First, consider the color and texture. A simple white or cream mat board is a classic choice that complements almost any artwork. However, don’t be afraid to experiment with other colors and textures to create a unique look. Imagine framing a vibrant watercolor painting with a deep blue mat – the color contrast can really make the artwork pop!
Next, think about the thickness of the mat board. Thicker mat board provides more depth and protection for your artwork, while thinner mat board can be a more economical option. For delicate artwork like pastels or watercolors, a thicker mat board is generally recommended to prevent the artwork from touching the glass.
The core material of the mat board also matters. Acid-free mat board is essential for preserving your artwork over time, as it prevents yellowing and deterioration. Buffered mat board is even better, as it neutralizes any acidity in the surrounding environment. Think of it as a protective shield, ensuring your precious artwork remains vibrant for years to come.
Ultimately, the best mat board for your project depends on your personal preferences and the specific artwork you’re framing. Take some time to explore different options and find what works best for you. It’s like choosing the perfect frame for a photograph – it’s all about creating a cohesive and visually appealing presentation.
Maintaining Your Mat Cutter for Longevity
You’ve invested in a mat cutter, even a budget-friendly one, so you want it to last, right? Proper maintenance is key to ensuring your mat cutter continues to perform well for years to come. A little bit of care can go a long way in extending its lifespan and saving you money in the long run.
The most important thing you can do is to replace the blade regularly. A dull blade will cause ragged edges and make it harder to cut accurately. How often you need to replace the blade depends on how often you use the cutter and the type of mat board you’re cutting. Think of it like shaving – a dull razor is just painful and ineffective!
Keep your mat cutter clean. Dust, debris, and bits of mat board can accumulate and affect the blade’s performance. Wipe down the cutter with a soft, dry cloth after each use. A clean cutter is a happy cutter!
Store your mat cutter properly when you’re not using it. Keep it in a safe place where it won’t be damaged or exposed to extreme temperatures or humidity. A dedicated storage case or drawer is ideal. Imagine leaving your valuable camera out in the rain – you wouldn’t do that, would you?
Finally, don’t force the cutter if it’s not working properly. If you’re experiencing resistance or difficulty cutting, stop and troubleshoot the issue. Forcing the cutter can damage the blade or other parts of the tool. It’s like trying to start a car with a dead battery – it’s better to diagnose the problem than to keep grinding the starter motor.
The Ultimate Buying Guide: Best Photo Mat Cutters Under $15
Hey there, fellow crafters and memory keepers! Looking to add that professional touch to your photos without breaking the bank? You’ve landed in the right place. Cutting your own photo mats can save you a bundle and give you complete creative control. But with so many options out there, finding the best photo mat cutters under $15 can feel a little overwhelming. Don’t worry, I’m here to help you navigate the world of budget-friendly mat cutting and find the perfect tool for your needs. This guide will walk you through everything you need to consider before making your purchase, ensuring you end up with a mat cutter that’s easy to use, accurate, and helps you create stunning photo displays. Let’s get started!
1. Blade Sharpness and Longevity: Will it Cut the Mustard?
Okay, let’s talk blades. A dull blade is your worst enemy when it comes to mat cutting. Not only will it make the process a pain, requiring excessive force, but it will also leave you with ragged edges that completely ruin the professional look you’re going for. You want a blade that’s sharp enough to slice through mat board smoothly and cleanly, leaving a crisp, professional edge. Check reviews to see what other users are saying about the blade’s sharpness and how long it lasts before needing replacement.
Think of it like this: would you rather spend an extra few bucks on a cutter with high-quality, long-lasting blades, or constantly be replacing cheaper, dull blades that tear your mat board? Replacing blades more often also equates to more money spent in the long run. Consider the ease of replacing the blades too! Is it a simple process or will you need a degree in engineering to get it done? Trust me, you’ll thank yourself later for paying attention to the blade quality upfront.
2. Cutting Angle and Bevel: Straight or Slanted?
The cutting angle determines the look of the edge of your mat. Most professional-looking mats have a beveled edge, which is a slanted cut that adds depth and visual interest. Some of the best photo mat cutters under $15 offer a fixed bevel angle, while others might only offer a straight cut. Decide what kind of look you’re going for before you buy.
If you’re aiming for that classic, gallery-style presentation, a beveled edge is the way to go. It’s those little details that elevate your photos and make them look like they belong in a frame shop window. However, a straight cut can also look perfectly fine, especially if you’re going for a more modern or minimalist aesthetic. Just make sure the straight cut is clean and precise.
3. Ease of Use and Ergonomics: Comfort is Key!
Let’s be real: nobody wants to struggle with a tool that’s clunky, awkward, or difficult to maneuver. The best photo mat cutters under $15 should be easy to use, even for beginners. Look for features like a comfortable grip, a smooth cutting action, and clear markings for accurate measurements. Ergonomics matters!
Imagine spending an afternoon cutting mats for a whole stack of photos. If your cutter is uncomfortable to hold or requires a lot of force to operate, your hand will be aching in no time. A well-designed cutter will feel natural in your hand and allow you to cut mats with precision and ease. Check user reviews for comments on the cutter’s comfort and ease of use.
4. Accuracy and Measurement Guides: Precision Matters!
Accuracy is paramount when it comes to cutting mats. Even a slight miscalculation can result in a mat that’s too big, too small, or uneven. The best photo mat cutters under $15 will have clear and precise measurement guides, either printed on the cutter itself or included as a separate ruler or template. These guides should be easy to read and use, ensuring you can cut mats to the exact dimensions you need.
Think of it as baking a cake – if you don’t measure your ingredients accurately, the results can be disastrous. The same goes for mat cutting. Without accurate measurements, you risk wasting mat board and ending up with mats that don’t fit your photos properly. Look for cutters with both imperial (inches) and metric (centimeters) markings to accommodate different measurement preferences.
5. Material Compatibility: What Can It Cut?
While you’re probably primarily interested in cutting mat board, it’s worth considering what other materials the cutter can handle. Some cutters might also be able to cut cardstock, foam board, or even thin plastic. This versatility can be a bonus if you’re a multi-craftual person or have other creative projects in mind.
However, be realistic about your needs. If you only plan to cut mat board, you don’t necessarily need a cutter that can handle thicker materials. But if you think you might want to experiment with different materials in the future, it’s worth looking for a cutter that offers more flexibility. Check the manufacturer’s specifications to see what materials the cutter is designed to handle.
6. Safety Features: Play it Safe!
Mat cutters can be sharp and potentially dangerous if not used properly. The best photo mat cutters under $15 should have safety features to protect your fingers and prevent accidents. This might include a blade guard, a safety lock, or a non-slip base to keep the cutter stable on your work surface.
Always prioritize safety when working with sharp tools. Read the instructions carefully before using the cutter and follow all safety precautions. Store the cutter in a safe place when not in use, out of reach of children and pets. Remember, a moment of carelessness can lead to a serious injury.
7. Durability and Build Quality: Will it Last?
Even though you’re looking at budget-friendly options, you still want a mat cutter that’s reasonably durable and well-built. Check the materials used in the construction of the cutter and look for signs of quality craftsmanship. A flimsy or poorly made cutter is likely to break down quickly and won’t provide accurate cuts.
While you can’t expect the same level of durability from a $15 cutter as you would from a professional-grade model, you should still be able to find one that’s sturdy enough to handle regular use. Read user reviews to get an idea of the cutter’s durability and how well it holds up over time. A little research can help you avoid wasting your money on a cutter that falls apart after a few uses. Remember to consider the best photo mat cutters under $15 that offer longevity for their low price.
FAQs
What exactly *is* a photo mat cutter, and why would I need one?
Great question! A photo mat cutter is essentially a specialized tool designed to cut precisely angled bevels into mat board, the material that surrounds and enhances your photographs within a frame. Instead of just plopping a photo directly into a frame, a mat adds a professional, finished look and creates visual breathing room around your image.
More than just aesthetics, a mat board protects your precious prints! It acts as a barrier between the photograph and the glass or acrylic of the frame, preventing moisture buildup and other potential damage. Plus, cutting your own mats allows you to customize the size and style to perfectly complement your photos and décor – a much more budget-friendly alternative to pricey custom framing services.
Are these “under $15” cutters any good, or am I sacrificing quality for price?
I understand your hesitation – it’s natural to be wary of cheaper options! The good news is, while these cutters might not have all the bells and whistles of professional-grade equipment, they can still produce perfectly acceptable mats for hobbyists and casual framers. Think of them as entry-level tools perfect for learning and smaller projects.
The key is to manage expectations and understand their limitations. They might require a bit more practice to master, and the cut quality might not be quite as flawless as you’d get with a pricier cutter. However, with a little patience and attention to detail, you can absolutely achieve beautiful, professional-looking mats without breaking the bank. Plus, at this price point, it’s a relatively low-risk way to test the waters and see if mat cutting is a hobby you enjoy!
I’m a complete beginner – will I be able to use these cutters, or are they too complicated?
Don’t worry, you’re not alone! Many people are intimidated by mat cutting, but these budget-friendly options are often designed with beginners in mind. While there will be a learning curve, most come with simple instructions or online tutorials to guide you through the process.
The best advice is to start with scrap mat board and practice your technique. Focus on maintaining consistent pressure and angle while moving the cutter. Don’t be discouraged if your first few attempts aren’t perfect – that’s all part of the learning process! With a little practice, you’ll be cutting mats like a pro in no time.
What kind of mat board should I use with these cutters?
That’s a smart thing to consider! For most of these cutters, you’ll want to stick to standard mat board thicknesses, typically around 4-ply (approximately 1/16 inch or 1.4 mm). Thicker boards might be too difficult to cut cleanly with these less powerful tools.
You can find mat board at most craft stores, art supply shops, and even online retailers. Look for acid-free or archival-quality board to ensure the longevity of your photos. Also, consider the color and texture of the mat board to complement your artwork. Experiment and find what you like the best!
How long will these cutters last? Are they durable enough?
Durability is always a concern, especially with budget-friendly tools. The lifespan of these cutters depends on how often you use them and how well you take care of them. With proper use and storage, they can certainly last for a decent amount of time, especially for occasional projects.
To maximize their lifespan, be sure to follow the manufacturer’s instructions carefully. Avoid excessive pressure or forcing the cutter, and always store it properly when not in use. Also, consider replacing the blades regularly, as dull blades can lead to rough cuts and put extra strain on the tool.
What are the main differences between the cutters mentioned in the reviews?
That’s a great question to ask before making a decision! While all the cutters are within the “under $15” range, they might differ in terms of blade type, cutting angle, ease of use, and additional features. Some might be better suited for straight cuts, while others might offer more versatility for creating decorative mats.
Read the reviews carefully and pay attention to what other users have said about their experiences with each cutter. Consider your own needs and preferences, such as the type of mats you plan to create and your level of experience. Comparing the pros and cons of each cutter will help you make an informed decision.
What if I’m not happy with the results? Can I return the cutter?
That’s a very valid concern! Most retailers offer return policies, so you should be able to return the cutter if you’re not satisfied with its performance. Check the specific return policy of the store where you purchased it before you buy, just to be on the safe side.
Before initiating a return, though, take the time to practice with the cutter and make sure you’re using it correctly. Sometimes, a little bit of practice can make a big difference! If you’re still not happy, contact the retailer and explain your situation. They might be able to offer a refund or exchange for a different cutter.
Final Verdict
So, there you have it! We’ve explored some fantastic contenders for the best photo mat cutters under $15. Hopefully, this guide has illuminated the path toward finding the perfect tool to elevate your photo presentations. Remember, even with a modest budget, you can achieve professional-looking results and unlock a whole new level of creative expression. Don’t let cost be a barrier – amazing possibilities are within your reach!
Now, go forth and create! Armed with this knowledge, you’re ready to select a mat cutter and start transforming your cherished photos into stunning works of art. Trust your instincts, consider your needs, and take the plunge. You might just surprise yourself with the beautiful, gallery-worthy pieces you can produce. Happy crafting!