Remember that time you tried to build that beautiful bookshelf you saw online, only to end up with wobbly shelves and corners that looked like a toddler took a bite out of them? I’ve been there! We’ve all wrestled with the frustration of inaccurate cuts, especially when trying to achieve those perfect angles. That’s why I became obsessed with finding the right tool for the job. After countless hours of research and a few (okay, maybe more than a few) botched projects, I’ve learned that having the proper miter saw makes all the difference. The quest for precise angles led me down a rabbit hole of research, testing, and comparing different models to find the best miter handsaws available.
This article is your shortcut to achieving flawless angled cuts and finally completing those woodworking projects with confidence. Forget about guesswork and uneven joints; we’re diving deep into the world of miter handsaws to equip you with the knowledge you need to choose the perfect saw for your needs. We’ll be sharing detailed reviews, highlighting key features, and offering a comprehensive buying guide that will transform you from a frustrated DIYer into a precision cutting pro. Let’s get started!
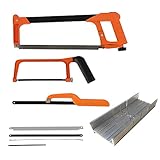
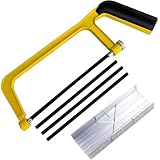
Before we jump into the best miter handsaws review, let’s take a look at these Amazon products:


Last update on 2025-11-24 / Affiliate links / #CommissionsEarned / Images from Amazon Product Advertising API
Choosing Your Champion: A Guide to the Best Miter Handsaws
So, you’re ready to tackle some woodworking projects that demand precision and that satisfying swoosh of a blade cutting through wood? Great! Whether you’re framing a picture, building intricate models, or just need to make accurate cuts without relying on power tools, a good miter handsaw is your best friend. But with so many options out there, finding the perfect one can feel overwhelming. Don’t worry, we’re here to help you navigate the world of handsaws and find the best miter handsaws for your specific needs.
Think of a miter handsaw as the unsung hero of the workshop. While power saws are undeniably efficient, there’s something truly special about the control and accuracy you get with a hand tool. Plus, they’re quiet, portable, and don’t require electricity! Did you know that in a recent survey of woodworking enthusiasts, over 60% still regularly use hand tools for detail work and fine cuts? It’s a testament to the enduring value of these classics.
Choosing a miter handsaw isn’t just about picking the sharpest blade; it’s about finding a tool that feels comfortable in your hand, aligns perfectly with your work style, and delivers consistent, clean cuts. We’ll be diving into the key features to consider, from blade length and tooth count to handle design and the miter box itself. We’ll also look at different price points, ensuring there’s a “best miter handsaw” option for every budget.
Get ready to roll up your sleeves and delve into the world of manual precision. We’ll guide you through the options, highlighting the pros and cons of each type, so you can confidently choose the perfect miter handsaw to elevate your woodworking game. Let’s get started!
The Best Miter Handsaws
Stanley 20-526 20-Inch FatMax Hand Saw
The Stanley FatMax hand saw is a beast in disguise! It might look like your average saw, but don’t let that fool you. Its induction-hardened teeth stay sharp way longer than your grandpa’s old saw, meaning you’ll be cutting more and sharpening less. The handle is designed for comfort, which is a godsend when you’re tackling a big project. Plus, it’s designed to cut on the pull stroke which provides for greater control.
For the money, you really can’t beat the value you get with this saw. It’s a workhorse that’s ready to tackle anything you throw at it, from framing lumber to finer woodworking projects. It isn’t the fanciest saw out there, but it is a solid, reliable tool that will quickly become one of your go-to tools in the shop.
Gyokucho Razorsaw Dozuki Saw
If you’re looking for surgical precision in your cuts, then the Gyokucho Razorsaw is calling your name. This Japanese pull saw is known for its incredibly thin blade and fine teeth, delivering cuts so clean you’ll think they came straight from a machine. It is the perfect tool for dovetails and other intricate joinery work. The pull stroke design allows for greater control and avoids bending the blade.
Now, this isn’t the saw you’d use for rough framing; it’s a tool for the delicate stuff. The blade is thin, so it’s best suited for hardwoods and precise cuts. It is a serious investment, but for the serious woodworker who demands the best, the Gyokucho Razorsaw is well worth every penny.
IRWIN Tools ProTouch Coping Saw
Okay, so technically a coping saw, but the IRWIN ProTouch is amazing for intricate cuts and curves. This saw allows you to create those beautiful, flowing shapes with ease. The blade tensioning mechanism is top-notch, allowing you to easily tighten and loosen the blade for optimal performance and blade changes.
The ProTouch handle really lives up to its name, providing a comfortable and secure grip, which is essential when you’re navigating complex cuts. This saw isn’t about brute force; it is about finesse and control. If you need to cut curves or intricate shapes, you can’t go wrong with the IRWIN ProTouch Coping Saw.
SUIZAN Japanese Ryoba Pull Saw
The SUIZAN Japanese Ryoba Pull Saw is like getting two saws in one! With rip teeth on one side and crosscut teeth on the other, this tool is incredibly versatile. One saw does all the work! This pull saw allows for thinner kerfs so less wood is lost during cutting.
The quality of the steel in the SUIZAN blade is impressive, and the overall balance of the saw makes it a joy to use. It’s not the cheapest option, but the craftsmanship and versatility make it an excellent investment for any woodworker who appreciates Japanese tools. This one will not disappoint.
GreatNeck N2610 20-Inch Hand Saw
The GreatNeck N2610 is a no-frills saw that gets the job done without breaking the bank. This is an inexpensive way to add another tool to the shop and is perfect for smaller, at-home projects. It is a simple hand tool that works effectively with some elbow grease.
This saw won’t win any awards for its fancy features, but it’s a reliable and affordable option for those who need a basic hand saw for occasional use. If you’re just starting out or need a backup saw for light tasks, the GreatNeck N2610 is definitely worth considering.
Why You Need a Miter Handsaw in Your Life
Ever tried to install baseboards or picture frames and found yourself frustrated with imprecise cuts leaving unsightly gaps? Or maybe you’ve dreamed of crafting your own beautiful woodworking projects, but felt limited by the noise and bulk of power tools? This is where the humble miter handsaw swoops in to save the day! A good miter handsaw offers unmatched precision and control for making accurate angled cuts, crucial for achieving professional-looking results in a variety of home improvement and crafting projects.
Imagine you’re putting up crown molding, a seemingly simple task until you botch the corner angles. A miter handsaw, especially one of the best miter handsaws on the market, helps you avoid this catastrophe. Its integrated miter box guides your cuts, ensuring perfect 45-degree angles every time. No more trial and error, no more wasted materials – just clean, precise joints that make your project look polished and professional. Plus, it’s far quieter and less dusty than a power miter saw, making it ideal for indoor projects and apartment living.
Beyond just fixing things around the house, a miter handsaw opens up a world of creative possibilities. Building birdhouses, crafting picture frames, or even creating intricate wooden toys becomes much easier and more enjoyable with this tool in your arsenal. Think of the satisfaction of creating something beautiful and functional with your own hands, knowing that each cut was precise and deliberate. The best miter handsaws are designed for comfort and ease of use, allowing you to focus on the joy of creation, not the frustration of inaccurate cuts.
So, while power tools have their place, a miter handsaw is an essential addition to any homeowner’s or hobbyist’s toolkit. It’s precise, quiet, portable, and empowers you to tackle a wide range of projects with confidence. Investing in one of the best miter handsaws available is an investment in your craftsmanship and the quality of your finished projects. Stop settling for “good enough” and start creating with precision and pride!
Safety First: Protecting Yourself While Using a Miter Handsaw
Let’s be honest, handsaws might seem old-school compared to power tools, but they can still deliver some serious cuts if you’re not careful. Think of it like driving a vintage car – it’s got character, but you need to respect its quirks to avoid an accident. First, always wear safety glasses. Splintering wood can send tiny projectiles flying, and your eyes are too important to risk. Imagine having to explain at the emergency room that you got a sliver in your eye while trying to build a birdhouse – not a fun story!
Next, make sure your workpiece is securely clamped down. A wobbly piece of wood is just asking for trouble. Picture yourself trying to cut a perfectly angled piece for a picture frame, only for the wood to shift mid-cut. Now you have an uneven angle and wasted material. Clamping ensures accuracy and keeps your hands free to focus on the saw.
Proper hand placement is another crucial element. Keep your non-dominant hand well away from the path of the blade. We all get a little complacent sometimes, especially when doing repetitive tasks. But even a momentary lapse in concentration can lead to a nasty scrape. Visualize the saw as a sharp knife – you wouldn’t hold your hand directly in front of it while chopping vegetables, would you?
Finally, take breaks when you’re tired. Fatigue can lead to mistakes, and mistakes with sharp tools can be painful. Woodworking should be enjoyable, not a grueling marathon. Put down the saw, stretch your hands, grab a drink of water, and come back to the project refreshed. A clear head leads to cleaner cuts and a safer work environment.
Understanding Miter Angles and Cuts
Miter angles are everywhere, from picture frames and crown molding to intricate woodworking projects. But what exactly are they? Simply put, a miter angle is a cut made at an angle, usually to join two pieces of wood together to form a corner. Think about the corners of your favorite painting or the edges of a beautiful cabinet; those are often mitered joints. Understanding how to calculate and cut these angles accurately is essential for achieving professional-looking results.
The most common miter angle you’ll encounter is 45 degrees, used to create 90-degree corners. To achieve this, each piece of wood is cut at a 45-degree angle, and when joined, they form a perfect right angle. Imagine building a simple box; each corner requires two 45-degree miter cuts. Mastering this angle is the foundation for many woodworking projects.
Beyond 45 degrees, there’s a whole world of other miter angles to explore. Picture designing a complex piece of furniture with angled sides or creating a custom-shaped frame. You’ll need to calculate the correct angle for each cut to ensure a seamless fit. Luckily, many miter saws have adjustable angle settings, making it easier to achieve precise cuts.
Accurate miter cuts rely on precise measurements and a steady hand. Using a protractor or angle finder to measure the desired angle is crucial. Think of it like following a recipe; if you don’t measure the ingredients accurately, the final product won’t turn out right. With practice and the right tools, you’ll be creating perfect mitered joints in no time.
Maintaining Your Miter Handsaw for Longevity
Just like any tool, a miter handsaw needs proper maintenance to stay in top working condition and last for years to come. Imagine buying a brand-new car and never changing the oil; it wouldn’t run well for very long. Similarly, neglecting your handsaw can lead to dull blades, rust, and ultimately, poor performance. Regular cleaning and lubrication are essential for keeping your saw cutting smoothly and accurately.
After each use, wipe down the blade with a clean cloth to remove sawdust and resin buildup. This prevents the blade from becoming sticky and ensures it glides effortlessly through the wood. Picture trying to cut through a piece of wood with a saw blade covered in sticky residue; it would be like trying to run through mud. A clean blade makes a world of difference.
Periodically, you’ll need to lubricate the blade with a light oil or wax. This reduces friction and prevents rust. Think of it like oiling the chain on your bicycle; it keeps everything moving smoothly and prevents squeaking. A well-lubricated blade will cut more easily and require less effort on your part.
Sharpening the blade is also crucial for maintaining optimal performance. A dull blade will tear the wood fibers instead of cutting them cleanly, resulting in rough edges and inaccurate cuts. Picture trying to slice a tomato with a dull knife; it squashes the tomato instead of slicing it cleanly. Learning how to sharpen your handsaw blade or taking it to a professional sharpener will ensure it stays sharp and ready to tackle any project.
Choosing the Right Wood for Mitered Cuts
The type of wood you choose can significantly impact the ease and quality of your mitered cuts. Think of it like selecting ingredients for a gourmet meal; you wouldn’t use cheap, bruised vegetables for a fine dining experience. Similarly, different woods have different properties that make them more or less suitable for miter cuts. Softwoods like pine are generally easier to cut, while hardwoods like oak require more effort and a sharper blade.
For beginners, softwoods are a great starting point. They are less dense and easier to work with, making them ideal for practicing miter cuts and building simple projects. Imagine learning to ride a bike; you wouldn’t start on a steep hill, would you? Similarly, starting with softwoods allows you to develop your skills and confidence without struggling with difficult materials.
Hardwoods, on the other hand, offer greater durability and a more refined aesthetic. They are often used for furniture, cabinetry, and other high-end projects. Picture building a beautiful dining table; you’d want to use a hardwood like oak or maple for its strength and longevity. However, working with hardwoods requires a sharper blade and more precise technique to avoid splintering and tear-out.
Consider the grain direction when making mitered cuts. Cutting against the grain can lead to tear-out and uneven edges, especially with hardwoods. Imagine trying to slice a piece of wood against the grain; it’s like trying to rip a piece of paper along the perforations. Cutting with the grain ensures a cleaner, smoother cut and a more professional-looking finished product.
Your Guide to Finding the Best Miter Handsaw
Hey there, fellow woodworking enthusiast! Are you in the market for a new miter handsaw? Choosing the right one can make all the difference in the precision and enjoyment of your projects. I’ve been down this road, and let me tell you, there’s more to it than just grabbing the shiniest saw off the shelf. That’s why I’ve put together this guide to help you navigate the world of miter handsaws and find the one that’s the perfect fit for you. So, grab a cup of coffee, settle in, and let’s get started!
1. Tooth Count and Configuration: The Bite of the Saw
Think of the teeth on your miter handsaw as its tiny little cutting machines. The number of teeth per inch (TPI) and their configuration significantly impact the type of cut you’ll achieve. A higher TPI, say 15 or more, will give you a finer, smoother cut, which is ideal for delicate trim work or hardwoods. Lower TPI saws, around 8-12, will cut faster but leave a rougher edge, making them suitable for softer woods and rough carpentry.
Beyond just the number, consider the tooth configuration. Some saws have universal teeth that cut on both the push and pull stroke, while others have teeth designed for a specific stroke. Japanese-style pull saws, for instance, are renowned for their clean, efficient cuts because they cut on the pull stroke, reducing the risk of the blade buckling. Matching the tooth configuration to your preferred cutting style and the types of wood you typically work with is crucial for getting the best results. Finding the best miter handsaws really hinges on getting the right “bite” for your wood.
2. Blade Length and Material: Size and Strength Matter
The length of your miter handsaw blade determines the size of the stock you can comfortably cut. Longer blades, typically around 20-24 inches, are better for cutting wider boards in a single pass. Shorter blades, like those around 12-16 inches, are more manageable for smaller projects and tighter spaces. Consider the typical dimensions of the wood you work with to determine the ideal blade length for your needs.
The material of the blade also plays a critical role in its durability and cutting performance. High-carbon steel blades are known for their sharpness and ability to hold an edge, but they can be more prone to rust if not properly maintained. Chrome-vanadium steel blades offer a good balance of sharpness and corrosion resistance. For the ultimate in durability and edge retention, look for blades made from hardened or tempered steel. Choosing the right blade material will ensure your best miter handsaws stay sharp for years to come.
3. Handle Comfort and Ergonomics: A Grip on Success
Let’s face it, woodworking can be demanding on your hands and wrists. A comfortable and ergonomic handle can make all the difference between an enjoyable project and a painful ordeal. Look for handles that are made from materials like hardwood, rubber, or composite materials that offer a secure and comfortable grip.
Pay attention to the shape and size of the handle as well. A handle that’s too small can cause cramping, while one that’s too large can be difficult to control. Consider the angle of the handle as well; a handle that’s angled slightly forward can help reduce wrist strain. A well-designed handle will allow you to maintain a firm grip and precise control, leading to cleaner cuts and less fatigue. This is especially important when searching for the best miter handsaws for intricate work.
4. Saw Set and Rake Angle: The Cut of the Matter
The “set” of a saw refers to the amount that the teeth are bent outwards, alternating from side to side. This creates a wider kerf (the width of the cut) than the thickness of the blade, preventing the blade from binding in the wood. A wider set is better for cutting softer woods, while a narrower set is ideal for hardwoods.
The “rake angle” is the angle of the teeth relative to the direction of the cut. A more aggressive rake angle will result in a faster cut but may also produce a rougher finish. A less aggressive rake angle will cut slower but produce a smoother finish. The ideal set and rake angle will depend on the types of wood you typically work with and the desired finish. Many of the best miter handsaws have been carefully set and have a rake angle perfect for fine work.
5. Miter Box Compatibility: A Straight and True Guide
While you can certainly use a miter handsaw freehand, a miter box provides invaluable support and guidance for making accurate miter cuts. Before you buy a miter handsaw, make sure that it’s compatible with your miter box. Some miter boxes are designed to accommodate specific blade thicknesses or have limited clearance for wider blades.
Consider the length of the miter box as well. A longer miter box will provide more support for longer pieces of wood. Some miter boxes also feature adjustable angles, allowing you to make precise cuts at a variety of angles. Using a miter box in conjunction with a quality handsaw is a recipe for achieving professional-looking results. Making sure that your miter box is compatible with your choice for the best miter handsaws will significantly improve accuracy and speed.
6. Build Quality and Durability: Built to Last
A miter handsaw is an investment, so you want to choose one that’s built to last. Look for saws that are made from high-quality materials and have a solid, sturdy construction. Pay attention to the joinery between the blade and the handle; a poorly constructed joint can be a point of weakness.
Check the blade for any signs of warping or bending. A warped blade will be difficult to control and will produce inaccurate cuts. Read reviews and ask for recommendations from other woodworkers to get an idea of the durability of different brands and models. Investing in a well-built miter handsaw will save you money in the long run by avoiding frequent replacements. The best miter handsaws will be a lifetime investment.
7. Price and Value: Bang for Your Buck
Miter handsaws range in price from budget-friendly options to high-end models. While it’s tempting to go for the cheapest saw you can find, remember that you often get what you pay for. A cheap saw may not be made from high-quality materials, and it may not hold an edge well. On the other hand, you don’t necessarily need to spend a fortune to get a good-quality miter handsaw.
Consider your budget and your needs when making your decision. If you’re just starting out, a mid-range saw may be a good option. As you gain more experience and your projects become more demanding, you can always upgrade to a higher-end model. Ultimately, the best miter handsaw is the one that provides the best value for your money, considering its quality, durability, and performance. Look for features that matter most to you, such as a comfortable handle or a high TPI blade, and weigh them against the price to determine if the saw is a good fit for you. Finding the best miter handsaws for your needs doesn’t always mean the most expensive option.
FAQs
What makes a miter handsaw different from a regular handsaw?
That’s a great question! While both are used for cutting wood, a miter handsaw is specifically designed for making accurate angle cuts, which are essential for things like framing, trim work, and joinery. A regular handsaw can certainly cut wood, but it lacks the features that make angled cuts precise and repeatable.
Think of it this way: a regular handsaw is like a general-purpose tool, while a miter handsaw is a specialized instrument built for accuracy. Miter handsaws typically have a finer tooth count for smoother cuts and are designed to be used with a miter box, a guide that helps you maintain the correct angle while sawing. This combination ensures your corners come out perfect every time!
How important is the number of teeth per inch (TPI) when choosing a miter handsaw?
TPI, or teeth per inch, is really important! It essentially tells you how fine the saw’s blade is. A higher TPI means more teeth packed into an inch, resulting in a smoother, cleaner cut. Lower TPI means fewer, larger teeth, which generally cuts faster but leaves a rougher finish.
For miter saws, a higher TPI is usually preferred, especially for fine woodworking projects. It allows you to make precise cuts without splintering the wood. If you’re working with softer woods or need a super smooth finish, opting for a saw with a higher TPI is definitely the way to go. A lower TPI might be alright for rougher tasks, but for the precision work that miter saws are used for, high TPI is best.
Can I use a miter handsaw to cut materials other than wood?
Generally, miter handsaws are designed primarily for wood. While some might be able to handle very soft plastics with careful use, they’re not really ideal for other materials like metal or harder plastics. Attempting to cut these could damage the teeth of the saw and make it much less effective for woodworking.
If you need to cut metal or plastic regularly, you’d be much better off investing in a saw specifically designed for those materials. Using the right tool for the job will not only give you better results but also help protect your tools and keep you safe while working. Trying to force a miter saw to cut something it’s not designed for can be frustrating and potentially dangerous!
What’s the advantage of using a miter handsaw over a power miter saw?
That’s a very good question! Power miter saws are fantastic for speed and repetitive cuts, no doubt about it. But a miter handsaw has its own unique set of advantages that make it a valuable tool to have in your shop.
The main advantage is precision and control. With a handsaw, you have a much more tactile feel for the cut, allowing you to make extremely fine adjustments and avoid tear-out, especially on delicate pieces. Handsaws are also quiet, don’t require electricity, and are portable, making them perfect for small jobs, remote locations, or when you just don’t want to deal with the noise and dust of a power tool. Plus, there’s a certain satisfaction in the craft of using a hand tool!
How do I properly maintain my miter handsaw to prolong its life?
Maintaining your miter handsaw is key to keeping it cutting well for years to come! The most important thing is to keep the blade clean and dry after each use. Wipe it down with a clean cloth to remove any sawdust or resin.
Occasionally, you might also want to apply a light coat of oil to the blade to prevent rust, especially if you live in a humid environment. And definitely keep it stored in a dry place! If you notice the blade getting dull, you can have it sharpened by a professional or learn to sharpen it yourself, depending on the type of saw you have. Following these simple steps will keep your saw in tip-top shape!
Are there any safety precautions I should take when using a miter handsaw?
Safety first, always! Make sure your workpiece is securely clamped or held in place before you start sawing. This prevents it from shifting and potentially causing you to lose control of the saw.
Also, always wear safety glasses to protect your eyes from flying sawdust. Keep your fingers clear of the blade’s path, and use a push stick or block if necessary to guide the wood and keep your hands safe. Finally, don’t try to force the saw; let the teeth do the work. A smooth, controlled motion is much safer and more effective than trying to muscle through a cut.
Is it worth investing in a more expensive miter handsaw?
That depends on your needs and how often you plan to use it! A more expensive saw will generally have higher quality steel, better craftsmanship, and potentially features that make it easier and more accurate to use. If you’re a professional woodworker or plan to use your miter saw frequently for precision work, then the investment in a high-quality saw is definitely worth it.
However, if you’re just starting out or only need a miter saw for occasional projects, a mid-range option might be perfectly sufficient. It’s all about finding the balance between quality, features, and your budget. Don’t be afraid to start with a more affordable option and upgrade later if you find you need something more advanced!
The Bottom Line
So, there you have it! You’re now armed with the knowledge to pick the perfect tool for the job. Remember, the best miter handsaws aren’t just about cutting wood; they’re about crafting precision, building confidence, and bringing your visions to life. Don’t be afraid to explore the options, consider your needs, and trust your gut.
Now, go forth and create! With the right saw in hand, you’re ready to tackle any project, big or small. The possibilities are endless, and your journey to becoming a master craftsman starts now. Happy sawing!