Remember that time you were jamming on your acoustic, lost in the groove, and then thwack – a dead fret buzz instantly killed the vibe? It’s the absolute worst, right? That sinking feeling as you realize your trusty guitar, your voice, is out of commission. Maybe you tried a quick fix, but deep down you know a real solution involves some fretwork. That’s where the right luthier tools come in. Taking on fretwork can seem daunting, but with the best luthier tools acoustic guitar frets can be replaced, leveled, and crowned with precision, breathing new life into your instrument and bringing back that sweet, clear tone.
Choosing the proper equipment is crucial to achieve professional results. A poorly chosen fret puller, a dull crowning file, or an inaccurate leveling beam can quickly turn a simple repair into a frustrating mess. This guide cuts through the noise and provides honest reviews of the best luthier tools acoustic guitar frets require, empowering you to confidently tackle fretwork and keep your beloved acoustic singing for years to come. We’ll explore essential tools, discuss what to look for in terms of quality and usability, and provide a comprehensive buying guide to help you make informed decisions.
Before we jump into the best luthier tools acoustic guitar frets review, let’s take a look at these Amazon products:


Last update on 2026-02-27 / Affiliate links / #CommissionsEarned / Images from Amazon Product Advertising API
Taming the Tang: Your Guide to Acoustic Guitar Fretwork
So, you’re diving into the world of fretwork on acoustic guitars, huh? Awesome! Whether you’re aiming to refret a vintage Martin or just tweak a few high spots on your trusty Taylor, you’re entering a realm where precision and patience meet craftsmanship. Fretting might seem daunting at first, but with the right approach and the right gear, it’s incredibly rewarding. Did you know that a recent study estimated that approximately 60% of all acoustic guitars over 10 years old could benefit from some fretwork attention? It’s a common issue!
Now, before you get overwhelmed by all the specialized tools out there, let’s break it down. Think of it like this: you’re a surgeon performing a delicate operation on a beautiful instrument. You wouldn’t go in with a butter knife, would you? Similarly, using the right tools for the job is crucial for achieving a professional, playable result. We’re talking about everything from fret pullers and nippers to leveling beams and crowning files – each tool designed to perform a specific task with accuracy and finesse.
This isn’t just about having fancy equipment, though. It’s about understanding how each tool functions and how it contributes to the overall process. For instance, a quality fret hammer is essential for seating frets evenly without damaging the fretboard. And a properly radiused fret press caul ensures consistent pressure, leading to a well-seated fret that won’t pop up later. Choosing the best luthier tools acoustic guitar frets is a journey in itself!
In the following sections, we’ll explore the essential tools you’ll need for successful acoustic guitar fretwork, delving into the specific features and benefits of each. We’ll also offer some tips and tricks to help you navigate the challenges and achieve that smooth, buzz-free playability we all crave. Get ready to level up your luthier skills!
5 Best Luthier Tools Acoustic Guitar Frets
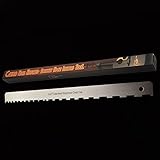
StewMac Fret Tang Nippers
These nippers are a game changer for anyone tackling fretwork, especially on bound fretboards. The precisely ground blades cleanly remove the fret tang without damaging the binding, saving hours of tedious filing. The comfortable handles provide excellent grip and control, allowing for accurate and consistent cuts. Forget struggling with standard end nippers and risking costly mistakes, these are an investment that pays off in both time and peace of mind.
While the price point might seem a bit high compared to other nippers, the specialized design and superior performance make them worth every penny for serious luthiers and repair technicians. They are built to last, with durable construction that can withstand the rigors of frequent use. These nippers significantly speed up the fret installation process and ensure a professional-looking result.
Hosco Fret Puller
Removing frets without chipping the fretboard is an art, and this tool helps you become a master. The Hosco Fret Puller features a slim, sharp jaw that slides easily under the fret, combined with a smooth pulling action that minimizes the risk of damage. The ergonomic handles provide a comfortable and secure grip, allowing for precise control. Say goodbye to nail-biting fret removal sessions and hello to a smooth, efficient process.
Although it requires some practice to get the hang of using it effectively, the Hosco Fret Puller is an essential tool for any luthier or guitar tech. It’s well-built and durable, ensuring it will be a reliable companion for countless fret jobs. The tool’s design prioritizes protecting the fretboard, making it a worthwhile investment for preserving the integrity of your instruments.
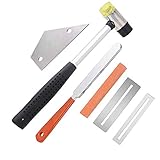
Luthier Tool Fret Crowning File
Achieving that perfect, smooth fret profile after leveling is crucial for optimal playability, and this crowning file makes it easier than ever. Its unique shape is designed to round the top of the fret without flattening it, ensuring comfortable bending and accurate intonation. The comfortable handle and precise cutting edges allow for controlled and consistent results. It quickly transforms leveled frets into beautifully crowned ones.
Available in various sizes to match different fret wire widths, this crowning file offers versatility for working on a range of instruments. While some initial practice may be needed to develop a feel for the right amount of pressure, the file’s quality and design make it a valuable asset for achieving professional-level fretwork. With proper use, it delivers consistently excellent results.
StewMac Fret Rocker
Finding high frets can be a real headache, but this simple tool makes it quick and easy. The StewMac Fret Rocker is essentially a precision straightedge with different lengths designed to span multiple frets. By rocking it across the fretboard, you can quickly identify any frets that are higher than the surrounding ones. It’s a fundamental tool for any setup or fretwork job, ensuring a level and playable fretboard.
The compact size and durable construction make this fret rocker a must-have for every luthier’s toolkit. Its ease of use makes it accessible to both beginners and experienced professionals. It’s a surprisingly affordable tool that saves time and prevents misdiagnosis, leading to more accurate and efficient fretwork.
Crimson Guitars Fret Press Caul
Pressing frets in provides a consistent and even seating, resulting in better tone and playability, and this caul makes the process incredibly easy. The Crimson Guitars Fret Press Caul is made from high-quality steel and features interchangeable inserts to match various fretboard radii. This allows for precise and controlled pressure application during fret installation, minimizing the risk of damage to the fretboard or frets.
The tool’s robust design ensures long-lasting durability, even with frequent use. While a fret press is required to utilize this caul, the combination delivers professional-quality fret installation with minimal effort. The interchangeable inserts offer versatility for working on different instruments, making it a worthwhile investment for any luthier looking to elevate their fretwork.
Why Buy Luthier Tools and Acoustic Guitar Frets?
Imagine the disappointment of discovering fret buzz on your beloved acoustic guitar. Maybe a high fret is causing notes to choke out, or the edges are sharp and uncomfortable. You could take it to a professional luthier, which can be costly and time-consuming. But what if you could tackle these issues yourself, achieving a custom setup perfectly tailored to your playing style? Investing in luthier tools and acoustic guitar frets opens the door to a world of guitar maintenance and repair, empowering you to become your own guitar tech.
Think about the satisfaction of smoothing down fret ends for a silky smooth playing experience. Or the freedom to experiment with different fretwire materials and profiles to find the perfect feel and tone. Upgrading worn frets can breathe new life into an older instrument, restoring its playability and unlocking its full sonic potential. With the right tools and materials, you’ll gain the ability to fine-tune your guitar to your exact preferences, ensuring it performs at its absolute best.
Now, while any tools and frets will technically work, using the “best luthier tools acoustic guitar frets” translates into greater precision, efficiency, and longevity. High-quality fretwire resists wear and tear, ensuring lasting playability. Precision-engineered tools, like fret presses and crowning files, minimize the risk of damaging your instrument and yield professional-level results. Investing in quality ensures that you’re set up for success, avoiding frustrating setbacks and achieving a superior finish.
Ultimately, purchasing luthier tools and acoustic guitar frets is an investment in your passion for music. It’s about taking control of your guitar’s performance, unlocking your creative potential, and saving money in the long run. It’s about gaining a deeper understanding of your instrument and fostering a rewarding connection with it. Embrace the challenge, learn new skills, and experience the profound satisfaction of maintaining and improving your acoustic guitar with the best possible tools and materials available.
Essential Fret Measurement Tools
So you’re about to tackle some fretwork? Excellent! First things first, you’ll need accurate measurements. Forget eyeballing it! A good fret ruler, specifically designed for fret spacing, is your best friend here. Imagine trying to refret a vintage guitar and accidentally putting the frets slightly off – it’d be a sonic disaster!
Beyond just a ruler, consider a fret rocker. This little tool helps identify high frets that might be causing buzzing or intonation issues. Picture this: you’ve just spent hours setting up your guitar, but it still buzzes on the 7th fret of the G string. A fret rocker will quickly pinpoint that sneaky culprit, saving you loads of frustration.
Digital calipers are another must-have. They’re perfect for measuring fret wire tang thickness and fretboard slot width. Say you’re planning to install new frets on a rare instrument and the fretboard slots are unusually narrow. Knowing the exact dimensions before you start hammering will prevent a cracked fretboard.
Finally, don’t underestimate the value of a good magnifying glass or even a jeweller’s loupe. Examining fret ends for sharp edges or imperfections becomes much easier with magnification. Think of it like surgery – you need to see the fine details to get the best results! These tools ensure that you get a smooth, professional feel after your fretwork.
Fret Pulling and Seating: Key Techniques
Pulling frets might seem straightforward, but doing it wrong can seriously damage your fretboard. The key is to heat the fret with a soldering iron or heat gun before attempting to pull it. This softens the glue underneath and helps prevent chipping the wood. Imagine pulling a fret cold – you risk ripping out chunks of the fretboard!
When seating new frets, even pressure is crucial. A fret press, either a dedicated press or one that attaches to your drill press, is ideal. This tool applies even pressure across the entire fret, ensuring it’s seated properly. Think of it like baking – uneven heat leads to a sunken cake, and uneven pressure leads to a poorly seated fret.
Hammering frets is still a valid technique, but it requires precision. Use a fret hammer with a plastic or nylon head to avoid damaging the fret wire. Imagine wailing away with a metal hammer – you’d end up with a dented, uneven fret! Practice your technique on scrap wood first to get a feel for the right amount of force.
Don’t forget about the importance of caul dimensions when using a fret press. Using a slightly wider caul is always better than using a caul that is too narrow because it creates more contact with the fret. If using a caul that is too narrow, you will risk damaging the fretboard where the edges of the caul are making contact.
Leveling, Crowning, and Polishing: Achieving Fret Perfection
Leveling frets is all about creating a consistent playing surface. Start by marking the tops of your frets with a marker. Then, using a leveling beam with sandpaper attached, carefully sand the frets until the marker is gone from all of them. Envision a bumpy road – leveling makes it smooth and playable.
Crowning restores the rounded shape of the frets after leveling. This is where a good crowning file comes in handy. A well-crowned fret allows the string to vibrate freely, improving tone and intonation. Picture a flat tire – crowning is like re-inflating it, restoring its proper shape.
Polishing frets is the final step to a smooth, professional feel. Use progressively finer grits of sandpaper or polishing cloths to achieve a mirror-like shine. Imagine running your fingers across a rough surface versus a polished one – polishing eliminates any remaining friction.
Don’t underestimate the importance of masking your fretboard before leveling, crowning, and polishing. Painter’s tape or fretboard guards protect the wood from scratches and debris. Think of it like prepping a room before painting – masking ensures a clean and professional result.
Fretboard Maintenance and Repair
Keeping your fretboard clean and properly hydrated is crucial for its longevity and playability. Use a fretboard conditioner, such as lemon oil or bore oil, to prevent the wood from drying out and cracking. Think of it like moisturizing your skin – it keeps it supple and healthy.
Dealing with fret sprout (where the fret ends protrude from the fretboard) is a common issue, especially in drier climates. A simple fix involves carefully filing the fret ends flush with the fretboard using a fret end dressing file. Imagine walking barefoot on a cracked sidewalk – fret sprout is equally unpleasant.
If you encounter a loose fret, don’t panic! A small amount of wood glue or epoxy can usually secure it back in place. Just be sure to clamp it properly while the glue dries. Think of it like fixing a wobbly table leg – glue and clamping provide stability.
Sometimes, fretboard damage is beyond a simple repair. Cracks, chips, or deep scratches might require more extensive work, such as filling or even fretboard replacement. In these cases, it’s best to consult with a qualified luthier. Envision a badly damaged car – sometimes, professional repair is the only option.
Best Luthier Tools Acoustic Guitar Frets Buying Guide
Hey there, future fret master! So, you’re diving into the world of refretting acoustic guitars? Awesome! It’s a rewarding skill, and selecting the best luthier tools acoustic guitar frets is the first step on that journey. Trust me, having the right gear makes all the difference between a smooth, enjoyable process and a frustrating, potentially guitar-damaging one. This guide is here to help you navigate the sometimes-overwhelming world of fret wire and the essential tools that make it sing. Let’s get your guitar playing like a dream!
Fret Wire Material: Nickel Silver vs. Stainless Steel
Choosing the right fret wire material is like picking the right tires for your car – it significantly impacts performance and longevity. Nickel silver is the traditional choice, known for its softer feel and warmer tone. It’s easier to work with, files down nicely, and is generally less expensive than its stainless-steel counterpart. For vintage instruments or players who prefer a more classic sound, nickel silver is often the go-to.
However, nickel silver frets wear down faster. If you’re a heavy bender or play aggressively, you’ll find yourself needing to refret more often. That’s where stainless steel shines. These frets are incredibly durable and resistant to wear, essentially lasting a lifetime for many players. The tradeoff is that they are harder to work with and can produce a brighter, sometimes harsher tone. But for players seeking maximum longevity and a slick, fast feel, stainless steel is a worthwhile investment.
Fret Wire Size: Width and Height Matters
Fret wire size is often overlooked but plays a huge role in playability. Think about it – your fingers directly interact with the frets! Wider frets offer more surface area for bending and vibrato, making those techniques easier to execute. Taller frets allow for a lighter touch, as you don’t need to press down as hard to get a clean note.
Conversely, smaller frets can feel more comfortable for some players, especially those accustomed to vintage instruments with their typically narrower fret wire. Smaller frets can also contribute to a smoother, more traditional feel. Ultimately, fret wire size is a personal preference. Experiment with different sizes if you can to discover what feels best under your fingers and complements your playing style. Consider what kind of guitar you’re working on, as a vintage replica might call for vintage-sized frets.
Tang Dimensions: Ensuring a Secure Fit
The tang is the part of the fret wire that anchors it into the fret slot. Getting the tang dimensions right is absolutely crucial for a secure and stable fret job. If the tang is too wide, you’ll risk damaging the fretboard by splitting it. If it’s too narrow, the frets will be loose and prone to popping out.
Always measure your fret slots carefully before ordering fret wire. Calipers are your best friend here! Many suppliers offer fret wire with slightly oversized tangs that can be carefully filed down to achieve the perfect fit. It’s always better to err on the side of caution and have a little extra material to work with than to end up with a loose fit. Taking your time and ensuring a snug tang fit is one of the keys to a professional-looking and long-lasting refret.
Fret Press Caul and Hammer: Choose Your Weapon
Refretting requires some serious finesse, and having the right tools is a must. A fret press caul helps you seat the frets evenly into the fret slots using a drill press or arbor press. Fret hammers are specially designed with a soft head to avoid damaging the fret wire during installation.
Which should you choose? A fret press caul offers more control and precision, especially for challenging fretboards. It distributes the pressure evenly across the entire fret, reducing the risk of bending or distorting the wire. A fret hammer is a more traditional method and can be quicker for some luthiers. The decision often comes down to personal preference and the type of work you’re doing. Start with one method and you can always add the other to your collection later!
Fret Cutters and End Nippers: Clean Cuts for a Clean Finish
Once your frets are installed, you’ll need to trim the ends. That’s where fret cutters and end nippers come in. Fret cutters are designed to cleanly cut the fret wire close to the fretboard edge. End nippers are then used to carefully remove the remaining bit of fret wire flush with the fretboard.
The key is to invest in high-quality tools that provide clean, precise cuts without damaging the fretboard. Cheap cutters can crush the fret wire or leave jagged edges. Look for cutters with hardened steel blades and comfortable handles. Your goal is to remove the excess fret wire cleanly, leaving a smooth surface that requires minimal filing and dressing. These steps are essential for achieving a professional, comfortable playing experience.
Fret Files and Dressing Tools: Achieving Perfect Playability
Once the frets are installed and trimmed, the real magic happens: fret dressing. This involves leveling the frets to ensure they are all at the same height, crowning them to achieve a comfortable rounded profile, and polishing them to a mirror shine. This is where those best luthier tools acoustic guitar frets can make the difference.
Fret files, crowning files, and polishing compounds are essential for this stage. Invest in a good set of fret files that are designed specifically for fretwork. Crowning files help you restore the rounded profile of the frets after leveling. Finally, polishing compounds and cloths will bring the frets to a smooth, playable finish. Taking the time to properly dress your frets will dramatically improve the playability of your guitar and make it a joy to play. It is all about the detail!
Fretboard Protection and Maintenance: Keep it Clean!
Protecting your fretboard during the refretting process is essential. Fretboard protectors shield the wood from scratches and dents while you’re leveling, filing, and polishing the frets. Masking tape can also be used to protect the fretboard during these operations.
Once the refretting is complete, proper fretboard maintenance will keep your guitar playing its best. Fretboard oil helps to keep the wood hydrated and prevents it from cracking or drying out. Cleaning the frets regularly will remove dirt and grime, improving their feel and preventing corrosion. A little bit of care goes a long way in ensuring your refretted guitar remains a pleasure to play for years to come. Remember, the best luthier tools acoustic guitar frets can only do so much; it’s the maintenance that keeps them in top condition.
FAQs
What are the essential tools a beginner luthier needs for acoustic guitar frets?
Starting out with fretwork can feel daunting, but don’t worry! You don’t need to buy everything at once. Focus on the basics first. A good fret hammer, a fret puller, a fret leveling beam (with some sandpaper), a crowning file, and some fret erasers are your initial must-haves. A set of radius gauges can also be incredibly helpful for ensuring your frets are consistently curved.
These tools will allow you to remove old frets, level existing ones, and shape them for optimal playability. As you gain experience, you can then expand your collection with more specialized tools like a fret slot cleaning saw, a notched straightedge, or even a fret rocker. Remember, quality over quantity is key when starting out!
How do I choose the right fret size for my acoustic guitar?
Choosing the right fret size is crucial for achieving the desired feel and playability of your guitar. Consider your playing style and preferences. Taller frets allow for easier bending and vibrato, while shorter frets often provide a more comfortable feel for chording. Many acoustic guitars use medium-jumbo or medium frets as a good all-around choice.
Research the original fret size of your guitar if you’re replacing them. Websites like StewMac often have specifications for various guitar models. Experimenting with different fret sizes on other guitars can also help you discover what feels best for your playing style. Ultimately, the best fret size is the one that allows you to play comfortably and effortlessly.
What is the difference between a fret leveling beam and a fret rocker?
These two tools are both used to address uneven frets, but they tackle the problem in slightly different ways. A fret leveling beam is a long, flat tool (usually metal or wood) that’s used with sandpaper to uniformly level all the frets on the fingerboard. This helps ensure consistent action across the neck. Think of it as creating a level playing field for all your frets.
A fret rocker, on the other hand, is a smaller, notched tool designed to identify individual high or low frets. You rock it back and forth across three frets at a time. If it rocks, the middle fret is either higher or lower than the surrounding two. It’s great for pinpointing problem areas that need individual attention.
How do I prevent chipping the fretboard when pulling frets?
Chipping the fretboard when pulling frets is a common fear, and rightfully so! But with the right technique and precautions, you can minimize the risk. First, make sure you’re using a dedicated fret puller, not pliers. A good fret puller has jaws that are designed to grip the fret securely and pull it straight out.
Second, heat the frets slightly with a soldering iron before pulling them. This softens the glue and helps the frets release more easily. Finally, work slowly and carefully. Don’t try to yank the frets out in one motion. Instead, use a gentle rocking motion to gradually loosen them. Taking your time and being patient will go a long way in preventing damage.
What is the best way to clean and polish acoustic guitar frets?
Keeping your frets clean and polished not only improves their appearance but also contributes to smoother playing. After leveling and crowning your frets, use progressively finer fret erasers or polishing papers to remove any scratches or imperfections. Start with a coarser grit and gradually work your way up to finer grits for a mirror-like shine.
For regular maintenance, you can use a soft cloth and a fretboard cleaner or polish. Be sure to mask off the fretboard with painter’s tape to avoid getting cleaner on the wood. You can also use steel wool (0000 grade) to gently buff the frets, but be very careful to protect the pickups and finish from any stray steel wool particles.
What are some common mistakes to avoid when working on acoustic guitar frets?
One common mistake is rushing the process. Fretwork requires patience and precision. Take your time and focus on each step. Another mistake is using the wrong tools or using them incorrectly. Make sure you’re using dedicated fret tools and that you understand how to use them properly.
Over-leveling the frets is also a common pitfall. Remove only the necessary amount of material to achieve a level playing surface. Too much leveling can result in buzzing and reduced fret life. Finally, neglecting to protect the fretboard can lead to scratches and chips. Always use masking tape to protect the wood around the frets when filing or polishing.
How do I know when it’s time to refret my acoustic guitar?
There are several signs that indicate it’s time for a refret. If your frets are severely worn down, causing buzzing or intonation problems that can’t be resolved with leveling, it’s likely time for new frets. Visually, you might notice that the frets are very low and flat, with deep grooves worn into them.
Another sign is that the frets are loose or lifting from the fretboard. This can also cause buzzing and intonation issues. If you’ve already leveled the frets multiple times and they’re still causing problems, a refret is likely the best solution to restore the playability of your guitar. Don’t hesitate to consult with a qualified luthier if you’re unsure!
The Bottom Line
So, you’ve explored the world of the best luthier tools acoustic guitar frets, seen the options, and hopefully gained a clearer picture of what you need to level up your craft. Remember, there’s no one-size-fits-all solution, the best way to find the perfect tools is by considering your specific needs and the projects you plan to tackle. Don’t be afraid to experiment, ask experienced luthiers for advice, and most importantly, trust your gut!
Armed with this knowledge, you’re now equipped to choose the best luthier tools acoustic guitar frets for your workbench. The journey of a luthier is one of constant learning and refinement. Embrace the challenges, celebrate the successes, and keep creating music! Your perfect sound is waiting to be brought to life. Now go out there and make some beautiful music!