Remember that dusty box of slides tucked away in the attic? It probably holds a treasure trove of memories – family vacations, childhood birthdays, maybe even a glimpse into your grandparents’ youth. I remember uncovering mine last year and being overwhelmed with a wave of nostalgia. But, of course, actually seeing those memories meant setting up a projector, dimming the lights, and hoping the bulb didn’t burn out halfway through Aunt Mildred’s slideshow of the Grand Canyon. Surely, there had to be a better way! That’s when I embarked on a quest to find the best way to breathe new life into these old slides, leading me to the world of digital conversion and, ultimately, to researching the best led slide scanners available.
Finding the perfect device can feel daunting, but it’s absolutely worth it to preserve those precious moments for future generations. This buying guide is here to simplify the process and help you discover the best led slide scanners to fit your needs and budget. We’ve compiled in-depth reviews, compared features, and highlighted key considerations to ensure you choose a scanner that will transform your old slides into beautiful digital memories you can easily share and cherish for years to come. Let’s dive in and unlock those hidden gems!
Before we jump into the best led slide scanners review, let’s take a look at these Amazon products:


Last update on 2025-11-17 / Affiliate links / #CommissionsEarned / Images from Amazon Product Advertising API
Rediscovering Lost Memories: Your Guide to the Best LED Slide Scanners
Remember those old boxes overflowing with slides? Maybe they’re your parents’, grandparents’, or even your own – filled with sun-drenched vacations, awkward childhood moments, and cherished family gatherings. These tiny frames hold a wealth of memories just waiting to be rediscovered, but the thought of setting up a projector and painstakingly viewing them one by one can feel daunting. That’s where the magic of slide scanners comes in, specifically the newer LED models.
These handy devices allow you to digitize your precious slides, breathing new life into them and ensuring they’re preserved for generations to come. Imagine sharing those vintage photos on social media, creating a slideshow for a family reunion, or simply reliving those special moments whenever you want! The convenience and accessibility of digital images are undeniable. According to a recent study, the market for image scanners is projected to reach \$2.1 billion by 2026, highlighting the growing demand for digitizing older media.
But with so many options available, choosing the right one can feel overwhelming. That’s why we’re here to help you navigate the world of slide scanners. We’ll be focusing on LED slide scanners because, in our experience, they offer a great balance of performance, efficiency, and longevity. The LED technology ensures a consistent light source and doesn’t generate excessive heat, protecting your delicate slides during the scanning process.
Our guide will help you understand what to look for in the best LED slide scanners, covering crucial factors like resolution, scanning speed, compatibility, and overall ease of use. We’ll delve into the features that truly make a difference, helping you select a scanner that perfectly fits your needs and budget. Get ready to unlock those forgotten treasures and embark on a journey down memory lane!
Best Led Slide Scanners – Reviewed
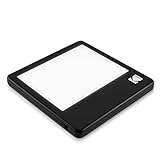
Kodak Slide N Scan Digital Film Scanner
The Kodak Slide N Scan is a fantastic option for those looking to digitize their old memories without breaking the bank. It’s incredibly user-friendly, featuring a large, bright LCD screen that makes previewing and adjusting your slides a breeze. The scanner works surprisingly fast, and the image quality is decent, especially considering its affordability. While it may not produce professional-grade results, it’s more than sufficient for sharing photos with family and friends or creating digital backups of treasured slides and negatives.
This scanner’s biggest strength lies in its simplicity and versatility. It handles a wide range of film formats, including 35mm, 126, 110, Super 8, and 8mm negatives and slides. Plus, it has built-in image editing features like brightness and color adjustments, which can save you time and effort in post-processing. Just pop in your film, make any necessary tweaks, and save the digital images directly to an SD card. It’s a hassle-free way to bring your old photos back to life!
Plustek OpticFilm 8200i Ai
If you’re serious about image quality and want to extract every last bit of detail from your film, the Plustek OpticFilm 8200i Ai is definitely worth considering. This scanner boasts impressive resolution and dynamic range, delivering scans that are sharp, vibrant, and full of detail. The included SilverFast Ai Studio software is a powerful tool that offers a wide range of controls for fine-tuning your scans, including dust and scratch removal, color correction, and sharpening.
While the Plustek OpticFilm 8200i Ai is undoubtedly a capable scanner, it does require a bit of a learning curve. The SilverFast software can be overwhelming at first, but once you get the hang of it, you’ll be able to achieve truly outstanding results. Keep in mind that this scanner is designed for 35mm film only, so it’s not suitable for other formats. However, if you’re primarily working with 35mm slides and negatives, the Plustek OpticFilm 8200i Ai is a top-tier choice.
Magnasonic All-in-One High Resolution 22MP Film Scanner
The Magnasonic All-in-One Film Scanner is a great solution if you have a variety of old film formats you’d like to digitize. This scanner can handle 35mm, 126, 110, 8mm, and Super 8 films with ease. The large 5-inch LCD screen makes it simple to view and adjust your images before saving them, and the included adapters and trays make the scanning process straightforward, even for beginners. Its ease of use is a major selling point.
While it offers broad compatibility, don’t expect professional-grade quality from this scanner. The 22MP resolution is adequate for most users who want to share photos online or create prints for scrapbooks, but serious photographers might find the image quality a bit lacking. However, for casual users looking for a quick and convenient way to convert their old film to digital format, the Magnasonic All-in-One Film Scanner is a solid choice.
Braun NovoScan 5-in-1
The Braun NovoScan 5-in-1 is another versatile option that supports multiple film formats, including 35mm, 110, 126, Super 8, and standard 8mm. This scanner focuses on convenience, allowing you to quickly convert your slides and negatives to digital images without requiring a computer connection. The intuitive interface and straightforward controls make it simple to operate, and the integrated color display lets you preview and edit your scans on the go.
The image quality is decent for its price point, making it suitable for archiving your memories and sharing them with friends and family. While it may not offer the highest resolution or the most advanced features, it’s a practical and affordable solution for those who want to digitize their old film collection without a lot of fuss. The ability to save directly to an SD card is also a nice touch, making it easy to transfer your scanned images to your computer or other devices.
Pacific Image PrimeFilm XA
For serious enthusiasts and professionals seeking top-notch image quality from their 35mm slides and negatives, the Pacific Image PrimeFilm XA is a worthy contender. This scanner boasts impressive resolution, excellent dynamic range, and a sophisticated optical system that delivers sharp, detailed scans with accurate color reproduction. The included CyberView X software provides a comprehensive set of tools for fine-tuning your scans, including automatic dust and scratch removal, color correction, and sharpening.
The PrimeFilm XA offers a step up in quality, and consequently, it is reflected in the price. However, if you’re looking for a scanner that can truly capture the detail and nuance of your film, this one won’t disappoint. Be aware that this scanner focuses primarily on 35mm film. While it doesn’t offer the versatility of some other models, its exceptional image quality and advanced features make it a standout choice for discerning users.
Why You Need an LED Slide Scanner
Remember those boxes of slides gathering dust in your attic? Each one holds a precious memory – family vacations, childhood birthdays, graduations – all moments you’d love to revisit and share with younger generations. But those slides are fading, susceptible to damage, and trapped in an outdated format. An LED slide scanner is your key to unlocking these memories and bringing them back to life. Imagine easily viewing those old photos on your computer, sharing them on social media, or even creating a beautiful slideshow for a family reunion.
The problem with traditional projectors is their limitations. They require specific setups, a darkened room, and are a hassle to manage. Plus, the projector bulb eventually burns out! An LED slide scanner, especially one of the best led slide scanners, offers a modern and convenient solution. These scanners use cool, efficient LED technology to digitize your slides with incredible detail and vibrant colors, without damaging the fragile film. You can then easily edit, enhance, and preserve these digital images for years to come.
Think about the peace of mind knowing your family history is safely backed up on a hard drive or in the cloud. You can easily make prints for family members or create personalized gifts. Instead of relying on fragile slides, you have readily accessible digital files that can be viewed anytime, anywhere. It’s not just about preserving memories; it’s about making them accessible and shareable.
Investing in one of the best led slide scanners is an investment in your family’s legacy. You’re not just buying a device; you’re buying the opportunity to relive cherished moments, share them with loved ones, and ensure they are preserved for future generations. Stop letting those memories fade away in a box. Embrace the convenience and power of digital preservation and bring your slides back to life!
Understanding Slide Film Types and Compatibility
Ever wondered why some slides look different than others, even if they were all taken around the same time? That’s often down to the type of film used! Different film types, like Kodachrome, Ektachrome, and Fujichrome, have their own unique color palettes and grain structures. Knowing what kind of film you’re dealing with can help you choose the best slide scanner settings for optimal results. You’ll often find the film type stamped on the slide mount itself or recorded in your photo album notes.
But how does this affect your scanning? Well, some scanners are better equipped to handle the denser, richer colors of Kodachrome, for example, than others. Kodachrome tends to be more challenging due to its high density. If you primarily have Kodachrome slides, prioritize scanners that specifically mention Kodachrome compatibility in their specifications. Ignoring this can lead to dull or inaccurate colors in your digital scans.
Consider this: you’ve got a box of old family slides, mostly from the 1970s. Chances are, many of them are Kodachrome. Before you buy a scanner, research which models are known for handling Kodachrome well. Look for reviews that mention Kodachrome specifically. Failing to do so might mean hours of post-processing work trying to correct color casts and recover lost details.
Finally, remember that slide mounts also vary in size and thickness. While most scanners accommodate standard 35mm slides, some might struggle with thicker or oddly shaped mounts. Check the scanner’s specifications for its slide holder capacity and size limits to ensure a smooth scanning experience without jamming or damaging your precious slides.
Optimizing Scanning Resolution and DPI
Have you ever scanned a photo, only to realize it looked great on your computer but became blurry when you tried to print it larger? That’s often due to insufficient scanning resolution. Think of resolution as the level of detail your scanner captures. It’s measured in DPI (dots per inch). Higher DPI means more detail, resulting in clearer and sharper scans, especially when you want to enlarge them or zoom in.
Now, you might be tempted to always scan at the highest possible DPI, but that’s not always the best approach. Higher DPI scans create larger files, which can quickly eat up storage space on your computer and slow down your editing software. It’s about finding the right balance. For simply viewing photos on your computer or sharing them online, a DPI of 2400 might be perfectly adequate.
Imagine you’re scanning slides to create a slideshow for a family reunion. You plan to project the images onto a large screen. In this case, a higher DPI, like 3200 or even 4000, would be beneficial. This ensures the projected images remain sharp and detailed, even at a larger size. Experiment with different resolutions to see what works best for your specific needs.
Ultimately, the ideal DPI depends on how you intend to use your scanned slides. Consider the output size, whether it’s for digital display, printing, or archival purposes. By understanding the relationship between resolution, DPI, and intended use, you can optimize your scanning process for the best possible results without unnecessary file bloat.
Understanding Color Correction and Image Enhancement Features
Ever scanned a slide and felt the colors just weren’t quite right? Maybe the image looked faded, had a color cast, or lacked contrast. That’s where color correction and image enhancement features come to the rescue. Many LED slide scanners offer built-in tools to address these common issues, saving you time and effort in post-processing.
Think of these features as your digital darkroom tools. Some scanners offer automatic color correction, which analyzes the image and adjusts the colors to restore them to their original vibrancy. Others provide manual controls, allowing you to fine-tune the brightness, contrast, saturation, and sharpness to your liking. Dust and scratch removal features are particularly valuable for older slides that may have accumulated imperfections over time.
Consider a scenario where you’re scanning a collection of slides from a family vacation in the 1980s. The slides have faded over time, and the colors are muted. A scanner with robust color correction features can help you revive those memories, bringing back the vivid colors and details that were lost. Look for scanners that offer features like “fade correction” or “color restoration.”
Don’t be afraid to experiment with these features! Start with the automatic settings and then fine-tune the adjustments manually to achieve the best possible results. Remember, the goal is to restore your slides to their original glory, preserving those precious memories for generations to come.
Maintenance and Storage of Your Scanned Slides
So, you’ve successfully scanned all your slides – congratulations! But the journey doesn’t end there. Proper maintenance and storage of both your physical slides and digital scans are crucial for ensuring their long-term preservation. Think of it as protecting your investment in both time and memories.
For your physical slides, the best way to store them is in a cool, dry, and dark place. Avoid areas with high humidity or temperature fluctuations, as these can damage the film over time. Acid-free slide storage boxes or binders are ideal for protecting your slides from dust, light, and other environmental factors. Label each box or binder clearly so you can easily find specific slides in the future.
Now, let’s talk about your digital scans. Always back up your scanned images to multiple locations. This could include an external hard drive, a cloud storage service, or even a USB drive. Having multiple backups ensures that you won’t lose your precious memories in case of a hardware failure or other unforeseen events.
Consider creating a clear and organized file structure for your scanned images. For example, you could organize them by date, event, or family member. This will make it much easier to find specific images when you need them. And don’t forget to regularly check your backups to ensure they are still accessible and functional.
Choosing the Best LED Slide Scanners: A Friendly Guide
Hey there! Ready to dive into the world of digitizing your precious memories tucked away in old slides? It can seem a little daunting with all the different options out there, but don’t worry, I’m here to help you navigate the process. We’re going to break down everything you need to consider when choosing the best LED slide scanners, so you can pick the perfect one to bring your slides back to life. Think of me as your friendly guide, helping you unlock those cherished memories stored away.
We all have boxes full of slides gathering dust, containing glimpses into the past – family vacations, childhood birthdays, maybe even some embarrassing fashion choices! The problem is, those memories are fading with time and technology. Scanners are the perfect way to preserve these memories for generations to come. Let’s get started on this journey to choose the perfect scanner, designed to make the whole process easy and enjoyable.
Image Quality: Capturing Every Detail
Let’s face it, the whole point of scanning your slides is to get a high-quality digital image. So, image quality is arguably the most important factor. Look for a scanner with a high optical resolution, measured in DPI (dots per inch). A higher DPI means more detail captured, leading to sharper, more vibrant images. You’ll want at least 3200 DPI for decent results, but 4000 DPI or higher is ideal if you plan on printing large versions of your scanned slides or doing any serious editing.
Don’t just blindly trust the DPI number, though! Check out sample scans or reviews from other users to see the actual quality of the images produced by the scanner. Sometimes manufacturers exaggerate their DPI claims. Also, consider the scanner’s dynamic range. A higher dynamic range means the scanner can capture a wider range of light and dark tones, resulting in images with better contrast and detail in both highlights and shadows. Choosing the best led slide scanners requires you to consider not just DPI, but the full picture quality.
Scanning Speed: How Much Time Do You Have?
Nobody wants to spend hours and hours scanning a mountain of slides. Scanning speed is a crucial factor, especially if you have a large collection. Some scanners can scan a single slide in just a few seconds, while others take considerably longer. Consider how much time you’re willing to invest in the scanning process. If you have hundreds or even thousands of slides, a faster scanner is definitely worth the investment.
Pay attention to whether the advertised scanning speed is for a preview scan or a full-resolution scan. The preview scan is typically much faster, but it’s not the final product. The full-resolution scan is what you’ll be using to preserve your memories, so that’s the speed you really care about. Batch scanning capabilities can also be a huge time-saver, allowing you to load multiple slides at once and let the scanner work its magic without constant supervision.
Ease of Use: Keeping Things Simple
Technology should simplify our lives, not complicate them! The best LED slide scanners are user-friendly and easy to set up, even if you’re not a tech wizard. Look for a scanner with intuitive software that guides you through the scanning process. Clear instructions, well-organized menus, and helpful error messages are all signs of a well-designed and user-friendly scanner.
Consider whether the scanner comes with pre-set scanning modes for different types of slides or films. These modes can automatically adjust the scanner’s settings for optimal results, saving you time and effort. Also, look for features like automatic dust and scratch removal, which can help to clean up your slides and reduce the need for manual editing. The goal is to find a scanner that you can easily use and enjoy, so you can focus on preserving your memories.
Slide Handling: Avoiding Damage
Old slides can be delicate, so it’s important to choose a scanner that handles them with care. Look for a scanner with a slide holder that is gentle and secure, preventing scratches or damage to your precious originals. Make sure the slide holder is easy to load and unload, and that it doesn’t require excessive force to operate.
Some scanners come with different slide holders for different types of slides (e.g., 35mm, 120 film). Check that the scanner supports the type of slides you have. Also, consider the scanner’s overall design. A sturdy and well-built scanner is less likely to damage your slides than a flimsy or poorly constructed one. The best led slide scanners offer the most gentlest handling.
Software Features: Enhancing Your Scans
The software that comes with your scanner can make a big difference in the quality of your scans and the overall experience. Look for software with features like automatic color correction, dust and scratch removal, and image editing tools. These features can help you to improve the appearance of your scans and save you time on post-processing.
Consider whether the software is compatible with your computer’s operating system (Windows or Mac). Also, look for software that is easy to use and intuitive. A cluttered or confusing interface can make the scanning process frustrating. Many scanners also come with the option to upgrade to more advanced software packages, offering even more features and control.
Price: Finding the Right Balance
Of course, budget is always a consideration. Slide scanners range in price from relatively inexpensive models to high-end professional-grade units. Determine your budget before you start shopping, and try to find a scanner that offers the best value for your money. Don’t automatically assume that the most expensive scanner is the best one for you.
Consider your needs and usage patterns. If you only have a small collection of slides to scan, and you don’t need the highest possible image quality, a more affordable scanner may be perfectly adequate. On the other hand, if you have a large collection of slides, and you demand the best possible quality, you may need to invest in a more expensive scanner. Remember to balance your needs with your budget to find the perfect scanner for you. Investing a bit more in one of the best led slide scanners might be a worthwhile investment if you have many slides to scan.
Connectivity: How Does It Connect?
Connectivity might seem like a minor detail, but it’s important to ensure that the scanner is compatible with your computer. Most scanners connect via USB, but some may use other interfaces. Make sure your computer has the necessary ports to connect the scanner. Also, check that the scanner is compatible with your computer’s operating system.
Consider whether the scanner comes with any additional connectivity options, such as Wi-Fi or Bluetooth. These options can allow you to scan wirelessly, which can be convenient if your computer is not located near the scanner. Also, look for scanners that support cloud storage integration, allowing you to easily upload your scans to services like Google Drive or Dropbox.
Frequently Asked Questions
What exactly is a LED slide scanner and why should I consider getting one?
Think of a slide scanner as a dedicated device specifically designed to convert your old 35mm slides and negatives into digital images. Unlike using a regular flatbed scanner, slide scanners are optimized for these small formats, offering better resolution, color accuracy, and overall image quality. The “LED” part refers to the light source used, which is typically brighter and cooler than older lamp types, resulting in sharper and more consistent scans without damaging your precious slides.
If you have boxes of old slides gathering dust, an LED slide scanner is a fantastic way to preserve and share those memories. You can easily digitize them, allowing you to view them on your computer, TV, or even share them online with family and friends. Plus, once digitized, you have a backup against physical damage or fading of the original slides, ensuring your memories last a lifetime!
What resolution should I look for in an LED slide scanner?
Resolution is super important when you’re considering a slide scanner, as it directly impacts the level of detail captured in your digital images. Generally, higher resolution means sharper and more detailed scans. For casual viewing and sharing online or via email, a resolution of around 3600 dpi (dots per inch) might be sufficient.
However, if you plan to print your digitized slides or significantly enlarge them for display, opting for a higher resolution scanner, like 4000 dpi or higher, is a wise move. This will ensure that your prints retain sharpness and clarity without appearing pixelated. Consider your primary use case to determine the best resolution for your needs – it’s always better to have more resolution than you need!
How does color depth affect the quality of scanned images?
Color depth refers to the number of colors a scanner can capture and reproduce. Think of it like a painter’s palette – the more colors available, the more realistic and vibrant the final image will be. Most modern LED slide scanners offer a color depth of at least 24-bit, which is perfectly fine for everyday use. This allows for a good range of colors and accurate reproduction.
For more professional or archival purposes, a 48-bit color depth scanner can provide even richer and more nuanced color detail. While the difference might not be immediately noticeable for all users, it can make a difference when scanning older or faded slides, allowing the scanner to capture more subtle variations in color and tone. Ultimately, 24-bit is great, but 48-bit provides that extra level of fidelity.
What are the benefits of using a multi-slide holder versus a single-slide holder?
A multi-slide holder, often found on more advanced scanners, can significantly speed up your scanning process. Instead of manually loading each slide individually, you can load a whole batch (sometimes 10 or more) into the holder, and the scanner will automatically feed and scan them one after another. This is a real time-saver if you have a large collection of slides to digitize.
On the other hand, single-slide holders are often found on more basic or portable scanners. While they require more manual effort, they can sometimes offer more flexibility in terms of the types of slides they can accommodate. If you only have a small number of slides to scan, or if you have a variety of different slide formats, a single-slide holder might be sufficient. It really boils down to the size of your collection and how quickly you want to get the job done.
Are there any software features I should look for in an LED slide scanner?
Absolutely! The software included with your LED slide scanner can make a huge difference in the overall scanning experience and the final image quality. Look for features like automatic color correction, which can help restore faded colors and balance the overall image tone. Dust and scratch removal is another invaluable feature that can automatically clean up imperfections on your slides.
Beyond those, consider software that includes manual adjustments for brightness, contrast, and sharpness, giving you more control over the final image. Also, check if the software supports different file formats (like JPEG, TIFF, or PNG) to match your specific needs. User-friendliness is key, too! Make sure the software is intuitive and easy to navigate so you can quickly and efficiently digitize your slides without a headache.
Will an LED slide scanner work with different types of film negatives?
Yes, most LED slide scanners that are designed for 35mm slides will also work with 35mm film negatives. Many scanners come with dedicated film holders specifically for negatives. The scanner software often includes a “negative to positive” conversion feature, which automatically inverts the colors to create a positive image from your negative.
However, keep in mind that some scanners might be limited to specific film formats, so it’s always a good idea to check the product specifications before you buy. If you have a collection of different film formats (like 110 or 126 film), you’ll need to look for a scanner that specifically supports those formats, or consider a more versatile flatbed scanner with film scanning capabilities.
What’s the difference between a dedicated slide scanner and using a flatbed scanner with a slide adapter?
A dedicated slide scanner is specifically designed for scanning slides and negatives. It has optics and light sources optimized for these small formats, resulting in generally better image quality, sharpness, and color accuracy compared to a flatbed scanner. They are typically smaller and more portable too.
A flatbed scanner, on the other hand, is a more versatile device that can scan documents, photos, and even slides if used with a slide adapter. While a good flatbed scanner can produce decent results, especially for larger film formats, it may not match the quality and detail of a dedicated slide scanner when it comes to 35mm slides. A flatbed is a jack-of-all-trades, while a dedicated scanner is a specialist!
Final Verdict
So, there you have it! We’ve explored some of the best led slide scanners on the market, highlighting their strengths and helping you understand what to look for in your ideal device. Remember, the “best” scanner for you depends entirely on your specific needs and budget. Don’t be afraid to weigh the pros and cons, consider your long-term goals for digitizing your memories, and choose the option that feels right. You’re armed with the knowledge now, go forth and conquer that mountain of slides!
Digitizing those precious memories is an investment in preserving your history for generations to come. Choosing one of the best led slide scanners can seem daunting, but with a little research and self-reflection, you’ll be capturing those moments with confidence and ease. Imagine the joy of easily sharing these stories with loved ones, or creating incredible digital archives. So, take that leap, embrace the technology, and unlock the treasures hidden within those slides! You’ve got this!