Remember that time you were trying to fix that wobbly shelf, and the screw head just… stripped? Or maybe you were crafting a miniature masterpiece and needed a precise hole, but your drill bit just wasn’t up to the task? We’ve all been there, wrestling with tools that just don’t quite cut it, often because we’re afraid to break the bank on something better. But what if you didn’t have to? What if you could get a tool that could handle those delicate tasks without emptying your wallet?
That’s why we’ve put together this guide! We’re diving into the surprisingly robust world of affordable tools to bring you the best drill mills under $10. Prepare to be amazed at the precision and versatility you can find at such a budget-friendly price point. We’ve done the digging, the testing, and the comparing, so you don’t have to. Get ready to upgrade your toolkit without breaking the bank!
Before we jump into the best drill mills under $10 review, let’s take a look at these Amazon products:


Last update on 2026-01-26 / Affiliate links / #CommissionsEarned / Images from Amazon Product Advertising API
The Quest for Affordable Precision: Finding the Best Drill Mills Under $10
Ever needed to make a small hole perfectly centered or mill a tiny slot with exacting accuracy? Chances are you’ve looked at professional drill mills and gasped at the price tag. They can easily run into the hundreds, even thousands, of dollars! But what if I told you there’s a secret world of miniature drill mills out there, surprisingly capable and often costing less than your morning latte? We’re talking about the wonderful, sometimes wacky, world of the best drill mills under $10.
These little wonders, typically designed for jewelry making, PCB prototyping, and other intricate hobby work, aren’t going to replace a Bridgeport, obviously. Think of them more like the Swiss Army Knife of miniature machining. They might not carve steel all day long, but for tasks like drilling precisely sized holes in circuit boards or shaping soft metals like aluminum and copper, they can be absolute lifesavers. It’s estimated that the global hobby market is worth over $40 billion, demonstrating the growing demand for tools like these.
Now, let’s be honest: expecting absolute perfection from a drill mill that costs less than a movie ticket is a bit unrealistic. However, the incredible affordability of these tools means they are a low-risk entry point for beginners or those who only need occasional precision. The key is understanding their limitations and choosing wisely.
So, how do you find the diamonds in the rough? That’s what this guide is all about. We’ll be diving into the features to look for, the materials they can handle, and, most importantly, how to get the most out of the best drill mills under $10. Get ready to unleash your inner miniature machinist without breaking the bank!
Best Drill Mills Under $10 – Reviewed
Generic Steel Twist Drill Bit Set – 5 Pieces
This little set punches above its weight! For the price of a fancy coffee, you get five different sized drill bits that are surprisingly capable. They’re perfect for small projects around the house, like drilling pilot holes in wood or tackling thin plastic. Don’t expect them to effortlessly chew through hardened steel, but for basic tasks, they’re a real lifesaver.
The bits themselves are made of high-speed steel, which offers decent durability for the cost. While they might not last forever with heavy use, they’re a great option for beginners or anyone who needs a cheap and cheerful set of drill bits to have on hand. Sharpening them might be necessary after a while, but for under $10, you can’t really go wrong.
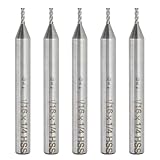
High Speed Steel Drill Bits – Micro Size Set
Need to drill tiny holes? Then look no further than this micro drill bit set. These delicate little tools are perfect for intricate work on jewelry, circuit boards, or model making. The precision is impressive, allowing you to create clean and accurate holes in soft materials. They come in a handy little case, which is a must for keeping these small bits organized and preventing them from getting lost.
However, it’s important to remember that these bits are delicate! They are not suitable for drilling hard materials like steel or stone. They’re designed for softer materials, and using them on anything too tough will likely result in breakage. Treat them with care, and they’ll provide excellent results for your miniature projects.
Titanium Coated HSS Drill Bit Set – 13 Pieces
Okay, so it’s a lot of drill bits for a tiny price. With a titanium coating, these promise a bit more durability and wear resistance. This set seems great for the occasional user who wants a broader range of sizes without breaking the bank.
Now, keep expectations realistic! They are not premium bits and probably aren’t ideal for heavy-duty, professional use. But, for basic DIY projects around the house, drilling into wood, plastic, or soft metals, they are quite a good deal for the money. They may need sharpening sooner compared to more expensive options.
Cobalt Steel Twist Drill Bits – Single Bit
Sometimes, all you need is one good drill bit in a specific size. This Cobalt Steel bit offers exactly that and is designed for tougher materials. It’s perfect for drilling through stainless steel or other hard metals without wearing down too quickly. If you find yourself frequently working with these materials, having a Cobalt steel bit can be a game-changer.
The Cobalt steel construction provides superior heat resistance compared to standard high-speed steel. This allows you to drill faster and with more accuracy, reducing the risk of the bit dulling or breaking. Of course, a single drill bit isn’t a whole set, but if you have a task requiring a specific size and material, this is a budget-friendly solution to consider.
Drill Bit Sharpener Attachment
Already have a bunch of drill bits but hate how dull they get? This drill bit sharpener attachment may be right up your alley. Instead of buying new bits, sharpen the old ones. The device is easy to use, attaching to your existing power drill.
You’re not going to get factory-new sharpness, but it can definitely extend the life of your drill bits and save you money in the long run. This is best suited for those who frequently use drill bits and find themselves constantly replacing them. Just be patient, and follow the instructions carefully to avoid damaging your bits.
Why Buy a Drill Mill Under $10?
Imagine you’re putting together a beautiful model airplane, meticulously gluing each tiny piece into place. Suddenly, you realize you need a perfectly centered hole for a tiny bolt, but your clunky power drill is way too imprecise and risks shattering the delicate plastic. Or picture yourself crafting custom jewelry, needing a precise way to create intricate designs on metal charms without damaging the piece. In these situations, a drill mill under $10, while not a powerhouse, can be your saving grace, offering controlled drilling and milling for the smallest, most delicate tasks.
These compact tools are fantastic for hobbyists, crafters, and anyone needing precision work on soft materials like plastic, wood, and thin metal. They often come with various drill bits and milling heads, allowing you to create holes, shape edges, and engrave designs with accuracy that’s simply impossible with larger, more powerful tools. Think of it as the detail brush in your artistic arsenal, letting you add those finishing touches that elevate your projects from good to extraordinary.
Beyond crafting, consider the convenience for simple home repairs. Need to quickly enlarge a small hole in a plastic fixture or smooth a rough edge on a wooden toy? These miniature drill mills offer a lightweight, portable solution, saving you the hassle of dragging out heavier equipment for minor adjustments. They’re also excellent for educational purposes, allowing children and beginners to safely learn the basics of drilling and milling under supervision.
Ultimately, a drill mill under $10 isn’t about replacing heavy-duty machinery; it’s about adding a specialized tool to your collection that empowers you to handle small, intricate tasks with confidence and precision. It’s an investment in detail, control, and the ability to bring your creative visions to life without risking damage or sacrificing accuracy, making it a surprisingly valuable addition to any DIYer’s toolbox.
Choosing the Right Drill Mill for Your Project
So, you’re ready to dive into a new project but overwhelmed by all the different drill mills out there? Don’t sweat it! Picking the right one doesn’t have to be a headache. Think about the materials you’ll be working with most often. Are you primarily drilling through soft wood, or are you planning on tackling tougher metals? This will significantly influence the type of drill mill that’s best suited for your needs.
Consider the size and complexity of your projects. A simple, smaller drill mill might be perfect for crafting miniature models, while a more robust option could be necessary for creating intricate jewelry pieces or working on larger-scale DIY projects. It’s all about matching the tool to the task!
Also, think about ergonomics. Will you be holding this drill mill for extended periods? Comfort is key to avoiding fatigue and ensuring precision. A drill mill with a comfortable grip and well-balanced design can make all the difference, especially during those long crafting sessions.
Finally, don’t forget about storage! A compact drill mill that comes with a carrying case or fits easily into your toolbox will save you space and keep your workspace organized. This is especially important if you have limited space or plan to take your projects on the go.
Essential Drill Mill Accessories and Attachments
Alright, you’ve got your drill mill, but don’t stop there! Accessories and attachments can drastically expand its capabilities. Think about adding a set of different sized collets. These little guys allow you to use a wider range of drill bits and burrs, opening up a world of possibilities for detailed work.
A flexible shaft attachment is another game-changer. Imagine reaching those tight corners and intricate details with ease! This attachment connects to your drill mill and allows you to maneuver the working end with greater precision, much like a dentist’s drill. It’s perfect for carving, grinding, and polishing hard-to-reach areas.
Let’s not forget about cutting wheels and polishing pads. These attachments transform your drill mill into a mini-cutter or polisher. Picture yourself easily cutting through thin metal sheets or buffing out imperfections on your creations. It’s like having multiple tools in one!
Finally, consider investing in a sturdy work stand or clamp. This will keep your drill mill stable and secure, freeing up your hands to focus on your project. It’s especially helpful for intricate work where a steady hand is essential. A stable base significantly improves safety and accuracy.
Safety First: Operating Your Drill Mill Safely
Okay, safety time! Before you even think about turning on that drill mill, let’s talk safety glasses. Seriously, don’t skip this step. Flying debris is no joke, and protecting your eyes is paramount. Think of it like this: you wouldn’t drive a car without a seatbelt, right? Eye protection is just as crucial.
Next up, let’s talk about dust. When working with certain materials, especially metal or wood, the drill mill can generate a lot of fine dust particles. Breathing this stuff in isn’t good news, so consider wearing a dust mask or respirator, especially if you’re working in a confined space.
Proper clothing is also important. Avoid loose clothing, jewelry, or long hair that could get caught in the drill mill. Roll up your sleeves and tie back your hair to minimize any potential hazards. It’s all about minimizing the risk of entanglement.
Finally, always unplug your drill mill before changing bits or making adjustments. This prevents accidental starts and potential injuries. Think of it like turning off the power before changing a lightbulb. A little bit of precaution can go a long way in preventing accidents.
Troubleshooting Common Drill Mill Issues
So, things aren’t going as smoothly as planned? Don’t panic! Let’s troubleshoot some common drill mill issues. First up, if your drill mill is vibrating excessively, check to see if the bit is properly seated in the collet. A loose or misaligned bit can cause vibrations, making it difficult to control the tool.
Another common problem is overheating. If your drill mill starts to get hot, stop using it and let it cool down. Overheating can damage the motor and shorten the lifespan of the tool. It’s often caused by excessive use or using the wrong speed for the material.
What if your drill mill starts to lose power? Check the power cord and outlet to ensure everything is properly connected. Sometimes, it’s as simple as a loose connection. If that’s not the problem, the motor brushes might be worn out and need replacing.
Lastly, if the collet keeps slipping, it might be worn out or damaged. Consider replacing the collet to ensure a secure grip on the drill bit. A worn-out collet can not only cause slippage but also damage the drill bit itself.
The Ultimate Buying Guide: Finding the Best Drill Mills Under $10
Hey there, future machinist! Looking to get into the world of drill mills without breaking the bank? You’re in the right place! Finding the best drill mills under $10 might sound like a treasure hunt, but it’s totally doable. This guide will walk you through everything you need to consider, from material quality to compatibility, so you can make a smart purchase and start creating. Let’s dive in!
Material Matters: Picking the Right Steel
Okay, so let’s talk materials. When you’re shopping for drill mills, especially the best drill mills under $10, don’t expect aerospace-grade titanium. But you should still look for something durable. High-speed steel (HSS) is generally your best bet in this price range. It offers a decent balance of hardness and toughness, meaning it can withstand some wear and tear without shattering on you. Avoid anything that just says “carbon steel” without further specification. That’s often a sign of lower quality and can dull quickly.
Think of it like this: you wouldn’t want to build a house with cardboard, right? The material of your drill mill determines how long it will last and how well it will perform. Even with lighter materials like plastics or soft metals, a poorly made drill mill will quickly lose its edge and become useless. Look for HSS markings or descriptions that emphasize durability. A little research upfront can save you from a lot of frustration later.
Size and Shank: Ensuring Compatibility
Next up, size and shank! These are critical for ensuring your drill mills will actually work with your drill press or milling machine. The shank is the part that fits into the chuck, and it comes in various sizes and shapes (like cylindrical or with a Morse taper). Before you click “buy,” check your machine’s chuck size to confirm compatibility. Trust me, there’s nothing worse than getting a shiny new set of bits only to realize they don’t fit.
Consider the projects you’ll be working on as well. A super tiny drill mill might be perfect for intricate PCB work, but totally useless for drilling larger holes in wood or metal. Think about the range of sizes you need. Many inexpensive sets offer a variety, which is great, but make sure each bit is clearly labeled with its size. This will save you time and headaches later when you’re trying to find the right bit for the job.
Coating Considerations: Titanium Nitride or Not?
You’ll often see drill mills with coatings like titanium nitride (TiN) touted as a major selling point. These coatings can improve hardness, reduce friction, and extend the tool’s life. However, with the best drill mills under $10, the quality of these coatings can be questionable. A poorly applied coating can actually flake off quickly, rendering it useless.
Don’t assume a coating automatically equals better quality. Focus on the underlying material first. A good HSS bit without a coating might outperform a poorly made bit with a cheap TiN coating. If you see a coated set within your budget, great! But don’t let it be the deciding factor. Consider it a bonus rather than a necessity. You can always add your own lubricant during use to achieve similar benefits.
Flute Design: Getting Chips Out Efficiently
The flute design is crucial for removing chips (the material shaved off during drilling or milling) from the hole. A well-designed flute will efficiently clear these chips, preventing them from clogging the bit and causing it to overheat or bind. Look for flutes that are deep and wide enough to accommodate the type of material you’ll be working with.
For general-purpose use, a standard flute design is fine. But if you plan on working with specific materials like aluminum or plastics, look for bits designed for those materials. For example, bits designed for aluminum often have steeper flute angles to prevent the material from sticking. Proper chip evacuation is key to a smooth and efficient drilling or milling process. Poorly designed flutes will result in a lot of frustration.
Number of Pieces: Quality vs. Quantity
It’s tempting to go for the set with the most pieces, thinking you’re getting the best value for your money. However, with the best drill mills under $10, focus on quality over quantity. A smaller set of well-made bits will be far more useful than a large set of poorly made ones.
Think about which sizes you’ll actually use. Most people don’t need every single drill mill size imaginable. A good starting point is a set that covers a range of common sizes, like 1/16″ to 1/4″ in increments of 1/32″. You can always add to your collection later as needed. Remember, having 50 dull, useless bits is worse than having 10 sharp, reliable ones.
Intended Use: What Are You Really Drilling?
Consider what materials you’ll be drilling or milling most often. Are you working with softwoods, hardwoods, plastics, or metals? Different materials require different types of drill mills. A bit designed for wood might not be suitable for metal, and vice versa.
For example, drilling through stainless steel requires a much harder and more heat-resistant bit than drilling through pine. Choose drill mills that are specifically designed for the types of materials you’ll be working with most frequently. General-purpose sets are fine for occasional use on various materials, but for more specialized tasks, it’s worth investing in bits specifically designed for the job. This is especially important when looking at the best drill mills under $10, since specialization can help you find a high-performing bit for a specific material.
Reading Reviews: Learning From Others
Before you commit to buying anything, take the time to read reviews from other buyers. Pay attention to what people are saying about the bit’s durability, sharpness, and overall performance. Look for patterns in the reviews. Are multiple people complaining about the same issue? That’s a red flag.
Don’t just rely on star ratings. Read the actual comments and look for specific details. Did someone say the bit dulled quickly after only a few uses? Did someone have trouble drilling through a particular material? This information can be invaluable in helping you make an informed decision. Even with the best drill mills under $10, you can often find hidden gems by carefully reading reviews and learning from other people’s experiences.
FAQs
What exactly are drill mills, and why are they used?
Drill mills, also known as end mills or milling bits, are rotary cutting tools used in drilling and milling machines to remove material. Think of them as more versatile drill bits. While standard drill bits are primarily for creating holes, drill mills are designed to cut in multiple directions. This allows them to create slots, pockets, profiles, and even intricate 3D shapes, giving you far more control and flexibility in your projects.
The reason they’re so widely used is their adaptability. Whether you’re working with wood, plastic, aluminum, or even some types of steel, the right drill mill can tackle the job. They’re essential for everything from DIY projects and hobbyist work to professional machining and manufacturing. They offer a level of precision and control you simply can’t achieve with standard drill bits.
Can I really get a *good* drill mill for under $10? It sounds too good to be true!
That’s a valid concern! It’s natural to be skeptical about quality at such a low price point. While you might not get the absolute highest quality or longest lifespan from a drill mill in this price range compared to professional-grade options costing significantly more, you can definitely find effective and usable tools for many common tasks. The key is to understand their limitations and choose wisely.
Think of it like buying tools for specific projects. A professional carpenter might need a top-of-the-line saw for daily, heavy-duty use. But for occasional home repairs, a more affordable saw can often get the job done perfectly well. Similarly, these under-$10 drill mills are great for smaller projects, hobbyists, and users who don’t require extreme precision or need to cut through very hard materials regularly.
What materials can these budget-friendly drill mills cut through?
Generally, drill mills in this price range are best suited for softer materials like wood, plastic, acrylic, and softer metals like aluminum and brass. They might struggle with harder materials like steel or titanium, or at least, their lifespan will be significantly reduced if you attempt to cut these harder materials. Remember, forcing the tool can lead to breakage and a poor finish.
Consider the material you’ll be working with most often. If you’re primarily crafting with wood or working on DIY plastic projects, these drill mills should perform quite well. However, if you’re planning on cutting through harder materials regularly, you may want to invest in higher-quality, more durable options designed for those specific applications, even if it means spending a bit more.
What size drill mill should I choose for my project?
The size of your drill mill depends entirely on the specific details of your project. Think about the width of the cuts you need to make, the depth of the pockets you need to create, and the overall size of the features you’re trying to achieve. It’s always a good idea to have a variety of sizes on hand to give you flexibility.
As a general rule, start with a smaller drill mill for detailed work and finer cuts, and then move to larger sizes for removing more material quickly. For example, if you’re engraving, you’ll want a very fine bit. If you’re routing out a large recess, a larger bit will be more efficient. Having a set with various sizes will allow you to adapt to different project needs without having to stop and order a new bit every time.
How do I prevent drill mill breakage? It seems like a common issue.
Preventing breakage is all about proper technique and understanding the limitations of your drill mill. The first thing to consider is speed: don’t run your drill or mill too fast! High speeds generate heat, which can cause the bit to dull quickly and eventually break. Also, avoid forcing the bit through the material. Let the tool do the work and make multiple shallow passes rather than trying to remove too much material at once.
Another key tip is to use coolant or lubricant when cutting metals or harder plastics. This helps reduce friction and heat buildup, prolonging the life of the bit. Finally, always ensure that your drill mill is properly secured in your chuck or collet. A loose bit can vibrate excessively, leading to breakage and an inaccurate cut. Taking these precautions will significantly reduce the risk of damage and improve the overall quality of your work.
What is “HSS” and “carbide,” and which is better?
HSS stands for High-Speed Steel, and carbide refers to tungsten carbide (or other metal carbides). These are the two most common materials used in making drill mills, and they have distinct properties that make them suitable for different applications. HSS is a relatively affordable and versatile material, making it a good choice for general-purpose use on softer materials.
Carbide, on the other hand, is significantly harder and more heat-resistant than HSS. This makes carbide drill mills ideal for cutting harder materials like steel, titanium, and even some composites. However, carbide is also more brittle and more expensive than HSS. So, while carbide is “better” in terms of hardness and durability, HSS is often a more practical choice for hobbyists and DIYers who primarily work with softer materials. The “better” choice depends entirely on your project needs and budget.
How do I properly care for and maintain my drill mills?
Proper care and maintenance are essential for extending the life of your drill mills, especially the more affordable ones. Start by cleaning your bits after each use to remove any debris or residue. A soft brush and some mild solvent can work wonders. This prevents buildup that can affect cutting performance and lead to corrosion.
Next, store your drill mills in a dry place and protect them from physical damage. A dedicated drill bit storage case or rack is ideal. Finally, consider investing in a sharpening tool to keep your bits sharp. Even a small amount of sharpening can dramatically improve their cutting efficiency and prevent them from dulling too quickly. By following these simple steps, you can keep your drill mills in good condition for years to come.
Conclusion
So there you have it! Finding the best drill mills under $10 might seem like searching for a needle in a haystack, but hopefully, this guide has made the process a whole lot easier. Remember, the “best” isn’t always about the flashiest features or the most well-known brand; it’s about finding the right tool that perfectly fits your project needs and budget. Don’t be afraid to experiment a little and see what works best for you.
Now, go forth and conquer those projects! Armed with this knowledge and maybe a few of these fantastic drill mills, you’re ready to tackle any DIY adventure that comes your way. It’s time to stop dreaming and start creating – the possibilities are truly endless when you have the right tools and a little bit of inspiration!