You’re staring at your kitchen cabinets, the morning light highlighting every scratch, scuff, and tired finish. Maybe you’re dreaming of a fresh coat of paint, a modern update, or simply restoring their original luster. But the thought of hand-sanding those intricate details fills you with dread, right? It’s time to ditch the elbow grease and embrace the power of a quality sander! The right tool can transform this daunting task into a surprisingly satisfying project, giving you professional-looking results without the aching arms.
Choosing from the vast array of options can feel overwhelming, though. That’s where we come in! We’ve put together this comprehensive guide to the best cabinet sanders, carefully evaluating different models based on their power, maneuverability, dust collection, and overall value. We’ll walk you through the various types, highlight their strengths and weaknesses, and help you determine which sander is the perfect match for your specific needs and budget, so you can confidently tackle your cabinet refinishing project.
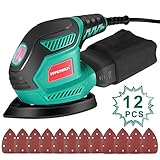
Before we jump into the best cabinet sanders review, let’s take a look at these Amazon products:


Last update on 2025-12-13 / Affiliate links / #CommissionsEarned / Images from Amazon Product Advertising API
Sanding Cabinets: From Headache to Handiwork Hero
Ever looked at your kitchen cabinets and thought, “Ugh, those could really use a refresh”? Maybe the finish is chipped, the color is dated, or you’re just plain tired of looking at them. The thought of sanding them down might fill you with dread, but trust me, it doesn’t have to be a Herculean task! In fact, with the right tools and a little know-how, you can transform your cabinets from drab to fab in a weekend. We’re here to help navigate the world of sanding, and that all starts with selecting the proper equipment.
Sanding cabinets is a crucial step in preparing them for painting, staining, or simply revitalizing the existing finish. It creates a smooth, even surface for better adhesion and a professional-looking result. It’s estimated that a properly sanded cabinet will hold paint twice as well as one that isn’t, meaning your hard work will last longer and look better. Choosing the right sander can be the difference between a quick and easy project and a frustrating, time-consuming ordeal.
That’s where the search for the best cabinet sanders comes in. Now, there’s no single “best” sander for everyone. The ideal choice depends on factors like the size of your project, the type of finish you’re working with, and your comfort level. But fear not! We’re going to break down the different types of sanders available, highlighting their strengths and weaknesses, so you can confidently choose the perfect tool for the job.
Think of this as your friendly guide to achieving beautifully sanded cabinets. We’ll explore orbital sanders, detail sanders, and even multi-tools, offering insights and recommendations to help you achieve a flawless finish. We’ll also share tips and tricks for sanding different parts of your cabinets, from the flat surfaces to the intricate details. Get ready to ditch the dread and embrace the satisfaction of transforming your kitchen (or bathroom!) with perfectly sanded cabinets.
Top 5 Best Cabinet Sanders
Festool Rotex RO 150 FEQ-Plus Sander
The Festool Rotex RO 150 FEQ-Plus isn’t just a sander; it’s a portal to woodworking nirvana. This beast boasts three distinct modes: coarse sanding, fine sanding, and polishing, making it ridiculously versatile. It’s aggressive enough to strip paint and smooth enough to leave a glass-like finish. The ergonomic design and vibration control mean you can sand for hours without feeling like you’ve gone ten rounds with a heavyweight boxer. Dust extraction is top-notch too, keeping your workspace cleaner than a surgeon’s operating room.
Of course, all that German engineering comes at a price. It’s an investment, no doubt. But if you’re serious about woodworking and demand professional-grade results, the Rotex RO 150 FEQ-Plus is worth every penny. Think of it as buying a lifetime supply of perfectly sanded surfaces. You might wince at the initial cost, but the time saved and the quality achieved will quickly justify the splurge.
Bosch GET75-6N Random Orbit Sander
The Bosch GET75-6N is a powerhouse in disguise. Don’t let its sleek design fool you; this sander is built for performance and durability. The variable speed control lets you dial in the perfect setting for any material, from delicate veneers to tough hardwoods. Its robust motor maintains consistent speed under load, preventing bogging down and ensuring a consistent finish. The vibration damping system is also a welcome feature, making extended sanding sessions much more comfortable.
One of the standout features of this sander is its multi-hole pad system, which provides superior dust extraction compared to traditional 8-hole designs. This means less cleanup and a clearer view of your work. The Bosch GET75-6N strikes an excellent balance between power, precision, and comfort, making it a great choice for both professionals and serious hobbyists. It’s a workhorse you can rely on, project after project.
Mirka DEROS 650CV Electric Random Orbital Sander
The Mirka DEROS 650CV is a game-changer in the world of sanding. This electric random orbital sander is lightweight, compact, and incredibly powerful. The brushless motor delivers consistent performance and requires minimal maintenance. The variable speed control and ergonomic design make it a joy to use, even for long periods. The intelligent design and features really set this sander apart.
The real magic of the DEROS lies in its dust extraction capabilities. When paired with a Mirka dust extractor, it creates a virtually dust-free sanding environment. This not only improves visibility and reduces cleanup but also helps to protect your lungs. The MyMirka app allows you to track vibration levels and monitor usage, providing valuable insights into your sanding habits. It’s pricey, but this advanced technology offers a superior sanding experience.
DeWalt DWE6423 5-Inch Variable Speed Random Orbit Sander
The DeWalt DWE6423 is a reliable and affordable option for anyone looking for a solid random orbit sander. This tool offers a good balance of power and control, making it suitable for a variety of sanding tasks. The variable speed dial allows you to adjust the sanding speed to match the material you’re working with, preventing damage and ensuring a smooth finish. The dust-sealed switch helps to protect the motor from dust and debris, extending the life of the tool.
This sander is built to last, with a durable construction that can withstand the rigors of daily use. The textured rubber overmold provides a comfortable and secure grip, even when your hands are sweaty. While it might not have all the bells and whistles of some of the more expensive models, the DeWalt DWE6423 is a dependable workhorse that delivers consistent performance at a reasonable price. It’s a great choice for both DIYers and professionals on a budget.
Porter-Cable 382 Random Orbit Sander
The Porter-Cable 382 is a no-frills, budget-friendly random orbit sander that gets the job done. While it may not have all the advanced features of more expensive models, it’s a reliable and straightforward tool for basic sanding tasks. The random orbit action helps to prevent swirl marks, ensuring a smooth and even finish. The dust collection bag helps to keep your workspace clean, although it’s not as effective as a dedicated dust extractor.
If you’re looking for a simple and affordable sander for occasional use, the Porter-Cable 382 is a great option. It’s lightweight and easy to handle, making it ideal for smaller projects and tight spaces. While it may not be the most powerful or feature-rich sander on the market, it offers excellent value for the price. It’s a great starter sander or a backup tool for more experienced woodworkers.
Why Do People Need to Buy Cabinet Sanders?
Imagine you’re finally tackling that kitchen remodel you’ve been dreaming about. New cabinets are on the way, but the unfinished surfaces are begging for your personal touch. That’s where a cabinet sander comes in – your secret weapon for achieving a flawless, professional finish. Forget wrestling with bulky orbital sanders in tight corners; a dedicated cabinet sander, especially one of the best cabinet sanders on the market, provides the control and precision needed for delicate tasks like sanding door frames, drawer faces, and intricate moldings. It’s about more than just sanding; it’s about elevating your craftsmanship.
Beyond new projects, consider the existing cabinets in your home. Years of use can leave them looking worn and tired. Instead of replacing them entirely, a cabinet sander can breathe new life into those surfaces. A light sanding removes old varnish, scratches, and imperfections, creating the perfect canvas for a fresh coat of paint or stain. Think of the money you’ll save by refinishing instead of replacing, and the satisfaction of giving your kitchen a stunning makeover yourself!
Choosing the right cabinet sander, like one of the top-rated models known for their ergonomic design and dust collection capabilities, can truly transform the sanding process. No more aching hands or a workspace filled with sawdust! These features make sanding not only more efficient but also more enjoyable, allowing you to focus on the artistry of the project. You’ll be amazed at how smoothly and evenly the sander glides, leaving behind a surface so perfect, you’ll be proud to show it off.
Ultimately, investing in a cabinet sander is an investment in your DIY skills and the beauty of your home. Whether you’re a seasoned woodworker or a weekend warrior, the right sander can empower you to achieve professional-quality results on all your cabinet projects. From crafting stunning new furniture to revitalizing existing pieces, a cabinet sander opens a world of possibilities, transforming ordinary cabinets into extraordinary works of art.
Types of Cabinet Sanders: Finding the Right Fit
So, you’re ready to tackle some cabinet sanding? That’s awesome! But before diving in, let’s talk about the different types of sanders you might encounter. Think of it like choosing the right tool for any job – a screwdriver won’t work for a nail, and vice versa. Similarly, each sander type has its strengths and weaknesses when it comes to cabinet work. Understanding these differences will save you time, effort, and potentially even prevent costly mistakes.
First up, we have the orbital sander, also known as a random orbital sander. These are your go-to for general sanding and surface prep. They move in small, circular motions, minimizing the risk of leaving noticeable swirl marks. Imagine you’re refinishing kitchen cabinets. An orbital sander is perfect for removing old paint or varnish from flat surfaces like cabinet doors and drawer fronts. It’s user-friendly and a great starting point for most cabinet projects.
Next, consider the detail sander, often referred to as a corner or mouse sander. These are smaller, lighter, and designed to get into tight spaces that larger sanders can’t reach. Think about the inside corners of a cabinet frame or the intricate details on a raised panel door. A detail sander is indispensable for these tricky areas, ensuring a smooth, even finish throughout your project.
Finally, we have belt sanders. These are the powerhouses of the sanding world, ideal for removing large amounts of material quickly. While they can be useful for flattening warped cabinet doors or leveling uneven surfaces, they also require a steady hand and plenty of practice. Imagine trying to remove a thick layer of old paint on a large cabinet panel. A belt sander can make quick work of it, but be careful not to remove too much material or create uneven surfaces.
Sanding Techniques for Cabinets: Achieving a Flawless Finish
Okay, you’ve got your sander picked out. Now, let’s dive into the techniques that will help you achieve that smooth, professional-looking finish you’re after. Sanding isn’t just about running a machine over wood; it’s about understanding the process and using the right approach for each situation. Think of it like painting – preparation is key to a lasting, beautiful result.
First, always start with the right grit. This is crucial! Using too coarse of a grit can gouge the wood and create deep scratches that are difficult to remove. Think about using a very coarse sandpaper on a delicate wood veneer – you’d end up with a mess! Instead, start with a medium grit, like 120 or 150, to remove imperfections and then gradually move to finer grits, like 220 or 320, for a smooth finish.
Next, learn to sand with the grain. This is especially important on solid wood cabinets. Sanding against the grain can create noticeable scratches that are difficult to hide. Imagine you’re sanding a beautiful oak cabinet door. Following the natural lines of the wood will ensure a seamless, professional look. Practice on scrap wood first to get a feel for the grain direction and how the sander behaves.
Don’t forget about dust collection! Sanding creates a lot of fine dust that can be harmful to your health and can also interfere with your ability to see what you’re doing. Always wear a dust mask or respirator and consider using a sander with a built-in dust collection system. Imagine sanding cabinets in a small, enclosed space without any dust protection – you’d be breathing in harmful particles all day!
Lastly, take your time! Sanding is not a race. Rushing the process can lead to mistakes and an uneven finish. Apply even pressure and let the sander do the work. Regularly check your progress and make sure you’re not removing too much material in any one area. Think of it like baking a cake – you wouldn’t rush the baking process, would you? Similarly, taking your time with sanding will result in a much better outcome.
Safety First: Protecting Yourself During Cabinet Sanding
Before you even plug in that sander, let’s talk about safety. Sanding can be a dusty and potentially hazardous task, so it’s essential to take precautions to protect yourself. Think of it like any other power tool – respect the potential risks and take steps to minimize them. A few simple safety measures can make a big difference in preventing accidents and protecting your health.
First and foremost, protect your lungs. As mentioned before, sanding generates a lot of fine dust that can be harmful to breathe in. Always wear a dust mask or, even better, a respirator that’s specifically designed to filter out fine particles. Imagine sanding old painted cabinets that might contain lead – a respirator is absolutely essential in this scenario. Don’t underestimate the importance of proper respiratory protection.
Next, protect your eyes. Flying debris and dust particles can easily irritate or even damage your eyes. Wear safety glasses or goggles to shield your eyes from these hazards. Imagine a small splinter flying up and hitting you in the eye – ouch! Safety glasses are a simple and effective way to prevent such injuries.
Don’t forget about hearing protection. Some sanders can be quite noisy, especially belt sanders. Prolonged exposure to loud noise can damage your hearing over time. Wear earplugs or earmuffs to protect your ears from excessive noise. Imagine working in a small workshop with a loud sander running for hours – hearing protection is a must.
Finally, be aware of your surroundings. Keep your work area clean and free of clutter to prevent trips and falls. Make sure you have adequate lighting to see what you’re doing. And always unplug the sander before changing sandpaper or making any adjustments. Imagine tripping over a power cord while holding a running sander – that could be a recipe for disaster!
Troubleshooting Common Sanding Issues: Solving Problems Like a Pro
Even with the best techniques and equipment, you might still run into some common sanding issues. Don’t worry, it happens to the best of us! The key is to recognize the problem and know how to fix it. Think of it like being a detective – you need to identify the clues and use your knowledge to solve the case.
One common issue is swirl marks. These are circular scratches that can be left behind by orbital sanders, especially if you’re not using the correct technique. To fix swirl marks, try using a finer grit sandpaper and make sure you’re overlapping your passes slightly. You can also try sanding in a slightly different direction. Imagine you’re refinishing a dark-stained cabinet and notice swirl marks in the finish – addressing them before applying the topcoat is crucial.
Another common problem is uneven sanding. This can happen if you’re applying too much pressure in one area or if your sander isn’t moving smoothly across the surface. To fix uneven sanding, try using a sanding block to level out the surface. You can also try using a larger sander with a wider base. Imagine sanding a large, flat cabinet door and accidentally creating a low spot – a sanding block can help you blend the area and even out the surface.
Sometimes, you might encounter clogged sandpaper. This happens when the sandpaper becomes filled with dust and debris, reducing its effectiveness. To prevent clogged sandpaper, use a dust collection system or regularly clean the sandpaper with a brush. You can also try using sandpaper with an anti-clog coating. Imagine sanding a sticky, resinous wood and finding that your sandpaper is clogging up quickly – using the right type of sandpaper and regularly cleaning it can make a big difference.
Finally, you might experience burning the wood. This happens when the sander generates too much heat and scorches the surface of the wood. To prevent burning, use a lower speed setting and avoid applying too much pressure. You can also try using a sharper sandpaper. Imagine sanding a hard, dense wood and noticing a burnt smell – reducing the speed and pressure can help prevent further damage.
Best Cabinet Sanders: A Buyer’s Guide to Achieving a Flawless Finish
Choosing the right sander can feel daunting, especially when you’re aiming for that showroom-worthy finish on your cabinets. Don’t sweat it! Think of me as your friendly neighbor, someone who’s been there, sanded that, and is ready to share some hard-earned wisdom. This guide will walk you through the key things to consider so you can pick the best cabinet sanders for your project and get those cabinets looking fantastic. Let’s dive in!
Power and Performance: Matching the Sander to Your Task
Think about the type of sanding you’ll be doing most often. Are you dealing with a lot of aggressive material removal, like stripping old paint or leveling uneven surfaces? Or will you primarily be focusing on fine-tuning and creating a smooth, ready-to-paint finish? A more powerful sander is crucial for heavy-duty tasks, but a less aggressive model might be better suited for delicate work to avoid accidentally gouging or damaging the wood. Remember, more power isn’t always better – it’s about having the right tool for the job.
For example, if you plan on refinishing older cabinets with multiple layers of paint or varnish, a sander with a robust motor and adjustable speed settings will be your best friend. You’ll be able to start with a coarser grit and higher speed to quickly remove the old finish, then dial down the speed and switch to finer grits to achieve a smooth, even surface. On the other hand, if you’re mainly working with new, pre-primed cabinet doors, a lighter-duty sander with a focus on fine finishing might be all you need.
Sander Type: Orbital, Detail, or Belt – Knowing the Difference
Choosing the right type of sander is like picking the right paintbrush for a specific detail. Each type is designed for different purposes, and using the wrong one can lead to frustration and less-than-perfect results. Orbital sanders, with their random orbital motion, are versatile workhorses that are great for general sanding and creating a smooth surface. Detail sanders, also known as corner or mouse sanders, excel at getting into tight corners and intricate areas that other sanders can’t reach. Belt sanders, on the other hand, are powerful machines designed for rapid material removal and flattening large surfaces.
If you’re tackling a complete kitchen renovation, you might find that you need a combination of sanders. A belt sander can quickly remove old finishes from cabinet frames, an orbital sander can smooth the flat surfaces of doors and drawer fronts, and a detail sander can precisely sand intricate moldings and corners. Understanding the strengths of each type will allow you to build a sanding arsenal that’s ready for anything. Choosing the best cabinet sanders is a mix of strategy and the right tools.
Dust Collection: Keeping Your Workspace Clean and Healthy
Sanding creates a lot of dust, and breathing in that dust isn’t good for your health. That’s why a good dust collection system is essential. Look for sanders with built-in dust collection ports that can be connected to a shop vacuum. Some sanders even come with their own dust collection bags, but these tend to be less effective than a dedicated vacuum.
Trust me, investing in a decent dust collection system is an investment in your health and sanity. Not only will it keep your lungs happy, but it will also improve visibility while you’re working, making it easier to see imperfections and achieve a smoother finish. Plus, a cleaner workspace means less time spent cleaning up and more time spent enjoying your beautifully refinished cabinets. For the best cabinet sanders, dust collection isn’t just a nice to have – it’s a must.
Ergonomics and Comfort: Ensuring a Smooth Operation for You
Sanding cabinets can be a time-consuming process, so it’s important to choose a sander that’s comfortable to hold and use for extended periods. Look for features like ergonomic grips, vibration dampening, and a lightweight design. A comfortable sander will reduce fatigue and allow you to maintain better control, resulting in a more consistent and professional finish.
Imagine sanding an entire set of kitchen cabinets with a sander that’s heavy, vibrates excessively, and has a poorly designed grip. Your hands will be aching, your arms will be tired, and your work quality will likely suffer. On the other hand, a comfortable sander will feel like an extension of your hand, allowing you to focus on the task at hand and achieve the best possible results. Consider the size of your hands and grip strength when choosing a sander. The best cabinet sanders are the ones you can use for hours without feeling like you ran a marathon.
Speed Control: Dialing in the Perfect Pace
Having variable speed control is like having a volume knob for your sanding aggression. It allows you to adjust the speed of the sander to match the type of material you’re working with and the desired level of sanding. Lower speeds are ideal for delicate work and preventing overheating, while higher speeds are useful for aggressive material removal.
Think about sanding delicate veneers or intricate moldings. Using a sander at full speed could easily damage the wood or obliterate the details. With variable speed control, you can dial down the speed to a more manageable level, allowing you to carefully sand these areas without causing any harm. This feature is a game changer that helps you achieve consistent results across various projects. Therefore, for the best cabinet sanders, speed control is a must.
Pad Size and Shape: Matching the Sander to the Surface
The size and shape of the sanding pad will determine how effectively you can sand different surfaces. Larger pads are better for sanding large, flat areas, while smaller pads are more maneuverable in tight spaces and around curves. Detail sanders often have pointed or triangular pads that are specifically designed for getting into corners and intricate details.
Consider the types of cabinets you’ll be sanding. If you’re working with modern cabinets with simple, flat surfaces, a sander with a larger, round pad might be ideal. However, if you’re refinishing antique cabinets with ornate carvings and detailed moldings, a smaller sander with a detail pad will be essential for reaching those hard-to-get areas. Choosing the right pad size and shape will ensure that you can effectively sand every nook and cranny of your cabinets. The best cabinet sanders are about versatility to manage varied surfaces.
Durability and Reliability: Investing in a Long-Lasting Tool
When you are looking for the best cabinet sanders, you should keep in mind durability and reliability. A sander is an investment, and you want it to last for years to come. Look for models with durable construction, high-quality components, and a reputable brand name. Reading online reviews and checking warranty information can give you a good idea of a sander’s reliability.
Think about the cost of replacing a sander every year or two. Not only is it a waste of money, but it’s also incredibly frustrating. By investing in a durable and reliable sander, you can avoid these headaches and enjoy years of trouble-free sanding. Plus, a well-built sander is more likely to perform consistently and deliver professional-quality results, time after time.
FAQ
What kind of sander is best for cabinets?
Well, that really depends on the job you’re tackling! For large, flat surfaces like cabinet doors, a random orbital sander is your best friend. They’re great at removing material quickly and efficiently while minimizing swirl marks. If you’re dealing with intricate details, tight corners, or edges, a detail sander or even a good old-fashioned sanding block might be the way to go.
Think of it like choosing the right tool for any job around the house. You wouldn’t use a sledgehammer to hang a picture, right? Each sander has its strengths, so consider the shapes and sizes of your cabinet parts before committing to a specific type. Don’t be afraid to experiment with different sanders on scrap wood to see what works best for you and gives you the results you’re looking for!
What grit sandpaper should I use for sanding cabinets?
Start with a coarser grit, around 80-grit, if you’re removing old paint or a thick finish. This will help you cut through the layers quickly. Then, gradually work your way up to finer grits like 120-grit, 180-grit, and finally 220-grit. This gradual progression is key to getting a smooth, paint-ready surface.
Think of it like building up layers of smoothness. You wouldn’t put the finishing touches on a cake before baking it, would you? Same idea here. Each grit progressively smooths out the imperfections left by the previous one. Don’t rush the process – taking your time with each grit will give you a much better final result.
How do I sand cabinet doors without damaging them?
The key is to be gentle and patient! Don’t apply too much pressure to the sander, let the sandpaper do the work. Start with a coarser grit to remove the finish, then gradually move to finer grits for a smooth surface. Always move the sander with the grain of the wood to avoid scratches.
It’s also a good idea to practice on a hidden area or a scrap piece of wood before tackling the entire door. This will give you a feel for the sander and the different grits of sandpaper. And remember, take breaks! Your arms will thank you, and you’ll be less likely to make mistakes when you’re not fatigued.
Can I sand cabinets that have been previously painted?
Absolutely! In fact, sanding painted cabinets is often necessary for proper paint adhesion. You’ll want to start with a coarser grit sandpaper to remove the existing paint, then gradually move to finer grits to smooth out the surface.
Just be sure to wear a dust mask or respirator to protect yourself from the paint dust. Also, consider using a vacuum cleaner with a brush attachment to remove the dust as you go. A clean surface will help you see your progress and ensure a smooth finish.
How do I clean cabinets after sanding?
Cleaning is crucial! You want to remove all the dust and debris from the sanding process. A tack cloth is your best friend here. These sticky cloths pick up even the tiniest particles of dust.
You can also use a vacuum cleaner with a brush attachment to get into any crevices. After vacuuming and using the tack cloth, wipe the cabinets down with a slightly damp cloth. Make sure the cloth is not too wet, as you don’t want to saturate the wood. Let the cabinets dry completely before painting or applying a new finish.
What safety precautions should I take when sanding cabinets?
First and foremost, wear a dust mask or respirator! Sanding creates a lot of fine dust particles that can be harmful to your lungs. Safety glasses are also a must to protect your eyes from flying debris.
Additionally, work in a well-ventilated area. Open windows and doors to allow for good airflow. If you’re sanding for an extended period of time, consider wearing ear protection as well, as sanders can be quite noisy. And remember to unplug the sander before changing the sandpaper or making any adjustments. Safety first!
What is the difference between a random orbital sander and a detail sander?
A random orbital sander is designed for sanding large, flat surfaces quickly and efficiently. It uses a circular sanding pad that moves in a random, orbital motion, which helps to minimize swirl marks. Think of it as the workhorse for sanding cabinet doors or large panels.
A detail sander, on the other hand, is much smaller and designed for sanding intricate details, tight corners, and edges. It often has a triangular or pointed sanding pad that can get into those hard-to-reach areas. It’s perfect for sanding decorative molding or the inside corners of cabinet frames. They both have their place!
Conclusion
Alright, you’ve journeyed through the world of cabinet sanding! Hopefully, you feel empowered with the knowledge to pick the best cabinet sanders for your specific needs. Remember that perfect finish is waiting, and with the right tool, it’s absolutely attainable. Don’t be afraid to experiment, take your time, and enjoy the process of transforming those cabinets!
Now, go forth and conquer those cabinets! You’ve got the insight, you’ve seen the options, and the power to create a beautiful, updated space is literally in your hands. Trust your gut, choose the sander that speaks to you, and get ready to reveal the true potential of your cabinets. Happy sanding – you’ve got this!