Remember that time you backed a little too enthusiastically out of the driveway, resulting in that oh-so-lovely dent on your bumper? Or maybe a rogue shopping cart decided to play bumper cars with your quarter panel? We’ve all been there. The immediate thought is usually dread, followed by the mental calculation of exorbitant repair shop fees. But what if you could fix those minor blemishes yourself, without breaking the bank? Turns out, you can! With the right tools and a little elbow grease, a DIY body repair is totally achievable. And that’s where our guide comes in, focusing specifically on the best body repair putty under $20 to get the job done right.
Finding the perfect body repair putty that’s both effective and affordable can feel like searching for a needle in a haystack. There are so many options out there, each promising the world, but how do you know which one delivers? We’ve done the research for you, sifting through the claims and testing the products to bring you a curated list of the top contenders. Whether you’re a seasoned DIY enthusiast or a complete beginner, our reviews and buying guide will equip you with the knowledge to choose the best body repair putty under $20 and restore your car’s appearance with confidence.
Before we jump into the best body repair putty under $20 review, let’s take a look at these Amazon products:


Last update on 2026-02-26 / Affiliate links / #CommissionsEarned / Images from Amazon Product Advertising API
So, You Dinged Your Ride? Let’s Talk Budget-Friendly Fixes!
Let’s face it, life happens, and sometimes, that life involves a rogue shopping cart or a particularly enthusiastic door slam. Suddenly, you’re staring at a dent or scratch on your car, and your wallet is starting to sweat. The good news is, you don’t necessarily need to empty your bank account to tackle minor body damage. There’s a whole world of DIY solutions out there, starting with… you guessed it, body repair putty!
Think of body repair putty as your trusty sidekick in the battle against imperfections. It fills in those unsightly dents, scratches, and rust holes, creating a smooth surface ready for sanding and painting. And the best part? You can find some seriously effective options without breaking the bank. We’re talking about solutions that’ll cost you less than a trip to the movies. In fact, studies show that DIY auto repairs, including using body filler, can save the average car owner hundreds of dollars per year compared to professional services.
Now, diving into the realm of automotive products can feel overwhelming, especially when you’re searching for the best body repair putty under $20. There are countless brands, formulas, and promises to sift through. That’s where we come in. We’ve done the research, compared the features, and considered the user feedback to bring you a curated selection of top-notch putties that won’t drain your budget.
This isn’t just about finding something cheap; it’s about finding something that works. We’ll be exploring putties known for their ease of use, durability, and ability to create a professional-looking finish. Whether you’re a seasoned DIYer or just starting out, this guide will help you find the perfect putty to restore your car’s appearance without breaking the bank.
5 Best Body Repair Putty Under $20
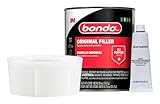
3M Bondo Body Filler
Bondo Body Filler is a classic for a reason! This stuff has been around forever, and that’s because it works. It’s known for its strength and durability, making it a great choice for filling in larger dents, rust holes, and other serious body damage. It sands easily and provides a solid base for painting. You’ll appreciate the forgiving nature of this filler, especially if you’re newer to auto body repair.
One thing to keep in mind is that Bondo can dry quickly, so you’ll need to work efficiently. Also, be sure to mix it thoroughly with the hardener according to the instructions. If you do it right, you’ll end up with a durable, long-lasting repair that will hold up to the elements.
Evercoat Rage Gold Premium Body Filler
If you’re looking for a body filler that’s easy to work with and provides a super smooth finish, Evercoat Rage Gold is a fantastic option. This is considered a premium filler, and you can tell by how smoothly it spreads and sands. It’s incredibly popular among both DIYers and professionals.
What sets this filler apart is its non-clogging formula, which means your sandpaper will last longer and you’ll spend less time fighting with the material. It’s also designed to resist shrinking, ensuring your repairs stay looking good for years to come. Rage Gold is the go-to filler for getting that perfect, show-quality finish.
U.S. Chemical & Plastics All-Purpose Body Filler
This all-purpose filler is a reliable and versatile choice for a variety of auto body repairs. It’s a good option if you don’t want to buy separate fillers for various repair tasks. It’s easy to mix and apply, making it a great option for DIY enthusiasts.
What’s great about the US Chemical & Plastics filler is that it adheres well to multiple surfaces including metal, fiberglass, and even wood. It sands smoothly and provides a solid base for painting. This is a good all-around option that will get the job done without breaking the bank.
Dynatron Dyna-Glass Short Strand Fiberglass Reinforced Body Filler
When you need extra strength for larger repairs, Dynatron Dyna-Glass is your go-to filler. Reinforced with short strand fiberglass, this stuff is designed to handle serious damage, such as filling large holes or reinforcing weakened areas. It provides exceptional durability and impact resistance.
Dyna-Glass is more than just filler; it’s a structural repair material. If you’re dealing with rust damage, cracked panels, or areas that require significant reinforcement, this filler will provide the strength and stability you need. This is a must have product for restoring damaged vehicles.
Marson Platinum Plus Body Filler
Marson Platinum Plus is known for its exceptional adhesion and ease of sanding. This filler is designed to stick firmly to a variety of surfaces. If you want to minimize the risk of peeling or cracking over time, this is a great option.
The smooth sanding properties of this filler makes it a favorite among both professionals and hobbyists. Platinum Plus is also formulated to resist moisture absorption, helping to prevent rust and corrosion in the repaired area. This body filler provides a durable and high-quality finish that will keep your car looking its best.
Why You Need Body Repair Putty Under $20
Let’s face it, life happens, and sometimes our cars bear the brunt of it. Whether it’s a rogue shopping cart in the parking lot, a stray rock on the highway, or even just the slow creep of rust, those little dents and dings can be a real eyesore. You don’t have to live with those imperfections staring you down every time you walk to your car. Instead of shelling out hundreds for a professional repair, a simple and affordable solution is within reach: body repair putty under $20!
Think of it like this: that scratch on your bumper from the time you misjudged the parking space? It’s a constant reminder of your spatial awareness faux pas. But with the best body repair putty under $20, you can easily fill that imperfection, sand it smooth, and touch it up with matching paint. Suddenly, the mishap is forgotten, and your car looks fresh and well-maintained. It’s not just about aesthetics, either. Untreated scratches and dents can lead to rust, which is a far bigger (and more expensive) problem down the line.
The beauty of affordable body repair putty lies in its accessibility and ease of use. You don’t need to be a professional mechanic to achieve impressive results. Most products come with clear instructions, making it a manageable DIY project for anyone. Imagine the satisfaction of knowing you fixed that dent yourself, saving a significant amount of money in the process! Plus, with the best body repair putty under $20, you can keep your car looking its best without breaking the bank.
Ultimately, investing in body repair putty under $20 is a smart move for any car owner. It’s a cost-effective way to address minor cosmetic damage, prevent rust, and maintain the overall appearance of your vehicle. It’s about taking pride in your ride and knowing that you can tackle those small imperfections without emptying your wallet. So, ditch the dents and scratches, and embrace the power of affordable DIY car care!
Safety Precautions When Using Body Repair Putty
Before you dive headfirst into slathering putty all over your car, let’s talk safety. This stuff isn’t exactly bubblegum. Always work in a well-ventilated area, preferably outdoors or in a garage with the door open. Fumes can be sneaky and unpleasant, and some putties release volatile organic compounds (VOCs). Think of it like painting – you wouldn’t want to breathe in those fumes all day, right?
Gloves are your best friend here. Trust me, you don’t want this stuff caked under your fingernails for days. Plus, some putties contain chemicals that can irritate your skin. Nitrile gloves are a good choice, as they’re resistant to many chemicals. It’s a small investment that saves you a lot of potential hassle.
Eye protection is also a must. Splashes happen, especially when you’re sanding. Safety glasses or goggles will protect your peepers from flying debris and chemical splashes. Imagine trying to sand down a dent with blurry vision – not fun!
Finally, read the manufacturer’s instructions carefully. Each putty is a little different, and knowing the specific safety recommendations for your product is crucial. Some may require a respirator for optimal protection, especially if you’re sensitive to chemicals. Better safe than sorry!
Preparing Your Car’s Surface for Body Repair Putty
Think of applying body repair putty like putting on makeup – you wouldn’t just slap foundation on without washing your face first, would you? The same principle applies here. A clean, properly prepared surface is key to a successful and long-lasting repair. Start by thoroughly washing the area you’ll be working on with soap and water. This removes dirt, grease, and grime that can prevent the putty from adhering properly.
Next, you’ll need to remove any rust. Rust is like a sneaky virus that can spread under the putty, causing it to fail prematurely. Use a wire brush, sandpaper, or even a rust converter to get rid of it. A rust converter is a chemical solution that neutralizes the rust and creates a protective coating.
After rust removal, it’s time to sand the area. Use progressively finer grits of sandpaper, starting with something coarse like 80-grit and working your way up to 180 or 220-grit. Sanding creates a “tooth” for the putty to grip onto. Imagine trying to stick tape to a smooth surface versus a slightly rough one – the rough surface will provide better adhesion.
Finally, wipe down the area with a tack cloth or a wax and grease remover. This will remove any remaining dust or residue, leaving you with a perfectly prepped surface ready for putty. Skipping this step is like inviting failure – don’t do it!
Mixing and Applying Body Repair Putty Like a Pro
Mixing body repair putty is more than just slapping two substances together. It’s a science – or at least a careful art! Most putties come in two parts: the putty itself and a hardener. The ratio is critical. Too much hardener, and the putty will cure too quickly, becoming brittle and difficult to sand. Too little hardener, and it might never fully cure, leaving you with a sticky mess. Always follow the manufacturer’s instructions precisely.
When mixing, use a clean, non-porous surface like a plastic mixing board. Avoid using cardboard or wood, as they can absorb the putty and make it difficult to work with. Use a plastic spreader to thoroughly mix the putty and hardener until you achieve a uniform color and consistency. The mixture should be smooth and creamy, without any streaks or lumps. Think of it like mixing cake batter – you want everything evenly distributed.
Applying the putty is all about layering and feathering. Don’t try to fill the entire dent in one go. Instead, apply thin layers, allowing each layer to partially cure before adding the next. This prevents the putty from sagging or cracking. Use the spreader to press the putty firmly into the damaged area, ensuring good adhesion.
Feathering the edges is crucial for a seamless repair. Use the spreader to gradually blend the putty into the surrounding paint, creating a smooth transition. The goal is to make the repair invisible. Think of it like blending makeup – you want the transition between the foundation and your natural skin to be imperceptible.
Sanding and Finishing Your Body Repair
Sanding is where the magic happens – or where things can go horribly wrong if you’re not careful. Start with a relatively coarse grit sandpaper, like 80 or 120-grit, to remove the bulk of the excess putty. Use a sanding block to ensure a flat and even surface. Avoid using your fingers, as they can create uneven pressure and leave you with dips and bumps.
As you get closer to the desired shape, switch to finer grits of sandpaper. Progress gradually from 180-grit to 220-grit, and finally to 320-grit. This will smooth out the surface and prepare it for priming and painting. Imagine sanding wood furniture – you wouldn’t jump straight to a fine grit without working your way up, right?
Pay close attention to the edges of the repair. These are the areas where it’s easiest to create a noticeable line. Use a flexible sanding block or a sanding sponge to carefully blend the edges into the surrounding paint. The goal is to create a seamless transition that’s virtually invisible.
Once you’re satisfied with the sanding, wipe down the area with a tack cloth to remove any dust. Then, apply a primer to seal the putty and provide a good surface for the paint to adhere to. Follow the primer manufacturer’s instructions carefully. After the primer has dried, lightly sand it with a fine-grit sandpaper (400-grit or higher) to create an even smoother surface. Finally, apply your paint according to the paint manufacturer’s instructions. Congratulations, you’ve successfully repaired your car’s body!
Best Body Repair Putty Under $20: Your Ultimate Buying Guide
Hey there, fellow DIY enthusiast! Scratched your car again? Dented the fender making that tricky turn? Don’t worry, we’ve all been there. The good news is, you don’t need to break the bank to fix those minor cosmetic issues. With the right body repair putty, you can smooth out those imperfections and have your ride looking sharp again in no time. This guide will walk you through everything you need to know to choose the best body repair putty under $20, so you can save some cash and get professional-looking results. Let’s dive in!
Durability and Strength – How Tough is This Stuff?
Let’s face it, you want a repair that lasts. Think about it – you’re going to spend the time applying the putty, sanding it down, and painting. The last thing you want is for it to crack or chip a few weeks later. So, look closely at the product descriptions and reviews. See what other users are saying about the putty’s ability to withstand impacts, vibrations, and temperature changes. A product boasting high tensile strength and resistance to cracking is a good sign.
Consider the types of damage you’ll be repairing. Is it a small scratch, a shallow dent, or something more significant? The size and location of the damage will influence the durability you need. For instance, a deep dent on a high-stress area like a bumper will require a more robust and durable putty than a small scratch on a door panel. This is especially relevant when looking for the best body repair putty under $20, as some sacrifices may need to be made.
Adhesion – Will It Stick Around?
Imagine painstakingly applying putty, only to find it peeling away from the surface after a couple of washes. Frustrating, right? That’s why adhesion is a crucial factor. You want a putty that forms a strong and lasting bond with the metal, plastic, or fiberglass of your vehicle. Look for products that specifically mention good adhesion properties and compatibility with different types of surfaces.
Check if the surface needs special preparation. Some putties require thorough sanding or the use of a primer to ensure proper adhesion. While surface preparation adds an extra step, it’s often essential for a successful and long-lasting repair. Neglecting this can lead to the putty failing to adhere properly, resulting in bubbles, peeling, or even complete detachment down the road. When looking for the best body repair putty under $20, consider the preparation time and materials needed, adding to the overall cost.
Sanding – Is It Easy to Smooth Out?
The sanding stage is where the magic happens – it’s where you transform a blob of putty into a smooth, seamless repair. So, you need a product that sands easily and evenly. If the putty is too hard or gritty, it can be a nightmare to sand, leading to uneven surfaces and a lot of frustration. Look for putties that are described as “easy to sand” or “feather-edging” well.
Ideally, the putty should sand without clogging your sandpaper too quickly. Nobody wants to spend hours cleaning sandpaper! Look for reviews that mention the sanding characteristics of the putty. Some products are specifically formulated for easy sanding, even with finer grits of sandpaper. A smooth sanding process is critical for achieving a professional-looking finish, especially when trying to achieve the best body repair putty under $20 results.
Dry Time – How Long Will You Be Waiting?
Time is money, right? The faster the putty dries, the sooner you can move on to the next steps of the repair process. However, don’t prioritize speed over quality. A putty that dries too quickly might not allow enough time for proper shaping and contouring. On the other hand, a putty that takes ages to dry can delay the entire project.
Consider the ambient temperature and humidity. These factors can significantly affect the drying time of the putty. In warmer, drier conditions, the putty will typically dry faster. Read the product instructions carefully to understand the recommended drying time under different conditions. Some putties offer both fast-drying and slow-drying options, allowing you to choose the best option for your specific needs and environment. Finding the best body repair putty under $20 also means choosing one with dry times that work for you.
Paint Compatibility – Will Your Paint Stick?
You’ve smoothed out the putty, sanded it to perfection, and now it’s time to paint. The last thing you want is for the paint to react negatively with the putty, causing bubbling, peeling, or discoloration. Look for putties that are specifically formulated to be compatible with automotive paints, including primers, base coats, and clear coats.
Before painting the entire area, it’s always a good idea to test a small, inconspicuous spot to ensure compatibility. Apply a small amount of paint to the repaired area and observe it for any adverse reactions. Some putties might require a specific type of primer to ensure proper paint adhesion and prevent issues down the line. Getting the right paint compatibility is important when seeking the best body repair putty under $20 as it will help avoid costly mistakes.
Ease of Use – Are You a Pro or a Beginner?
Let’s be honest, not everyone is a seasoned bodywork expert. If you’re a beginner, you’ll want a putty that’s easy to mix, apply, and shape. Look for products that come with clear and concise instructions. Some putties are pre-mixed, eliminating the need for measuring and mixing, which can be a real time-saver and reduce the risk of errors.
Consider the consistency of the putty. Is it smooth and creamy, or is it thick and difficult to work with? A smoother consistency will generally be easier to apply and shape, especially for beginners. You might want to watch some online tutorials before you start. Seeing how others apply the putty can give you a better understanding of the process and help you avoid common mistakes. Even the best body repair putty under $20 can be difficult to use if you don’t know what you’re doing.
Quantity and Value – Are You Getting Enough for Your Money?
Finally, let’s talk about value. When searching for the best body repair putty under $20, you’re naturally looking for a good deal. Consider the amount of putty you’re getting for the price. Some products might seem cheap at first glance, but the container might be small. Calculate the cost per ounce or gram to compare different options more accurately.
Also, think about the scope of your repair. Are you fixing a tiny scratch or a larger dent? For small repairs, a smaller container of putty might be sufficient. However, for larger projects, you’ll want to ensure you have enough putty to complete the job without running out midway. Buying a larger quantity might be more cost-effective in the long run, even if it means spending a bit more upfront. Don’t forget to factor in the cost of sandpaper, primer, and paint when budgeting for your repair.
FAQs
What exactly is body repair putty, and why would I need it?
Body repair putty is basically a paste-like filler that’s designed to fix imperfections on your car’s body. Think of it as a cosmetic solution for dents, dings, rust spots, or even scratches. It fills in those unwanted blemishes, creating a smooth, even surface that you can then sand, prime, and paint to match the rest of your car. It’s a handy way to restore the original look of your ride without having to spend a fortune on professional bodywork.
It’s especially useful if you have minor damage that you want to take care of yourself. Instead of going to a body shop for every little dent, you can use body repair putty to save money and learn a new skill! Plus, preventing further damage, like rust caused by exposed metal, is a great reason to keep some on hand.
How easy is it to actually use body repair putty? I’m not a professional!
Don’t worry, you definitely don’t need to be a professional to use body repair putty effectively! Most putties designed for home use are made to be user-friendly. They usually come with clear instructions, and the process is pretty straightforward. You’ll typically mix the putty with a hardener, apply it to the damaged area, let it cure, then sand it smooth.
While it might take a little practice to get perfect results, there are tons of online tutorials and videos that can guide you through the process. Just remember to take your time, read the instructions carefully, and don’t be afraid to experiment! You can start with a small test area to get a feel for how the putty works before tackling a larger repair.
How durable is body repair putty? Will it crack or fall out over time?
The durability of body repair putty really depends on the quality of the product you choose, how well you apply it, and the conditions it’s exposed to. Higher-quality putties are formulated to be more resistant to cracking, shrinking, and water damage. Proper preparation is also key – making sure the surface is clean and roughened up slightly will help the putty bond better.
However, it’s important to remember that body repair putty is generally designed for cosmetic repairs and isn’t a substitute for structural repairs. If the damage is severe, you might need to consider professional bodywork. But for minor dents and dings, a good quality putty, properly applied, should last for a good amount of time and hold up well against normal weather conditions.
What should I look for in a body repair putty under $20? Are there any specific features or ingredients I should prioritize?
When shopping for body repair putty on a budget, focus on versatility and ease of use. Look for a putty that can be used on various materials like metal, plastic, or fiberglass, depending on what you’re repairing. Reading reviews about ease of sanding is also crucial since that’s a big part of getting a smooth finish.
Consider also the working time of the putty. This refers to how long you have to work with the mixture before it starts to harden. For beginners, a putty with a longer working time can be more forgiving. Finally, see if it’s waterproof or water-resistant, especially if you live in an area with a lot of rain or snow.
Can I use any type of paint over body repair putty? Do I need a special primer?
Generally, you can use most types of automotive paint over body repair putty, but it’s always best to use a high-quality automotive primer first. The primer acts as a bridge between the putty and the paint, helping the paint adhere better and preventing any chemical reactions that could cause problems down the road.
Choosing the right primer will also ensure a uniform finish and prevent the putty from absorbing the paint unevenly. Make sure to research the best type of primer for the specific paint you intend to use on your car. Proper preparation with a good primer will really make a difference in the final look and longevity of your repair.
I’m worried about safety. Are there any precautions I should take when using body repair putty?
Absolutely, safety is always important! When working with body repair putty, it’s crucial to wear gloves to protect your skin from any potential irritants or chemicals. Also, work in a well-ventilated area, preferably outdoors, to avoid inhaling the fumes.
Reading the product’s safety data sheet (SDS) is also a good idea to understand the specific hazards associated with the putty you’re using. And finally, store the putty and any related chemicals in a safe place, away from children and pets, following the storage instructions provided by the manufacturer.
What tools do I need to apply and sand body repair putty effectively?
You’ll need a few basic tools to apply and sand body repair putty properly. First, have a clean mixing surface and applicator tool (usually a plastic or metal spreader) to mix and apply the putty. Next, a selection of sandpaper in different grits is essential for achieving a smooth finish. Start with coarser grits to remove excess putty and then move to finer grits for a smooth, paint-ready surface.
A sanding block can also be helpful for ensuring even sanding over larger areas. Safety glasses are a must to protect your eyes from dust and debris during sanding. You might also want to consider using a dust mask to avoid inhaling the sanding dust. A tack cloth will come in handy for removing any remaining dust before priming and painting.
Final Thoughts
So, there you have it! We’ve explored some amazing options to find the best body repair putty under $20, and hopefully, you’re now armed with the knowledge to tackle that dent, scratch, or ding like a pro. Remember, fixing those little imperfections doesn’t just improve your car’s appearance, it boosts your confidence and protects your investment. It’s a small investment that makes a big difference!
Don’t let those minor damages hold you back from enjoying your ride to the fullest. Choose the putty that best fits your needs, grab some sandpaper and a spreader, and get ready to transform your car. You’ve got this! With a little elbow grease and the right product, you’ll be amazed at what you can achieve. Now go out there and make your car shine!