Remember that time you finally upgraded your car’s audio system, speakers blasting your favorite tunes, only to have it sound…well, kind of underwhelming? I’ve been there! After weeks of research and speaker shopping, I thought I was golden. Turns out, the weak link in my sound chain was the pathetic, thin factory wiring. It was like trying to fill a swimming pool with a garden hose. That’s when I discovered the importance of high-quality amp wiring. You need the right power and signal delivery to unleash the true potential of your amplifier. That’s why finding the best amp wiring kits is crucial for any serious car audio enthusiast.
So, if you’re staring at a pile of shiny new audio gear, don’t let poor wiring be the bottleneck to your sonic bliss. This guide is here to help you navigate the often-confusing world of amp wiring kits. We’ll cut through the marketing jargon, explain the key components, and provide you with honest reviews of the top kits on the market. Get ready to crank up the volume and experience your music the way it was meant to be heard!
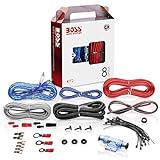
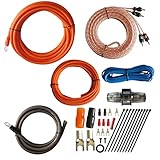
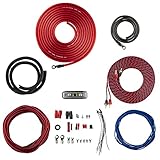
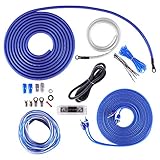
Before we jump into the best amp wiring kits review, let’s take a look at these Amazon products:

Last update on 2025-08-24 / Affiliate links / #CommissionsEarned / Images from Amazon Product Advertising API
From Muffled Mayhem to Crystal-Clear Cadence: Why Your Wiring Matters
Ever crank up the volume only to be greeted by a less-than-stellar sound? A weak, distorted signal can completely ruin your listening experience, and often, the culprit is hiding in plain sight: your amp wiring. Think of it like this: you wouldn’t expect a race car to win with low-grade fuel, would you? Similarly, even the most powerful amplifier needs a solid electrical foundation to truly shine. Choosing the right wiring kit is more than just connecting Point A to Point B; it’s about ensuring a clean, consistent power flow for optimal performance.
A high-quality amp wiring kit acts as the highway system for your car audio, delivering the necessary voltage and current to your amplifier. Poor wiring, on the other hand, can introduce resistance, leading to voltage drops, overheating, and ultimately, reduced sound quality. In fact, studies have shown that using an undersized or poorly constructed wiring kit can diminish amplifier output by as much as 20%! That’s a significant loss, especially considering the investment you’ve made in your amplifier and speakers.
So, where do you start? The world of wiring can seem daunting, filled with terms like gauge, CCA, and OFC. Don’t worry, we’re here to help. Think of gauge as the thickness of the wire. The lower the gauge number, the thicker the wire, and the more current it can handle. Matching the gauge to your amplifier’s power requirements is crucial. Copper Clad Aluminum (CCA) and Oxygen Free Copper (OFC) refer to the materials used. OFC offers superior conductivity and corrosion resistance, making it the preferred choice for demanding systems, though CCA kits can still be a budget-friendly option.
Choosing from the best amp wiring kits is an investment in the long-term health and performance of your car audio system. By understanding the basics and prioritizing quality components, you can unlock the true potential of your amplifier and finally experience the crystal-clear, powerful sound you’ve been craving. Let’s dive into what makes a top-notch kit and highlight some of the best options available, ensuring you can finally ditch the muffled mayhem and embrace the sweet, sweet sound of success.
5 Best Amp Wiring Kits
Rockford Fosgate RFK4X
The Rockford Fosgate RFK4X is a fantastic all-around amp wiring kit, perfect for anyone wanting reliable power delivery. The kit includes true AWG (American Wire Gauge) cables, which means you are actually getting the wire thickness that’s advertised. This is a big deal because some cheaper kits skimp on the copper. Installation is straightforward, thanks to the well-labeled wires and included hardware. It’s a dependable choice for powering your car audio system.
This kit is a solid investment. The quality of the wire, fuse holder, and connectors are top-notch. It’s designed to handle a good amount of power, so you can be confident in its performance even with a moderately powerful amplifier. If you’re looking for a wiring kit that will last and provide clean, consistent power, the Rockford Fosgate RFK4X is a great option.
KnuKonceptz Kolossus Flex 4 Gauge Amplifier Installation Kit
The KnuKonceptz Kolossus Flex 4 Gauge Amplifier Installation Kit is tailored towards enthusiasts. It stands out due to its exceptional flexibility, making it easier to route the wires through tight spaces in your vehicle. The CCA (Copper Clad Aluminum) wiring offers a great balance of conductivity and affordability. While not pure copper, the Kolossus Flex series ensures sufficient power delivery for most setups.
The installation process is streamlined with the included accessories. The kit includes a high-quality fuse holder and secure connectors. The robust construction of the wires and components is evident, promising durability and long-term performance. This kit is a top contender for those who prioritize flexibility and value.
NVX XAPK44
The NVX XAPK44 is a top-tier wiring kit for those serious about their car audio. The kit uses true OFC (Oxygen-Free Copper) wiring, providing superior conductivity and signal transfer. This translates to cleaner, more powerful sound from your amplifier. The attention to detail in the construction of the cables and connectors is evident, ensuring a secure and reliable connection.
With its robust design and high-quality components, the NVX XAPK44 is built to last. The included fuse holder is heavy-duty, and the wires are well-insulated. It is a bit pricier than some other options, but the performance benefits of using OFC wiring are undeniable for audiophiles seeking the best possible sound.
Stinger SK4641
The Stinger SK4641 is a well-regarded amp wiring kit known for its reliability and ease of installation. It features high-quality CCA (Copper Clad Aluminum) wiring, offering a good balance between performance and cost. The Stinger brand has a solid reputation in the car audio world, and this kit lives up to that standard. The included accessories and clear instructions simplify the installation process.
One of the standout features of the Stinger SK4641 is its user-friendly design. The wires are easy to work with, and the connectors are secure. It’s a practical choice for those looking for a dependable wiring kit without breaking the bank. For a straightforward installation and reliable performance, the Stinger SK4641 is a strong contender.
InstallGear 4 Gauge Complete Amplifier Installation Kit
The InstallGear 4 Gauge Complete Amplifier Installation Kit is an excellent option for budget-conscious consumers who still want a decent quality wiring kit. While it uses CCA (Copper Clad Aluminum) wiring, it provides sufficient power for most entry-level to mid-range amplifiers. The kit includes everything you need for a basic installation, making it a convenient choice.
While not as high-end as some of the other kits on the list, the InstallGear kit delivers good value for the money. It’s a great option for those who are just starting out in car audio or who don’t need the absolute best performance. With its affordable price and complete set of components, this kit offers a solid entry point into the world of aftermarket car audio.
Why Do People Need to Buy Amp Wiring Kits?
Imagine you’ve just invested in a fantastic new amplifier for your car. You’re picturing crystal-clear highs and earth-shattering bass transforming your daily commute into a personal concert. But without the right wiring, your amp is just a powerful paperweight. An amp wiring kit provides all the necessary components – power wire, ground wire, remote turn-on wire, fuse holder, and RCA cables – to properly connect your amp to your car’s electrical system and head unit. Trying to piece together these components individually can be a headache, ensuring you have the right gauge wire and compatible connectors.
The reason a dedicated amp wiring kit is crucial boils down to safety, performance, and convenience. Thin or low-quality wiring can overheat, potentially damaging your amplifier, or even worse, causing a fire. A proper kit contains appropriately sized, high-quality wiring to handle the current your amp demands, ensuring optimal performance and safety. Plus, the signal from your head unit to your amplifier needs to be clean and consistent, which is where the RCA cables in a good kit come in.
Now, you might be tempted to cut corners and buy cheaper components. However, investing in one of the “best amp wiring kits” translates to a significant improvement in sound quality. Think of it like this: you wouldn’t put regular gas in a high-performance sports car, would you? The wiring in a quality kit is designed to minimize signal loss and interference, resulting in cleaner, more powerful sound. You’ll actually be able to hear the difference, experiencing the full potential of your amplifier and speakers.
Ultimately, purchasing an amp wiring kit isn’t just about connecting wires; it’s about ensuring the longevity and safety of your equipment, maximizing sound quality, and simplifying the installation process. It’s a relatively small investment that yields a significant return in audio enjoyment and peace of mind, letting you crank up the volume and truly appreciate your music on the road.
Understanding Wire Gauge and Its Impact
Choosing the right wire gauge is crucial for your amp wiring kit, and it’s not just about making sure your system turns on. Think of wire gauge like the size of a water pipe. If you’re trying to deliver a lot of water (power) through a narrow pipe (thin wire), you’re going to experience a pressure drop (voltage drop) and the pipe could even burst (wire overheat)! Similarly, using a wire gauge that’s too small for your amplifier’s power requirements will lead to voltage drop, which means your amp won’t receive the power it needs to perform optimally.
So, how do you know which gauge to choose? Generally, the higher the wattage of your amplifier, the thicker the wire (lower gauge number) you’ll need. A small, low-power amp might be fine with an 8-gauge wire, while a powerful subwoofer amplifier could require a 4-gauge or even 0-gauge wire (also known as “aught”). Consult your amplifier’s manual or a reputable car audio installer to determine the correct wire gauge for your specific setup.
Think about this: You’re planning a road trip and relying on your audio system for entertainment. But the music sounds weak and distorted, and you notice your headlights dimming every time the bass hits. Chances are, your amp isn’t getting enough power due to an undersized wire gauge. Saving a few dollars on a cheaper kit with thinner wires can ultimately cost you performance and potentially damage your equipment.
It’s always better to err on the side of caution and choose a slightly thicker wire gauge than you think you need. This ensures that your amplifier receives adequate power and minimizes the risk of voltage drop or overheating. Plus, a higher-quality wire can handle more current and resist corrosion better, leading to a longer lifespan for your wiring and your amplifier.
Essential Tools and Accessories
Installing an amp wiring kit isn’t just about connecting wires; it requires the right tools to ensure a clean, safe, and professional-looking installation. Imagine trying to assemble IKEA furniture with just a butter knife – frustrating, right? The same goes for car audio wiring. Investing in a few essential tools will save you time, headaches, and potentially prevent damage to your vehicle or equipment.
What are these essential tools? First, a good set of wire strippers and crimpers is a must-have. These tools allow you to cleanly strip the insulation from wires without damaging the copper strands and securely crimp connectors onto the wires. A digital multimeter is also invaluable for testing voltage and continuity, helping you troubleshoot any issues that may arise during the installation process.
Consider this scenario: You’re in the middle of installing your new amp, and you realize you need to cut a wire to length. Using dull scissors or a utility knife could damage the wire strands and create a messy connection. A proper wire cutter will give you a clean, precise cut, ensuring optimal conductivity. Furthermore, having a set of quality screwdrivers, pliers, and a drill with various bits will make the installation process much smoother.
Don’t forget about accessories! Fuse holders, wire loom, zip ties, and electrical tape are essential for protecting your wiring and keeping everything organized. Fuse holders protect your electrical system from overcurrent, while wire loom helps to bundle and protect wires from abrasion. Zip ties keep your wiring neatly routed, and electrical tape can insulate connections and prevent shorts. Having these accessories on hand will not only make the installation easier but also ensure a professional and safe result.
Optimizing Grounding for Noise Reduction
Proper grounding is the unsung hero of car audio installations. It’s the foundation upon which a clean, noise-free signal is built. A poor ground connection can introduce unwanted noise, such as alternator whine or engine noise, into your audio system, ruining your listening experience. Think of grounding like the drain in your sink. If the drain is clogged, the water (noise) backs up and creates a mess.
So, what constitutes a good ground? Ideally, you want to connect your amplifier’s ground wire to a clean, bare metal surface on your vehicle’s chassis. This provides a low-resistance path for the electrical current to return to the battery. Scrape away any paint or rust from the chosen grounding location to ensure a solid connection. Use a bolt and nut to securely fasten the ground wire to the chassis, and apply a layer of dielectric grease to prevent corrosion.
Imagine this: You’ve spent hours installing your new amp and speakers, only to be greeted by a high-pitched whine that varies with the engine’s RPM. This is a classic symptom of a poor ground connection. The noise is entering your audio system because the ground wire is not providing a clean, low-resistance path for the electrical current.
Don’t skimp on the ground wire! Use the same gauge wire as your power wire for the ground connection. A shorter ground wire is also generally better than a longer one, as it reduces resistance. If you’re still experiencing noise after ensuring a solid ground connection, you may need to try a different grounding location. Sometimes, moving the ground point just a few inches can make a significant difference in noise reduction.
Troubleshooting Common Installation Issues
Even with the best planning and equipment, hiccups can happen during an amp wiring kit installation. Being prepared to troubleshoot common issues can save you time, frustration, and potential damage to your equipment. Think of it like baking a cake – sometimes things don’t go exactly as planned, and you need to know how to fix it!
One common issue is a blown fuse. If your amplifier isn’t turning on, the first thing to check is the fuse in the power wire. A blown fuse indicates that there was an overcurrent situation, which could be caused by a short circuit or a faulty amplifier. Replace the fuse with one of the same amperage rating. If the fuse blows again immediately, there’s likely a short circuit that needs to be identified and fixed.
Picture this: You’ve connected everything, turned on your car, and nothing happens. No power to the amp. You check the fuse, and it’s fine. What now? Use a multimeter to check for voltage at the amplifier’s power and ground terminals. If you have 12V at the power terminal but no ground, there’s a problem with your ground connection. If you have neither, there’s a problem with your power wire or the remote turn-on wire.
Another common issue is a weak or distorted signal. This could be caused by a poor connection between the amplifier and the speakers, a faulty RCA cable, or an improperly set gain control on the amplifier. Double-check all your connections and try replacing the RCA cables to see if that resolves the issue. Adjusting the gain control can also improve the signal quality, but be careful not to set it too high, as this can cause distortion and damage your speakers. Always consult your amplifier’s manual for proper gain setting procedures.
Best Amp Wiring Kits: A Buyer’s Guide
Hey there, audio enthusiast! Ready to crank up the volume and unleash the full potential of your car audio system? Upgrading your amplifier is a fantastic way to do just that, but you can’t simply plug it in and expect sonic bliss. A high-quality amp wiring kit is the unsung hero of any great car audio setup. It’s the lifeline that delivers power to your amp, ensuring clean, consistent performance and protecting your system from potentially damaging electrical issues.
Choosing the right amp wiring kit can feel a little daunting, with all the different gauges, materials, and components to consider. But don’t worry, this guide is here to demystify the process and help you find the best amp wiring kits for your specific needs. Think of me as your audio-savvy friend, offering some friendly advice to help you make the perfect choice. Let’s dive in!
Gauge Size: Power Needs Matter!
First things first: gauge size. This is arguably the most important factor when choosing an amp wiring kit. The gauge of the wire refers to its thickness – the lower the gauge number, the thicker the wire. Thicker wires can carry more current, which is crucial for delivering the necessary power to your amplifier. Using a wire that’s too thin can lead to voltage drop, meaning your amp won’t receive the power it needs to operate at its best. This can result in distorted sound, reduced output, and even damage to your amplifier.
Imagine trying to water your garden with a tiny straw instead of a hose. You might get some water through, but it’ll take forever and you won’t be able to give your plants the deep soaking they need. Similarly, undersized wiring will starve your amplifier of power, preventing it from reaching its full potential. Check your amplifier’s power requirements (RMS wattage) and use a gauge chart to determine the appropriate wire size. When in doubt, it’s always better to err on the side of caution and go with a slightly thicker gauge than you think you need. It’s an investment in performance and safety.
Wire Material: Copper is King
While you might see amp wiring kits with different materials, stick with copper – ideally oxygen-free copper (OFC). Copper is an excellent conductor of electricity, offering minimal resistance and ensuring efficient power transfer. OFC goes a step further by removing impurities that can hinder conductivity, resulting in even better performance and sound quality. While copper-clad aluminum (CCA) wiring kits are sometimes cheaper, they are not the best amp wiring kits due to their inferior conductivity.
Think of copper like a smooth highway for electrons, allowing them to flow freely and quickly to your amplifier. CCA, on the other hand, is like a highway with potholes and detours, slowing down the flow and potentially causing bottlenecks. While CCA might seem like a budget-friendly option, it can ultimately compromise the performance of your amplifier and even lead to overheating and safety concerns. Stick with copper for the best possible sound quality, reliability, and peace of mind.
Fuse Type and Rating: Protecting Your Investment
A fuse is a critical safety component in any amp wiring kit. It’s designed to protect your amplifier and your vehicle’s electrical system from overcurrent situations, such as short circuits or power surges. When choosing an amp wiring kit, pay close attention to the type of fuse included and its rating. The fuse rating should be slightly higher than your amplifier’s maximum current draw, but not so high that it defeats the purpose of protection. A standard AGU fuse is common, but higher-quality kits may include ANL or Maxi fuses for better protection and heat dissipation.
Imagine the fuse as a safety valve in your plumbing system. If the water pressure gets too high, the valve automatically opens to prevent the pipes from bursting. Similarly, the fuse in your amp wiring kit will blow if the current exceeds its rating, interrupting the flow of electricity and preventing damage to your amplifier and other components. Make sure the fuse is easily accessible for replacement, and always keep a few spares on hand just in case. It’s a small investment for big protection.
RCA Cables: Signal Integrity is Key
RCA cables are responsible for transmitting the audio signal from your head unit to your amplifier. The quality of these cables can have a significant impact on the overall sound quality of your system. Look for RCA cables with good shielding to minimize noise and interference. Twisted-pair construction is also beneficial, as it helps to cancel out electromagnetic interference. Gold-plated connectors are a plus, as they provide a better connection and resist corrosion. Some of the best amp wiring kits include high-quality RCA cables.
Think of RCA cables as the messengers carrying important information from your brain (the head unit) to your muscles (the amplifier). If the messengers are constantly getting distracted by noise and interference, the message will be garbled and the muscles won’t perform as well. High-quality RCA cables ensure that the audio signal is transmitted cleanly and accurately, resulting in a clearer, more detailed sound. Don’t skimp on the RCA cables – they’re an essential part of the signal chain.
Power and Ground Wire Length: Measure Twice, Cut Once
Before you purchase an amp wiring kit, take some measurements to determine the required length of the power and ground wires. It’s always better to have a little extra length than not enough. The power wire needs to run from your car battery to your amplifier, while the ground wire needs to connect your amplifier to a solid grounding point on the vehicle’s chassis. Choose a kit that provides enough wire to comfortably reach these locations without stretching or straining. Also, ensure the kit has sufficient remote turn-on wire to connect your head unit to the amplifier.
Imagine trying to reach something across a room with a rope that’s just a little too short. You might be able to stretch it, but it’ll be under a lot of tension and could easily snap. Similarly, using power and ground wires that are too short can put stress on the connections and potentially lead to electrical problems. Measure the distance between your battery, amplifier, and grounding point, and add a little extra length for flexibility. A little extra wire is always better than not enough!
Terminals and Connectors: Secure and Reliable Connections
The quality of the terminals and connectors included in the amp wiring kit is crucial for ensuring secure and reliable connections. Look for terminals that are made of high-quality materials, such as gold-plated brass, and that are properly sized for the gauge of wire you’re using. The connectors should be crimped tightly to the wires to ensure a solid connection. Ring terminals are generally preferred for connecting to the battery and grounding point, as they provide a more secure connection than spade terminals.
Think of terminals and connectors as the glue that holds your electrical system together. If the glue is weak or poorly applied, the connections will be loose and unreliable, leading to intermittent problems and potentially damaging your equipment. High-quality terminals and connectors ensure that the connections are tight, secure, and resistant to corrosion, providing a reliable flow of electricity for years to come. Always crimp the terminals properly and double-check that they are securely attached to the wires.
Kit Completeness and Brand Reputation: Get Everything You Need
Finally, consider the completeness of the amp wiring kit and the reputation of the brand. A good kit should include all the necessary components, such as power wire, ground wire, RCA cables, remote turn-on wire, fuse holder, fuse, terminals, and connectors. Some kits also include additional accessories, such as wire ties and split loom tubing, which can help to organize and protect your wiring. Research the brand and read reviews to ensure that you’re purchasing a kit from a reputable manufacturer known for quality and reliability. The best amp wiring kits often come from established brands in the car audio industry.
Think of buying an amp wiring kit as buying a toolbox. You want to make sure that the toolbox is complete with all the tools you need to get the job done right. A complete amp wiring kit will save you time and hassle by providing everything you need in one package. And a reputable brand will give you peace of mind knowing that you’re purchasing a high-quality product that’s built to last. Don’t be afraid to spend a little extra for a complete kit from a trusted brand – it’s an investment in the performance and reliability of your car audio system. Choosing one of the best amp wiring kits will ensure that you have an audio system that you can enjoy for a long time.
FAQ
What exactly is an amp wiring kit, and why do I need one?
Think of an amp wiring kit as the lifeline for your car amplifier. It’s a complete set of wires and components that deliver power from your car battery to your amp, allowing it to function and pump out those sweet tunes! It’s like a power cord for your guitar amp, but on a much larger scale and designed specifically for automotive applications.
Without the proper wiring, your amplifier simply won’t work, or worse, could be damaged or even pose a safety hazard. A good kit includes everything you need like power and ground cables, remote turn-on wire, speaker wire, fuse holder, fuses, and connectors. Trying to piece together these components separately can be a real headache, not to mention potentially risky if you’re not sure what you’re doing.
How do I choose the right gauge wire for my amplifier?
Choosing the right gauge wire is super important for ensuring your amp gets the power it needs! The lower the gauge number, the thicker the wire, and the more current it can handle. Too thin of a wire can cause voltage drop, leading to poor performance and even overheating – not good!
A good rule of thumb is to look at the RMS power rating of your amplifier. Higher wattage amps need thicker, lower-gauge wire. Most kits will specify what power range they’re suitable for. If you’re unsure, err on the side of caution and go with a slightly thicker gauge – it’s better to have more capacity than not enough! There are also online wire gauge calculators that can help you determine the best size based on the distance and power.
Are all amp wiring kits created equal? What should I look for in terms of quality?
Nope, definitely not all amp wiring kits are created equal! You’ll find a wide range of prices, and like with most things, you often get what you pay for. Cheaper kits often use thinner copper strands or even copper-clad aluminum (CCA) instead of pure copper. While CCA is cheaper, it doesn’t conduct electricity as efficiently as pure copper, and it’s more prone to corrosion.
Look for kits that explicitly state they use 100% oxygen-free copper (OFC) wire. OFC is the gold standard because it provides the best conductivity and resistance to corrosion. Also, pay attention to the quality of the connectors and fuse holder. Solid construction and secure connections are crucial for safety and performance.
How difficult is it to install an amp wiring kit myself? Do I need special tools?
Installing an amp wiring kit can range from relatively simple to a bit more involved, depending on your car, your amp, and your comfort level with car audio. If you’re comfortable working with basic tools and have some experience with car interiors, you can likely tackle it yourself.
You’ll generally need tools like wire strippers, crimpers, a screwdriver set, a drill (for running wires through firewalls), and maybe some zip ties to keep things organized. A multimeter can also be handy for testing connections and ensuring everything is working correctly. There are tons of helpful videos online that show the installation process step-by-step, and even if you don’t do it yourself, knowing what’s involved will help you understand the instructions better.
What’s the deal with fuses in amp wiring kits? Why are they so important?
Fuses are your car’s electrical system’s best friend when it comes to your amplifier! They’re safety devices designed to protect your amp and your car from electrical overloads and short circuits. Think of them like circuit breakers in your home – they’ll trip and cut off the power if there’s too much current flowing through the wire.
Without a fuse, a short circuit could cause a fire, damage your amplifier, or even fry your car’s electrical system. The fuse in your amp wiring kit should be located close to the battery, to protect the entire length of the power wire. Make sure you use the correct fuse size specified for your amplifier and the kit, and never replace it with a higher amperage fuse!
What is a remote turn-on wire, and how does it work?
The remote turn-on wire is like a secret handshake between your car’s head unit and your amplifier. It’s a small gauge wire that tells your amp to turn on only when your head unit (the radio) is powered up. This prevents your amp from constantly drawing power from your battery, even when you’re not listening to music.
It works by carrying a low voltage signal (usually +12V) from the head unit to the amplifier. When the head unit is turned on, it sends the signal, which triggers the amplifier to power up. When you turn off your head unit, the signal is cut off, and the amplifier turns off. This simple system saves battery life and prevents unwanted noise.
My amp wiring kit didn’t come with speaker wire. Do I really need to buy separate speaker wire?
You absolutely need speaker wire! While your amp wiring kit focuses on delivering power to the amplifier, the speaker wire is what carries the amplified signal from the amp to your speakers. Without it, you won’t hear a peep!
The gauge of the speaker wire you need depends on the power output of your amp and the distance to the speakers. Similar to power wire, thicker (lower gauge) wire is better for higher power and longer runs. While you could use some random wire you have lying around, it’s really not recommended. Proper speaker wire is designed to minimize signal loss and ensure the best possible sound quality, so invest in a decent spool!
Final Words
So, there you have it! Your ultimate guide to navigating the world of the best amp wiring kits. We’ve covered everything from gauge sizes and materials to all the essential components you’ll need for a smooth and powerful install. Hopefully, you now feel equipped to choose the perfect kit that’ll unlock the full potential of your car audio system. Remember, a little preparation and the right wiring can make all the difference in the world, translating to cleaner sound, louder volumes, and ultimately, a much more enjoyable listening experience.
Now it’s your turn to crank things up! Don’t be intimidated by the technicalities – armed with the knowledge from this guide, you’re ready to pick the best amp wiring kit for your needs. Go forth, upgrade your system, and get ready to feel the music like never before. Your perfect sound awaits!