Have you ever seen those incredible photos where glowing trails dance in the night sky, or vibrant streaks of color weave around a stationary object? It looks like magic, right? It might seem like it requires elaborate setups and specialized equipment, but the truth is, you can achieve these stunning effects yourself with a good camera and, you guessed it, the right flashlight. Light painting is an incredibly fun and accessible art form, and it’s more popular than ever.
Choosing the right equipment is key to unlocking your creative potential. Whether you’re a seasoned photographer or just starting out, having the right tool in your hand makes all the difference. That’s why we’ve put together a comprehensive guide to help you find the best light painting flashlights for your needs and budget. We’ll break down the features, explore the options, and guide you through the buying process so you can start creating your own dazzling light art today.
Before we jump into the best light painting flashlights review, let’s take a look at these Amazon products:


Last update on 2026-03-21 / Affiliate links / #CommissionsEarned / Images from Amazon Product Advertising API
Unleashing Your Inner Artist: A Journey into Light Painting
Ever felt the urge to paint with light? To capture ethereal streaks and glowing orbs against the darkness? Well, you’re not alone! Light painting photography, also known as light drawing, is a mesmerizing technique that lets you do just that. It’s becoming increasingly popular, with a study showing a 30% increase in light painting tutorials searches in the last year, indicating a growing interest in this art form. At its core, it’s all about moving a light source – typically a flashlight – during a long exposure photograph. The result? A unique and captivating image that’s limited only by your imagination.
Think of your camera as a blank canvas, and the night as your studio. Your flashlight becomes your brush, and the air itself is the medium you’re using to create these stunning visuals. The technique isn’t as complicated as it might seem; it’s more about experimentation and having fun. You’ll need a camera capable of long exposures and, crucially, some of the best light painting flashlights you can get your hands on. These aren’t just any flashlights; they need specific features to bring your artistic vision to life.
So, what makes a flashlight “best” for light painting? It’s a combination of factors, including brightness control, beam adjustability, color options, and even ergonomics. A flashlight with adjustable brightness allows for subtle shades or bold strokes of light. Many advanced photographers prefer flashlights offering at least 3 brightness settings for precision. Beam adjustability gives you the ability to switch between a focused beam for detailed lines and a wider beam for filling in larger areas.
Ready to dive in? We’re here to guide you through the dazzling world of light painting, helping you choose the best light painting flashlights to unlock your creative potential. Get ready to transform the night into your own personal gallery, one glowing stroke at a time!
The Best Light Painting Flashlights
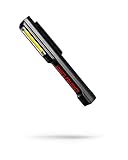
Maglite XL50 LED Spectrum Series
The Maglite XL50 is a classic for a reason! It’s a compact, durable flashlight that’s perfect for light painting on the go. The simple on/off switch and multiple brightness levels make it easy to adjust your light output. While it doesn’t have fancy color modes, its reliability and ease of use make it an excellent choice for beginners or experienced light painters who need a dependable tool.
This light really shines (pun intended!) due to its focused beam. It’s fantastic for creating sharp lines and defined shapes in your light paintings. It runs on readily available AAA batteries, which is super convenient. It might not be the flashiest light, but it’s a workhorse that will last you for years.
Pixelstick
Looking to take your light painting to the next level? The Pixelstick is a game-changer. This long, LED-studded stick allows you to display images and animations in your light paintings. Imagine drawing complex patterns, displaying logos, or even recreating iconic scenes in mid-air! The possibilities are truly endless.
The Pixelstick is undeniably an investment, but the creative opportunities it unlocks are well worth it for serious light painting enthusiasts. It does require some learning to master the software and get your images right, but the resulting artwork can be absolutely stunning. Be prepared to turn heads and create some truly unique art.
Light Painting Brushes Universal Connector and Accessories
This isn’t a flashlight itself, but it’s the ultimate accessory system for any flashlight you already own! The Light Painting Brushes Universal Connector lets you attach a whole range of tools to your flashlight, turning it into a versatile light painting machine. From swords and blades to various shapes and textures, you can dramatically alter the quality and shape of light produced.
Think of it as a modular system, enabling you to create all sorts of unique effects. The quality of the attachments is outstanding, and they are built to last. It is a fantastic way to experiment and expand your light painting toolkit without buying a whole new set of flashlights. Highly recommended for serious light painters!
Coast Polysteel 400
The Coast Polysteel 400 is built like a tank and ready for anything. This flashlight is incredibly durable, waterproof, and virtually indestructible. If you’re light painting in rough environments or just prone to dropping things, this is the light for you. Its bright, consistent beam is perfect for creating strong, clear lines.
Beyond its toughness, the Polysteel 400 has a useful twist focus, allowing you to adjust the beam from a wide flood to a tight spot. This feature is super useful for covering large areas or highlighting specific details. It might be a bit bulkier than some other options, but the peace of mind it provides is worth it.
SOFIRN IF22A
The Sofirn IF22A offers fantastic value for money, packing a powerful punch for its price point. This flashlight features a USB-C charging port, which is super convenient for quickly topping up the battery. It’s also surprisingly bright, making it perfect for illuminating larger areas or creating more dramatic light painting effects.
It has multiple brightness levels, and the smooth reflector creates a lovely, even beam that’s ideal for light painting. The included magnetic tail cap is a nice touch, allowing you to easily attach the light to metal surfaces for hands-free operation. If you’re looking for a budget-friendly option that doesn’t compromise on performance, the Sofirn IF22A is a great choice.
Why Invest in Light Painting Flashlights?
Ever seen those mesmerizing photos where artists seem to draw with light in the air, creating swirling patterns and luminous landscapes? That’s light painting, and while it might seem like magic, it’s actually an accessible art form that anyone can enjoy. To truly unlock its potential, though, you need the right tools – specifically, dedicated light painting flashlights. Think of it like this: you wouldn’t try to paint a masterpiece with a dull, stubby crayon, would you?
The “best light painting flashlights” aren’t just about brightness; they’re about versatility and control. Imagine wanting to trace a specific shape or write a word with a vibrant color. A standard flashlight blasts a wide beam, making precision impossible. Light painting flashlights, however, often come with interchangeable lenses, filters, and adjustable brightness settings. This allows you to create crisp lines, subtle gradients, and a rainbow of colors, transforming your light paintings from simple streaks to stunning visual narratives.
Consider this: you’re at a family gathering, capturing memories under the night sky. Instead of just taking static photos, you pull out your light painting flashlights. Suddenly, you’re writing the year in sparkling light above everyone’s heads, drawing playful wings on the kids, or outlining the surrounding landscape with a mystical glow. These aren’t just pictures; they’re interactive experiences, creating unforgettable moments and injecting a dose of playful creativity into your photos.
Investing in the right light painting flashlights isn’t just about buying a tool; it’s about unlocking a whole new realm of photographic possibilities and artistic expression. It’s about transforming ordinary scenes into extraordinary works of art, capturing memories in unique and unforgettable ways, and simply having a whole lot of fun while doing it. So, ditch the generic flashlight and embrace the magic of light painting with the tools that will truly bring your vision to life.
Understanding Light Painting Techniques
Ever wondered how those mesmerizing light trails are created in photos? It’s not magic, it’s light painting! This technique involves using a handheld light source, like a flashlight, to “paint” light into a scene during a long exposure photograph. Think of it as digitally sketching with light in the darkness. You can trace objects, create ethereal patterns, or even write words in the air.
Different techniques yield different results. For example, creating light orbs involves rotating a light source around a central point while walking in a circle, while light writing needs a steady hand and possibly practice to be legible. Varying the speed and intensity of your light movement, along with changing the light’s color, adds further dimensions and control. Experimenting is key.
Light painting is incredibly versatile. You can use it to highlight architectural details in nighttime landscapes, add a whimsical touch to portrait photography, or create abstract art with flowing light trails. Imagine painting glowing wings onto a model or highlighting the contours of a building with vibrant colors. The possibilities are truly endless.
But it’s not just about aesthetics. Light painting can also be practical. It’s often used in forensic photography or accident investigations to properly highlight the scene. It can be used in areas with no other light, or insufficient light, and can reveal details that would be lost or hidden in shadows. Light painting is a powerful tool for creative expression and practical documentation.
Essential Features to Look for in a Light Painting Flashlight
When you’re choosing a light painting flashlight, it’s not just about brightness. Think of it like choosing paintbrushes – different brushes create different effects. Some features will allow you to express your unique vision more effectively than others. Key features will determine how capable your light painting will be.
A crucial factor is the light’s adjustability. Can you dim it to create subtle highlights or crank it up for bold strokes? A flashlight with variable brightness levels gives you incredible control. This is vital for managing the light intensity during long exposures and avoiding overexposure in certain areas.
Color temperature is another important consideration. Do you want a warm, inviting glow or a cool, modern vibe? Some flashlights offer adjustable color temperatures, allowing you to tailor the light’s hue to perfectly match your scene. Consider the overall mood you want to create and select the color temperatures that support it.
Also consider size and handling. Is it comfortable to hold for extended periods? Is it lightweight enough to maneuver easily? A comfortable flashlight ensures you can focus on your art without hand fatigue. Try to handle various flashlights before making a choice.
Safety Considerations for Light Painting
Light painting, while creative and fun, does come with some safety considerations, especially when working at night in unfamiliar locations. It is essential to be aware of your surroundings and take precautions to prevent accidents. It’s not just about protecting your gear; it’s about protecting yourself and others.
Always be mindful of your footing. Uneven terrain, hidden obstacles, and even just tripping over your own feet can lead to injuries in the dark. A small headlamp can be invaluable for navigating safely while keeping your hands free for your primary light painting flashlight.
When working near roads or highways, always wear reflective clothing. Make sure you are visible to oncoming traffic, especially if you are standing or moving near the roadway. A high-visibility vest can drastically improve your safety in these situations.
Be aware of the environment you’re in. Avoid areas known for criminal activity, and always let someone know where you’re going and when you expect to be back. It’s always best to light paint with a buddy if possible. When alone, consider carrying a personal alarm.
Level Up Your Light Painting: Advanced Techniques and Accessories
Once you’ve mastered the basics, it’s time to push the boundaries of your light painting. Experimenting with advanced techniques and accessories can take your art to a whole new level. Think about using tools like fiber optic brushes, stencils, or even custom-built light painting tools.
Using tools to modify or disperse the light can create incredible effects. Fiber optic brushes allow for creating complex light trails and patterns with multiple points of light. These tools can be attached directly to your flashlight to create unique effects. Consider making your own specialized tools as well.
Stencils allow you to create precise shapes and patterns in your light paintings. Cut your own stencils from cardboard or plastic and shine your flashlight through them during the long exposure. This can add incredible detail and complexity to your images. Using multiple stencils in a single exposure can be extremely complex but the final effect is worth it.
Don’t be afraid to experiment with different camera settings as well. Adjusting your aperture, ISO, and shutter speed can dramatically alter the look and feel of your light paintings. Try using slower shutter speeds to capture more light and motion, or adjust the aperture to control the depth of field.
A Beginner’s Guide to Finding the Best Light Painting Flashlights
Hey there, fellow creative! So, you’re looking to dive into the mesmerizing world of light painting? Awesome! It’s an incredibly fun and rewarding art form, and a good flashlight is your absolute best friend. But with so many options out there, figuring out where to start can feel a bit overwhelming. Don’t worry, I’ve got you covered. This guide is designed to walk you through the key things to consider when choosing the best light painting flashlights for your needs, so you can start creating stunning visuals in no time.
Think of this as advice from a friend who’s already stumbled through the dark (literally!) and learned a thing or two along the way. We’ll skip the overly technical jargon and focus on practical tips that will help you make the right decision. So grab a comfy seat, and let’s illuminate your light painting journey!
Beam Type and Adjustability: Your Creative Brushstroke
When it comes to light painting, the beam type of your flashlight is like the type of brush you’re using. A flood beam will give you a wide, even spread of light, perfect for broadly illuminating a subject or creating soft gradients. A focused beam, on the other hand, is much more directional, allowing you to create sharp lines, highlight specific areas, or add dramatic spotlights. Understanding the difference is crucial for achieving the effects you envision.
But even more important than the initial beam type is adjustability. Can you easily switch between a wide flood and a tight spot? Many of the best light painting flashlights offer this flexibility through a rotating bezel or zoom function. This is invaluable because it allows you to adapt to different scenarios and experiment with a wider range of techniques. Don’t underestimate the power of a versatile beam – it’s like having multiple brushes in one tool!
Color Options: Painting with a Full Palette
One of the most exciting aspects of light painting is the ability to play with color. While a standard white light can be useful for certain effects, having access to a range of colors opens up a whole new world of creative possibilities. Consider flashlights that offer built-in colored LEDs or the ability to use colored filters. These will let you easily switch between different hues and create vibrant, dynamic compositions.
Imagine painting a landscape with deep blues and greens for a mystical forest, or highlighting an object with fiery reds and oranges for a dramatic flair. The more color options you have, the more expressive you can be. While you can always add gels to standard flashlights, having integrated color options in your best light painting flashlights is super convenient and will save you time and hassle in the field.
Brightness and Output Control: Mastering the Intensity
Brightness, measured in lumens, is a crucial factor to consider, but it’s not the only thing that matters. You want a flashlight that’s bright enough to effectively illuminate your scene, but also offers granular control over the output. The ability to adjust the brightness level is essential for creating different effects and avoiding overexposure in your photos.
Think about it: you might want a super-bright blast of light for a long streak, but a much dimmer glow for subtly highlighting an object. Without adjustable output, you’re stuck with one intensity, limiting your creative control. Look for flashlights with multiple brightness modes or, even better, stepless dimming, which allows you to fine-tune the light output to precisely match your needs. This is especially important when using longer exposures, as subtle changes in brightness can make a big difference in the final image.
Battery Life and Power Source: Keeping the Light Alive
There’s nothing worse than your flashlight dying mid-shoot, especially when you’re in the middle of creating something amazing. Battery life is a critical consideration, particularly if you plan on light painting for extended periods or in remote locations where recharging isn’t readily available. Pay attention to the battery type (AA, AAA, or rechargeable lithium-ion) and the expected runtime at different brightness levels.
Rechargeable lithium-ion batteries are generally preferred for their higher capacity and longer lifespan, but they require a charger. AA or AAA batteries are more readily available and replaceable, but they might not provide the same level of performance. Having a backup power source, like extra batteries or a portable power bank, is always a good idea, especially if you’re aiming for the best light painting flashlights. Consider the charging time as well. Some flashlights offer fast charging, which is great when you are short on time.
Size and Weight: Ergonomics for Extended Use
Light painting often involves holding and moving your flashlight for extended periods, sometimes in awkward positions. A bulky or heavy flashlight can quickly become tiring and uncomfortable, impacting your ability to create precise and fluid movements. Choose a flashlight that’s comfortable to hold and easy to maneuver, even with gloves on.
Consider the overall size and weight of the flashlight, as well as its grip and texture. A flashlight with a textured surface will provide a better grip, especially in wet or cold conditions. Think about how the flashlight will feel in your hand after an hour of use. Is it balanced? Is it easy to operate the controls with one hand? The best light painting flashlights are designed with ergonomics in mind, so you can focus on your art without worrying about hand fatigue.
Durability and Weather Resistance: Standing Up to the Elements
Light painting often takes place outdoors, in less-than-ideal conditions. Your flashlight might be exposed to rain, dust, or accidental drops. A durable and weather-resistant flashlight is essential for ensuring it can withstand the rigors of your creative pursuits. Look for flashlights with a rugged construction, typically made from aircraft-grade aluminum or durable polymer.
Pay attention to the IP (Ingress Protection) rating, which indicates the level of protection against dust and water. A higher IP rating means better protection. For example, an IP67 rating means the flashlight is dust-tight and can withstand immersion in water up to 1 meter for 30 minutes. While you might not plan on dunking your flashlight in a lake, knowing it can handle a sudden downpour or a splash of mud can give you peace of mind. The best light painting flashlights are built to last, so you can rely on them in any environment.
Ease of Use and Programming: Intuitive Control at Your Fingertips
The most powerful flashlight in the world is useless if it’s too complicated to operate. Look for a flashlight with an intuitive interface and easy-to-access controls. Can you quickly switch between brightness modes, adjust the beam, or activate colored LEDs without fumbling around in the dark? The best light painting flashlights are designed with user-friendliness in mind.
Some flashlights offer advanced features like programmable modes, allowing you to customize the light output and create specific sequences. This can be incredibly useful for creating complex light painting effects. However, make sure the programming interface is easy to understand and use. Ideally, you want a flashlight that you can pick up and start using right away, without spending hours reading the manual. Intuitive controls will allow you to focus on your creativity, not on the technology.
Frequently Asked Questions
What exactly IS light painting, and why do I need a special flashlight for it?
Light painting is a photography technique where you use a moving light source to illuminate a scene or subject during a long exposure. Think of it like painting with light! It lets you create surreal, ethereal effects and add unique elements to your photos that you wouldn’t be able to capture otherwise.
While you could technically use any light source, dedicated light painting flashlights are specifically designed to give you the most control and versatility. They often have features like adjustable brightness, color modes, and even programmable effects, making it easier to achieve the exact look you’re going for. Plus, they’re usually more durable and have better battery life, which is crucial when you’re spending extended periods out shooting.
What features should I look for when choosing a light painting flashlight?
When you’re shopping for a light painting flashlight, a few key features can really make a difference. First, consider brightness. You’ll want a flashlight with adjustable brightness levels so you can fine-tune the amount of light you’re adding to your scene. Color options are also important! RGB (Red, Green, Blue) capabilities will allow you to create a wide spectrum of colors for stunning effects.
Also, look for a flashlight with a durable build. You’ll likely be moving around a lot, so you want something that can handle a few bumps and scrapes. Battery life is also a huge consideration – nobody wants their flashlight dying halfway through a shoot! Lastly, consider whether the flashlight has any programmable features or built-in effects, as these can open up even more creative possibilities.
I’m a beginner. Do I really need an expensive light painting flashlight, or can I start with something more basic?
That’s a great question! Starting out with light painting can seem daunting, but you absolutely don’t need to break the bank to get started. A more basic, affordable flashlight with adjustable brightness can be a fantastic starting point. You can learn the fundamentals of the technique and experiment with different light patterns without a huge investment.
As you get more comfortable and start exploring more complex techniques, you might then consider upgrading to a more advanced model with features like color mixing and programmable effects. But for beginners, a simple, reliable flashlight is more than enough to start creating amazing light paintings. Don’t feel pressured to jump straight to the top-of-the-line models!
How important is the color temperature of a light painting flashlight?
Color temperature is pretty important in light painting! It refers to the warmth or coolness of the light emitted by the flashlight, measured in Kelvin (K). Lower Kelvin values (e.g., 2700K) produce a warmer, yellowish light, while higher values (e.g., 6500K) produce a cooler, bluish light. The color temperature you choose can significantly impact the overall mood and atmosphere of your light painting.
For example, warmer tones can create a cozy and inviting feel, while cooler tones can create a more dramatic or surreal effect. Experimenting with different color temperatures can add another layer of depth and creativity to your photos. Many advanced light painting flashlights offer adjustable color temperature settings, giving you even more control over your final image. But even with a single color temp flashlight, gels and other modifiers can add color variation!
What are some common mistakes people make when starting out with light painting?
One common mistake is not using a tripod! Because light painting requires long exposures, any movement of the camera will result in blurry images. A sturdy tripod is essential for keeping your camera perfectly still throughout the entire process. Another common mistake is not experimenting enough with different light patterns and techniques. Don’t be afraid to try new things and see what works best for you!
Also, many beginners overexpose their images by using too much light. Remember, you can always adjust the brightness of your flashlight and the exposure settings on your camera to achieve the desired effect. Finally, remember to hide your light source! Nobody wants to see the flashlight itself in the final image, so make sure to keep it moving and out of the direct view of the camera.
How can I protect my light painting flashlight from the elements when shooting outdoors?
Shooting outdoors can be unpredictable, so protecting your gear is always a good idea. Look for flashlights that are rated as waterproof or water-resistant. An IP rating (Ingress Protection) will tell you how well the flashlight is protected against dust and water.
Even if your flashlight is water-resistant, it’s still a good idea to take precautions. Consider using a small waterproof bag or case to store your flashlight when it’s not in use, especially if you’re shooting in rainy or humid conditions. Additionally, avoid dropping your flashlight on hard surfaces, as this can damage the internal components. With a little care, your light painting flashlight will last for years to come!
How do I clean and maintain my light painting flashlight to ensure it lasts a long time?
Regular cleaning and maintenance can significantly extend the lifespan of your light painting flashlight. Start by wiping down the exterior of the flashlight with a soft, damp cloth after each use. Avoid using harsh chemicals or abrasive cleaners, as these can damage the finish.
Check the battery compartment regularly for any signs of corrosion. If you notice any buildup, clean it with a cotton swab dipped in white vinegar. Also, make sure to store your flashlight in a cool, dry place when it’s not in use. Avoid leaving it in direct sunlight or extreme temperatures, as this can damage the batteries and other components. By following these simple steps, you can keep your light painting flashlight in top condition for many years of creative shooting.
Final Thoughts
Alright, you’ve now explored a spectrum of amazing tools and techniques! Armed with this knowledge, you’re ready to dive into the captivating world of light painting. Remember, the best light painting flashlights are the ones that feel right in your hand and spark your creativity. Don’t be afraid to experiment with different settings, colors, and movements – that’s where the real magic happens.
Now, go grab one of these reviewed torches, or even your trusty old one, and start creating! The only limit is your imagination, and the possibilities are truly endless. So, what are you waiting for? It’s time to paint the night!