Remember that time you tried to present a stunning beach backdrop for your virtual meeting, only to end up looking like a glitching, pixelated mess in front of a vaguely tropical blur? We’ve all been there! Creating professional-looking videos or presentations shouldn’t require a Hollywood budget, and thankfully, it doesn’t. The key to transforming any space into your own personal studio lies in having the right equipment, and it starts with finding one of the best green screens on the market.
Whether you’re a seasoned content creator, a budding streamer, or simply trying to add a touch of flair to your online presence, a good green screen is an indispensable tool. But with so many options available, navigating the world of chroma key can feel overwhelming. That’s why we’ve put together this comprehensive guide, packed with reviews and essential buying tips, to help you choose the perfect green screen solution for your specific needs and budget, allowing you to finally achieve that polished, professional look you’ve been dreaming of.
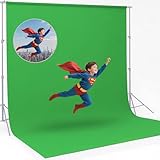
Before we jump into the best green screens review, let’s take a look at these Amazon products:


Last update on 2026-02-19 / Affiliate links / #CommissionsEarned / Images from Amazon Product Advertising API
Ever Wonder How They Do That? A Quick Intro to the World of Green Screens
Okay, let’s be honest. We’ve all watched a movie or show and thought, “Wow, how did they make that happen?” Whether it’s a superhero soaring through the skies or a news reporter broadcasting from a war zone (thankfully not actually there!), the answer is often… green! Specifically, a green screen. It’s a technique so ubiquitous that, according to a 2023 industry report, approximately 80% of major film and television productions utilize green screen technology in some capacity.
The magic behind a green screen, also known as chroma key compositing, is surprisingly simple, even if the execution can be incredibly complex. Basically, you film your subject in front of a bright green background. Then, using software, you digitally remove that green color and replace it with whatever image or video you desire. Think of it like digital cutting and pasting – but much, much cooler. It’s a staple in everything from Hollywood blockbusters to your favorite YouTube channels.
But with so many options available, how do you choose the best green screens for your needs? Are you looking for a portable solution for on-the-go filming? Or perhaps a professional-grade setup for a dedicated studio? From collapsible backdrops to full-room installations, the range of products can be overwhelming. Don’t worry; we’re here to break it down and guide you through the factors to consider.
In the following sections, we’ll explore the different types of green screens, discuss essential features like size, material, and portability, and provide our top recommendations to help you find the perfect green screen to bring your creative visions to life. Get ready to transform your videos and photos with the power of chroma key!
Best Green Screens – Reviews
Elgato Green Screen
The Elgato Green Screen is a pop-up dream! Seriously, setting this thing up is a breeze. It’s housed in a sleek, hard case and literally pops open in seconds. The wrinkle-resistant material is a lifesaver, saving precious editing time. It’s perfect for streamers or content creators who need a quick and easy setup and teardown, especially if space is limited. The size is ample enough for head-and-shoulders shots, but probably not suitable for full-body tracking.
While the price point is a bit higher than some other options, the convenience and quality are undeniable. The build feels sturdy, and the integrated stand makes it incredibly stable. If you are constantly on the move or simply prioritize ease of use, the Elgato Green Screen is worth the investment. Just keep in mind that it’s designed primarily for smaller spaces.
Neewer Collapsible Chromakey Backdrop
Looking for a budget-friendly green screen that gets the job done? The Neewer Collapsible Chromakey Backdrop is a solid choice. This portable screen is lightweight and folds down into a compact carrying case, making it ideal for creators on the go. While it might not be as fancy as some of the higher-end options, it provides a decent backdrop for video recording and live streaming.
Keep in mind that because it’s collapsible, wrinkles can be an issue. A quick iron or steamer session before use is highly recommended. Also, you’ll need a separate stand, as this one doesn’t come with built-in support. But for the price, it’s a fantastic entry-level option that delivers reasonable results with a little bit of effort.
Fancierstudio Chromakey Green Screen Backdrop
If you’re searching for a large, versatile green screen for a more expansive studio setup, the Fancierstudio Chromakey Green Screen Backdrop is definitely worth considering. The sheer size allows for full-body shots and more dynamic camera movements. Made from muslin material, this backdrop is relatively easy to clean and maintain.
The main drawback is that it’s a traditional backdrop, so you’ll need a proper backdrop stand system to support it. The muslin material can also be prone to wrinkles, requiring ironing or steaming for the best results. However, the larger surface area and overall durability make it a great choice for more professional applications where space isn’t an issue.
Emart Green Screen Backdrop Kit
The Emart Green Screen Backdrop Kit offers a complete package for anyone looking to get started with green screen photography or videography. It comes with a green screen backdrop, a backdrop stand, and clamps, providing everything you need for a basic setup. This all-in-one solution saves you the hassle of purchasing individual components and ensures compatibility.
The quality of the backdrop itself is decent for the price, though like many fabric backdrops, it may require some ironing to remove wrinkles. The stand is functional and adjustable, although it might not be the most robust option for heavy use. Overall, the Emart kit offers excellent value for beginners and hobbyists who want a straightforward and affordable green screen solution.
Weeylite Green Screen with Stand
The Weeylite Green Screen with Stand is a great option for those looking for a balance between portability and ease of setup. This screen features a built-in stand and a foldable design, allowing for quick and convenient use. The fabric is relatively wrinkle-resistant, minimizing the need for extensive ironing.
While it’s not as compact as some of the pop-up options, the Weeylite screen is still reasonably portable and suitable for small to medium-sized spaces. The integrated stand is sturdy enough for most applications, and the adjustable height provides flexibility in framing your shots. It’s a good choice for streamers, YouTubers, and anyone who needs a reliable green screen that’s easy to set up and take down.
Why Do People Need to Buy Green Screens?
Imagine you’re starting a YouTube channel showcasing your gaming skills. Wouldn’t it be amazing to transport yourself inside the game, interacting with the environment in real-time? Or perhaps you’re a teacher creating engaging online lessons, wanting to replace your cluttered living room background with a dynamic presentation. That’s where the magic of a green screen comes in. It’s a gateway to limitless possibilities, letting you ditch the mundane and embrace creative freedom.
Think of a green screen as a blank canvas for your imagination. With the right software, you can replace that green background with any image or video you desire. Suddenly, you’re broadcasting live from a tropical beach, delivering a professional presentation in a sleek virtual office, or even battling mythical creatures in a fantasy realm. The best green screens offer a consistent, wrinkle-free surface, ensuring a clean and seamless keying effect for optimal results.
But it’s not just for professionals! Aspiring filmmakers, social media enthusiasts, and even families looking for fun activities can benefit. Imagine creating hilarious family videos with customized backgrounds, transforming your living room into a Hollywood set. Or consider a small business owner showcasing their products against visually appealing backdrops, instantly boosting their brand’s image. The possibilities are endless, and surprisingly affordable, especially when you consider the return on investment in terms of enhanced content and engagement.
Investing in one of the best green screens empowers you to break free from the limitations of your physical surroundings. It’s a versatile tool that enhances video quality, boosts creativity, and unlocks a world of possibilities for content creation, communication, and entertainment. Whether you’re a seasoned professional or just starting out, a green screen is an essential addition to your creative toolkit, opening doors to visually stunning and captivating experiences.
Setting Up Your Green Screen for Success
Alright, you’ve got your shiny new green screen – fantastic! But before you jump in front of the camera and start teleporting yourself to tropical beaches, let’s talk setup. A poorly set up green screen can lead to frustrating results. Think patchy keying, weird shadows, and an overall unprofessional look. Nobody wants that! Properly lighting and positioning your screen is key to getting that crisp, clean background replacement you’re after.
First, consider the space you’re working with. The bigger the green screen, the better, especially if you plan on doing full-body shots. However, even a smaller screen can work wonders in a tight space. Just make sure you have enough room to position yourself far enough away from the screen to avoid casting harsh shadows. This distance is critical.
Lighting is your best friend (or worst enemy) when it comes to green screen work. Aim for even lighting across the entire surface of the green screen. Two lights, one on either side, angled slightly, often does the trick. Avoid direct sunlight, as it can create harsh shadows and uneven color tones. Instead, opt for softbox lighting or diffused lights for a smoother, more consistent background.
Finally, pay attention to wrinkles and creases. A perfectly smooth green screen is a dream, but often requires a little extra effort. Ironing (carefully!) or steaming your green screen can make a world of difference. For temporary fixes, try stretching the fabric taut and securing it tightly to its frame. These small details can save you tons of time in post-production.
Common Green Screen Mistakes (and How to Avoid Them)
We all make mistakes, especially when we’re learning something new. Green screen work is no exception! But the good news is, most common green screen errors are easily avoidable with a little knowledge and attention to detail. Let’s troubleshoot some potential pitfalls to keep your productions smooth and professional.
One frequent mistake is wardrobe choices. Avoid wearing anything green, obviously, unless you want to disappear on camera! But also, be mindful of shiny or reflective materials. These can pick up the green screen color and create unwanted artifacts in your final footage. Stick to matte fabrics and darker colors for best results.
Another common issue is insufficient lighting. We touched on this earlier, but it’s worth reiterating. Uneven lighting creates shadows that are a nightmare to key out cleanly. You’ll end up with a blotchy background and lots of frustrating tweaking in your editing software. Invest in decent lighting and take the time to properly illuminate your green screen.
Finally, neglecting the edges of your subject can be a big problem. Stray hairs, blurry edges, or even a slight halo effect can ruin the illusion. Pay close attention to these details during filming and editing. Use tools like rotoscoping or keying refinements in your editing software to clean up those troublesome edges.
Essential Accessories for Green Screen Shoots
Beyond the green screen itself, a few key accessories can make your life much easier and dramatically improve the quality of your results. Think of these as the supporting cast to your green screen’s starring role. These accessories will elevate your footage and save you time.
Lighting is perhaps the most important accessory. While a basic clamp light can work in a pinch, investing in a proper lighting kit can drastically improve your green screen results. Softboxes, umbrellas, and LED panels provide even, diffused light that minimizes shadows and creates a more professional look.
Next, consider the stand or support system for your green screen. A sturdy stand is essential for keeping your green screen taut and wrinkle-free. Look for adjustable stands that can accommodate different heights and widths, depending on your filming needs. If you’re using a collapsible green screen, make sure the stand is compatible and easy to set up.
Lastly, don’t forget about clamps, clips, and tape! These seemingly small items can be incredibly useful for securing your green screen, removing wrinkles, and preventing unwanted movement. Gaffer tape is a particularly versatile tool for a variety of on-set tasks. A good set of clamps will save you many headaches.
Green Screen Software Options: A Beginner’s Guide
Okay, so you’ve got your green screen setup and your footage looks great. Now it’s time to bring it all together in post-production. Choosing the right software is crucial for seamlessly replacing your green background with a virtual environment. There are many options available, ranging from free and user-friendly to professional-grade and feature-rich. Here’s a breakdown to help you find what’s right for you.
For beginners, free software like HitFilm Express and DaVinci Resolve (the free version) are excellent starting points. These programs offer robust keying tools and a surprisingly wide range of features for basic green screen work. They’re also great for learning the fundamentals of video editing. Start with free versions to see how green screen software affects your overall editing workflow.
If you’re ready to step up your game, consider paid options like Adobe Premiere Pro or Final Cut Pro. These industry-standard programs offer advanced keying tools, precise control over color correction, and seamless integration with other creative software. They may have a steeper learning curve, but the results can be stunning.
Beyond the main editing software, plug-ins can also enhance your green screen capabilities. Plugins such as Red Giant Keying Suite offer specialized tools for dealing with challenging green screen footage, such as difficult lighting or intricate details. Experimenting with plugins is a great way to optimize your keying results.
Choosing the Best Green Screens: A Buyer’s Guide
Hey there, future filmmaker, streamer, or virtual meeting extraordinaire! Ready to dive into the world of green screens? Whether you’re aiming for professional-quality special effects or just want to spice up your online presence, choosing the right green screen can make all the difference. But with so many options available, figuring out where to start can feel overwhelming. Don’t worry, I’m here to help! Consider me your friendly guide through the green screen jungle. We’ll break down the key factors you need to consider, making sure you pick the best green screen for your needs and budget. Let’s get started!
Size Matters (But Maybe Not How You Think)
Okay, first things first: size. It’s tempting to think bigger is always better, especially when you’re picturing epic scenes with dinosaurs or teleporting to exotic locations. But before you order a massive, wall-sized green screen, consider your actual shooting space and the type of content you plan to create. If you’re primarily filming head-and-shoulders shots for streaming or online meetings, a smaller, more portable option might be all you need.
Think about it: wrestling a giant green screen into a cramped room can be a nightmare. Plus, a larger screen means more surface area to light evenly, which brings us to our next point. So, assess your space, envision your typical shots, and choose a size that’s practical and manageable for your specific needs. Trust me, you’ll thank yourself later when you’re not banging your head against the wall trying to set up. Aim for efficiency! Remember, some of the best green screens are also the most practical ones.
Material Magic: Fabric vs. Vinyl vs. Paper
Now, let’s talk materials. Green screens come in a variety of fabrics, vinyl, and even paper options. Each has its own strengths and weaknesses, so understanding the differences is crucial. Fabric screens, often made from muslin or polyester, are generally lightweight, foldable, and relatively wrinkle-resistant. This makes them ideal for on-the-go shooting and storage. Vinyl screens, on the other hand, are more durable and easier to clean, but they can be heavier and prone to glare if not properly lit. Paper screens are the most affordable option, but they’re also the most fragile and not suitable for repeated use.
Imagine you’re setting up a screen for a client shoot and you pull out a wrinkled fabric screen, or worse, a ripped paper one. Not a good look, right? The material is going to have a huge impact on the final appearance. The best green screens are often the ones you can count on day in and day out. Consider how often you plan to use the screen, the conditions you’ll be using it in, and your budget when making your decision.
Lighting is Everything (Seriously!)
I can’t stress this enough: proper lighting is absolutely essential for achieving a clean and convincing green screen effect. Even the best green screens will look terrible if they’re not lit evenly. Uneven lighting creates shadows and variations in color, making it much harder to key out the green screen in post-production. This can result in jagged edges, color spill, and an overall amateurish look.
Think of it this way: you’re basically trying to create a uniform canvas for your virtual background. The more consistent the lighting, the easier it will be for your editing software to recognize and remove the green screen. Invest in good quality lighting equipment, experiment with different setups, and learn how to diffuse the light to minimize harsh shadows. Remember, good lighting is not just about brightness; it’s about evenness and consistency.
Portability and Storage: On the Go or Staying Put?
Are you a nomadic creator who’s always on the move, or do you primarily shoot in a dedicated studio space? Your answer to this question will greatly influence your green screen choice. If you need a portable solution, look for lightweight, foldable screens that come with a carrying case. Pop-up green screens are particularly convenient for quick setup and teardown.
Picture yourself lugging a heavy, bulky green screen to a remote location for an outdoor shoot. Not fun, right? On the other hand, if you have a dedicated studio, you might prefer a larger, more permanent setup. Consider the ease of storage as well. Can the screen be easily folded and stored away when not in use? Or will it take up valuable space? The best green screens for you will fit your lifestyle and shooting style.
Wrinkle Resistance: A Battle Worth Fighting
Wrinkles are the enemy of a clean green screen effect. They create shadows and variations in color, making it more difficult to key out the background smoothly. While no green screen is completely wrinkle-proof, some materials are more resistant than others. Fabric screens made from polyester or muslin tend to wrinkle less than vinyl or paper.
Imagine spending hours meticulously editing a video, only to realize that the green screen is riddled with wrinkles that are causing distracting artifacts. The best green screens minimize this headache. Look for screens that are marketed as wrinkle-resistant or that come with instructions on how to remove wrinkles. Steaming or ironing the screen (carefully!) can also help to smooth out any creases.
Stand and Deliver: Support Systems for Success
A sturdy stand is essential for keeping your green screen upright and stable. A flimsy stand can wobble or collapse, ruining your shot and potentially damaging your equipment. Look for stands that are made from durable materials like metal and that have adjustable height settings. Consider the weight capacity of the stand to ensure it can support the weight of your green screen.
Think about it: you’re in the middle of a live stream when your green screen suddenly topples over. Not exactly a professional look, is it? Investing in a high-quality stand is a small price to pay for peace of mind. Some green screens come with their own integrated stands, while others require you to purchase them separately. Make sure the stand is compatible with the size and type of green screen you’ve chosen. The best green screens are often sold as kits complete with stand and carry case.
Budget Bites: Finding the Sweet Spot
Last but not least, let’s talk about budget. Green screens range in price from affordable to downright expensive. It’s important to set a budget before you start shopping and to stick to it as much as possible. However, don’t be tempted to go for the cheapest option just to save a few bucks. A low-quality green screen can end up costing you more in the long run due to the extra time and effort required to fix imperfections in post-production.
Imagine spending hours struggling to key out a poorly lit, wrinkled green screen, only to end up with a subpar result. The best green screens offer a good balance of quality and affordability. Do some research, read reviews, and compare prices to find the sweet spot that works for you. Remember, you don’t need to break the bank to get a decent green screen that will meet your needs. Consider a mid-range option for the best value.
FAQs
What size green screen should I get?
Choosing the right size green screen really depends on what you plan to film! Think about whether you’ll be mostly shooting individuals, small groups, or even larger scenes. A smaller screen, like a 5×7 foot one, is great for headshots or single-person shots. But if you anticipate needing full body shots or want to include more people, you’ll definitely want to size up to something like a 10×12 foot screen.
Consider the space you have available as well! A huge screen is fantastic for versatility, but not so much if you’re working in a cramped room. Measure your space and then think about how you’ll be positioning your camera and subject to figure out what dimensions will work best. Don’t be afraid to err on the side of slightly larger – you can always crop in during editing, but you can’t add what isn’t there!
What material is best for a green screen?
Most green screens are made from either fabric (like muslin or polyester) or a solid, non-reflective material. Fabric screens are generally more affordable and easier to store since they can be folded up. However, they can wrinkle easily, which can cause headaches during the keying process (removing the green). You’ll need to take the time to iron or steam them before each shoot.
Solid screens, on the other hand, are typically smoother and wrinkle-resistant, giving you a cleaner, more consistent key. They tend to be more expensive and require more storage space since they can’t be folded. Ultimately, the best material depends on your budget, storage constraints, and how much time you want to dedicate to prepping your green screen before each use.
What’s the difference between a pop-up green screen and a fixed background?
A pop-up green screen is all about convenience and portability. Think of it like a giant reflector that folds up into a small disc. These are super easy to set up and take down, making them ideal for on-the-go shoots or if you have limited space for storage. They’re generally smaller than fixed backgrounds, so they’re best suited for headshots or waist-up shots.
Fixed green screen backgrounds, like those that hang on a stand or are mounted to a wall, offer a more stable and usually larger surface area. They’re great for more permanent setups in studios or dedicated filming spaces. While they might not be as easily portable, they often provide a smoother, more even background for easier keying and more flexibility in framing your shots.
What lighting is needed for a green screen?
Good lighting is absolutely crucial for a successful green screen shoot! You want to aim for even and consistent light across the entire screen. This means avoiding harsh shadows and hot spots. Use softboxes or diffusion panels to spread the light and make it more flattering. Having two lights positioned at 45-degree angles to the screen is a good starting point.
Separate the lighting for your subject from the lighting for the green screen. You don’t want light from the screen spilling onto your subject (or vice versa). Experiment with the intensity and position of your lights until you achieve a clean, evenly lit green screen with minimal shadows. A well-lit screen makes all the difference in post-production!
How do I prevent wrinkles and shadows on my green screen?
Wrinkles and shadows are the enemies of a clean green screen key! For fabric screens, ironing or steaming is your best friend. Take the time to smooth out any creases before you start filming. As for shadows, proper lighting is key. Use multiple light sources to evenly illuminate the screen and eliminate any dark spots.
Positioning your subject far enough away from the screen will also help minimize shadows cast by them. Remember that even the slightest shadows can create unwanted artifacts in your keyed footage, so take the extra time to get your lighting and screen setup just right!
How much do green screens typically cost?
Green screens come in a wide range of prices, depending on the size, material, and type (pop-up vs. fixed). Smaller, pop-up green screens can be found for as little as $30-$50, making them a budget-friendly option for beginners or those who need portability. These are great for quick headshots or webcam use.
Larger, more professional-grade green screens, especially those made from high-quality materials or with elaborate stand systems, can easily cost several hundred dollars. Consider your budget and your specific needs when making your decision. Investing in a slightly more expensive screen with better quality can often save you time and frustration in the long run, especially when it comes to post-production.
How do I clean and store my green screen?
The best way to clean your green screen depends on the material. For fabric screens, you can often spot clean minor stains with a mild detergent and a damp cloth. Always test the cleaning solution on an inconspicuous area first to make sure it doesn’t damage the fabric. For larger messes, check the manufacturer’s instructions to see if it’s safe to machine wash.
When it comes to storage, keeping your green screen wrinkle-free is key. For fabric screens, fold them carefully and store them in a garment bag or storage container. Pop-up screens can simply be folded back into their compact form and stored in their carrying case. For solid screens, store them flat or rolled up to prevent damage and creases. Proper cleaning and storage will help extend the life of your green screen and keep it looking its best!
The Bottom Line
So, there you have it! Armed with this guide to the best green screens, you’re now ready to take your content creation to a whole new level. Remember, the right green screen isn’t just about seamless backgrounds; it’s about unlocking limitless possibilities for your videos, streams, and photos. Whether you’re aiming for professional polish or quirky fun, the power to transform your visual world is now in your hands.
Don’t overthink it – pick the screen that speaks to your needs and budget, and just start creating! The best green screens are tools that help you bring your vision to life, so get ready to experiment, learn, and have a blast. The only limit is your imagination, so go out there and make some magic!