Remember that day you spent hours perfecting your curls, only to have them fall flat the moment you stepped outside? Or maybe you’ve tried countless products and techniques, but your curl definition just isn’t where you want it to be. I get it! I’ve been there, battling frizz and limp curls with the best of them. It wasn’t until I discovered the game-changing magic of a curl diffuser that my hair truly started to flourish. The right diffuser can make all the difference in achieving bouncy, defined curls without the dreaded heat damage.
If you’re ready to say goodbye to bad hair days and hello to gorgeous, natural curls, you’re in the right place! Finding the best curl diffuser hair dryers can feel overwhelming, but fear not! This guide is here to simplify your search. We’ve rounded up top-rated models and created a comprehensive buying guide, complete with expert reviews and helpful tips, so you can confidently choose the perfect diffuser for your unique curl type and styling needs. Get ready to unlock your curls’ full potential!
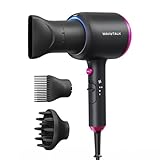
Before we jump into the best curl diffuser hair dryers review, let’s take a look at these Amazon products:


Last update on 2026-02-28 / Affiliate links / #CommissionsEarned / Images from Amazon Product Advertising API
Say Goodbye to Frizz and Hello to Defined Curls: Finding Your Perfect Diffuser
Let’s be honest, air-drying your curls is a dream… in theory. The reality? Hours of wet hair, inconsistent curl formation, and often, a whole lot of frizz. For years, I battled this very struggle, trying every curl cream and styling technique under the sun. Then, I discovered the magic of a diffuser! It was like unlocking a secret code to consistently bouncy, defined curls.
If you’re anything like me, you’re probably wondering, “What exactly is a diffuser, and why do I need one?” Think of it as a gentle, controlled airflow system for your hairdryer. It attaches to the end and disperses the heat, mimicking the natural air-drying process but with a lot more speed and precision. According to recent studies, using a diffuser can reduce frizz by up to 60% compared to traditional blow-drying – that’s a stat that caught my attention!
Finding the right one can feel overwhelming, though. There are so many different shapes, sizes, and materials out there. That’s where this guide comes in! We’re going to break down the essential features and considerations so you can confidently choose the best curl diffuser hair dryers for your unique curl type and hair needs. No more guessing games, just gorgeous, defined curls.
So, whether you’re a seasoned curly girl looking to upgrade your diffuser or a newbie just embarking on your curl journey, get ready to discover the perfect tool for achieving your dream curls. We’re diving deep into the world of diffusers, exploring the top contenders, and sharing tips and tricks to help you achieve salon-worthy results, all from the comfort of your own home. Let’s get those curls popping!
Top 5 Best Curl Diffuser Hair Dryers
DevaDryer with DevaFuser
This hair dryer and diffuser combo is a long-time favorite in the curly hair community, and for good reason! The patented DevaFuser is shaped like a hand, featuring “fingers” that gently cradle your curls while distributing air evenly. This design helps to lift the hair at the root, creating volume and preventing frizz. The dryer itself boasts three temperature settings and two-speed settings, giving you ample control over your drying process.
The DevaDryer is an investment, but many users find it worth the cost. The unique diffuser design is particularly effective for creating defined, voluminous curls without disrupting the natural curl pattern. Some may find the hand-shaped design a bit bulky to maneuver at first, but with practice, it becomes a beloved tool for achieving salon-worthy results at home.
Dyson Supersonic with Diffuser Attachment
The Dyson Supersonic needs no introduction; it’s known for its innovative technology and sleek design. While the initial price tag might raise eyebrows, the Supersonic’s diffuser attachment is a game-changer for curly hair. The diffuser is large and round, designed to distribute air evenly across a wider area. This helps to dry curls quickly and efficiently, minimizing heat damage and reducing frizz.
Beyond the diffuser, the Supersonic itself is a powerhouse. Its intelligent heat control prevents extreme heat damage, and the fast drying time is a major plus. The lightweight design and quiet operation are also noteworthy. If budget isn’t a major concern, the Dyson Supersonic with its diffuser attachment is a top-tier choice for achieving healthy, bouncy curls.
Xtava Black Orchid Diffuser
Looking for a budget-friendly option that still delivers impressive results? The Xtava Black Orchid Diffuser is a great choice. This universal diffuser is designed to fit most hair dryers, making it a versatile addition to your hair care routine. The large bowl shape and long prongs help to distribute air evenly and gently lift curls, creating volume and definition.
Users rave about the Xtava Black Orchid Diffuser’s ability to reduce frizz and enhance curl definition. It’s a simple yet effective tool that can transform the results of your existing hair dryer. While it may not have the advanced technology of more expensive options, it’s an excellent value for the price and a great way to experiment with diffusing.
ghd Helios Professional Hair Dryer with Diffuser
The ghd Helios is a professional-grade hair dryer known for its powerful airflow and precision. When paired with the ghd diffuser, it becomes a formidable tool for achieving salon-quality curls. The diffuser is designed to evenly distribute air, preventing frizz and enhancing curl definition. The Helios’s Aeroprecis technology also contributes to a smooth and shiny finish.
This combination is ideal for those who want a fast and efficient drying experience without sacrificing curl health. The Helios is lightweight and easy to maneuver, making it comfortable to use even for longer styling sessions. While it’s a significant investment, the ghd Helios with diffuser is a worthwhile upgrade for anyone serious about their curly hair routine.
Conair Volumizing Diffuser Attachment
For those seeking an affordable and widely accessible option, the Conair Volumizing Diffuser Attachment is a solid choice. This diffuser is designed to fit most Conair hair dryers and features long, finger-like extensions that help to lift hair at the roots for added volume. Its simple design makes it easy to use, even for beginners.
While it may not offer the same level of advanced technology as more expensive diffusers, the Conair Volumizing Diffuser Attachment is a great option for everyday use. It helps to reduce frizz and enhance curl definition without breaking the bank. It’s a reliable and practical choice for those who want to improve their diffusing technique without a major investment.
Why Buy a Curl Diffuser Hair Dryer?
Imagine this: you’ve spent time carefully applying your favorite curl cream, twisting and shaping each section, dreaming of bouncy, defined curls. But after air drying, you’re left with a frizzy, undefined mess. Or maybe you’re rushing to get ready and can’t wait hours for your hair to dry naturally, only to risk disrupting your curl pattern with a regular hairdryer. That’s where a curl diffuser hair dryer swoops in to save the day!
A curl diffuser is specifically designed to distribute airflow gently and evenly, preventing your curls from being blasted around, which leads to frizz. Instead of direct heat forcefully separating and disrupting your curl clumps, the diffuser’s prongs cradle and shape them as they dry. Think of it as giving your curls a cozy, heated hug that encourages definition and minimizes frizz. It helps to maintain the integrity of your curl pattern, resulting in softer, more defined, and voluminous curls.
Using a “best curl diffuser hair dryer” can significantly reduce drying time compared to air drying, all without sacrificing your curl definition. Plus, many come with adjustable heat and speed settings, allowing you to customize the drying process to your specific hair type and needs. This means you can achieve salon-worthy results at home, saving you both time and money.
Ultimately, investing in a curl diffuser hair dryer is investing in the health and happiness of your curls. It’s about giving them the gentle care and attention they deserve, allowing them to thrive and showcase their natural beauty. So, say goodbye to frizz and hello to beautifully defined, bouncy curls with the help of a curl diffuser hair dryer!
Understanding Your Curl Type
Before you even think about buying a diffuser, let’s get real about your curl type. Are we talking tight coils that spring back with a vengeance? Or maybe loose waves that gently cascade down your shoulders? Knowing your curl pattern – whether it’s 2A, 3B, or anything in between – is essential because different curl types respond differently to diffusers. For instance, someone with delicate 2A waves might need a diffuser with gentler airflow and wider prongs, while someone rocking 4C coils might benefit from a diffuser with deeper, more defined “fingers” to lift and separate those curls.
Think of it like choosing the right paintbrush for a masterpiece. You wouldn’t use a tiny detail brush to paint a broad landscape, right? Similarly, the wrong diffuser can lead to frizz, uneven drying, and curls that just don’t pop. So, take a good look in the mirror, examine your curls when they’re wet and dry, and do a little research to pinpoint your curl type. It’s the foundation for building your perfect curl routine.
Now, why does this matter in the real world? Imagine you’re rushing to get ready for a date night. You grab a diffuser that’s all wrong for your hair, and end up with a frizzy, undefined mess. That’s no way to start a romantic evening! Knowing your curl type prevents those hair-related disasters and helps you achieve consistently gorgeous curls.
Finally, understanding your curl type also means understanding its needs. Is your hair protein-sensitive? Does it crave moisture? These factors influence how you use your diffuser – the heat settings, the products you apply beforehand, and even the angle at which you hold the dryer. It’s all connected, and taking the time to learn about your specific hair type will pay off in the long run.
Maintaining Your Curl Diffuser
Okay, you’ve found your dream diffuser! Now, let’s talk about keeping it in tip-top shape. A dirty diffuser is like a clogged makeup brush – it won’t perform at its best. Product buildup, dust, and even hair can accumulate in the prongs and vents, affecting airflow and potentially damaging your hair. Imagine trying to bake a cake with a dirty oven – you’re just not going to get the best results.
Regular cleaning is key. Unplug your diffuser (safety first!), and use a damp cloth or a toothbrush to gently remove any visible debris. For stubborn buildup, a little diluted shampoo or dish soap can work wonders. Make sure to rinse thoroughly and let it dry completely before using it again. Don’t forget to check the air intake vent on the back of your hairdryer too – a clogged vent can cause the dryer to overheat.
Why is this so important in a real-world scenario? Picture this: you’re getting ready for a job interview, and you want your curls to look their absolute best. But, because you haven’t cleaned your diffuser, it’s spitting out product residue and causing your hair to look dull and weighed down. Not the confidence boost you were hoping for! A clean diffuser ensures that you’re always putting your best hair forward.
Beyond cleaning, proper storage also plays a role in diffuser maintenance. Avoid tossing it carelessly into a drawer where it can get damaged. A designated spot, like a drawer organizer or a shelf, will protect it from scratches and breakage. Consider wrapping the cord neatly to prevent tangles and prolong its lifespan. Treat your diffuser with care, and it will reward you with years of beautifully defined curls.
Essential Products to Use with a Curl Diffuser
So, you’ve got the perfect diffuser, and you know your curl type. Now it’s time to talk products! Think of your diffuser as the oven and your hair products as the ingredients for a delicious curl recipe. You wouldn’t bake a cake without flour, sugar, and eggs, right? Similarly, you need the right products to prep and protect your curls before and during the diffusing process.
Start with a good leave-in conditioner or curl cream. These provide moisture and definition, creating a smooth canvas for your curls. Next, consider a heat protectant. Even though diffusers use lower heat than other styling tools, heat protectant is always a good idea. It acts like a shield, preventing damage and frizz. Finally, a lightweight gel or mousse can help hold your curl shape and provide definition.
Let’s say you’re prepping for a wedding. You want your curls to look polished and perfect all day long. Without the right products, your curls might fall flat, become frizzy, or lose their definition by the time the reception rolls around. The right combination of leave-in conditioner, heat protectant, and styling product will ensure that your curls stay bouncy and beautiful from ceremony to dance floor.
Experimenting is key! What works wonders for one person might not work for another. Play around with different products and combinations until you find the ones that give you the best results. Pay attention to how your hair feels and looks after diffusing. Is it dry and crunchy? Too soft and undefined? Adjust your product routine accordingly. Remember, achieving perfect curls is a journey, not a destination.
Mastering the Diffusing Technique
Alright, let’s dive into the art of diffusing! It’s not just about blasting your hair with hot air. The technique you use can make or break your curl definition and overall look. Think of it like painting – the right brushstrokes can create a masterpiece, while haphazard strokes can lead to a messy canvas. The same goes for diffusing!
Start by hovering the diffuser near your roots, using a low heat and low speed setting. This helps to set the roots and create volume without causing frizz. Then, gently cup sections of your hair in the diffuser bowl and lift it towards your scalp, holding it there for a few seconds before moving on. This “pixie diffusing” method encourages curl formation and minimizes frizz. Avoid moving the diffuser around too much, as this can disrupt the curl pattern.
Imagine you’re getting ready for a photoshoot. You need your curls to look defined, voluminous, and picture-perfect. A rushed, haphazard diffusing technique will likely result in uneven curls, frizz, and a lack of definition. But, with a slow, deliberate approach – hovering at the roots, cupping the curls, and using low heat – you can achieve a polished, camera-ready look that will make you feel confident and beautiful.
Don’t be afraid to experiment with different diffusing techniques to find what works best for your hair. Some people prefer to flip their hair upside down for extra volume, while others find that diffusing in sections gives them the most control. The key is to be patient and gentle, and to pay attention to how your hair responds. With practice, you’ll develop a diffusing technique that delivers consistently stunning curls.
Buying Guide: Best Curl Diffuser Hair Dryers
Choosing the perfect curl diffuser hairdryer can feel overwhelming, but don’t worry! This guide is designed to help you navigate the options and find the best curl diffuser hair dryers for your unique hair type and styling needs. Think of it as a friendly chat with someone who’s been there, experimented with different diffusers, and wants to share the secrets to bouncy, defined curls. Let’s dive in and unlock the secrets to gorgeous, frizz-free curls!
1. Diffuser Size and Shape: Finding Your Perfect Fit
The size and shape of your diffuser significantly impact your curl definition and drying time. Larger diffusers cover more surface area, making them great for faster drying, especially for those with long, thick hair. However, they can sometimes straighten curls if the bowl is too wide and doesn’t cup your curls effectively. Smaller diffusers provide more focused airflow, ideal for shorter hair or achieving tighter, more defined curls.
Consider the depth of the diffuser bowl as well. A deeper bowl allows you to gather more curls into the diffuser, helping to prevent frizz and maintain curl shape during drying. If you have delicate curls that easily lose their shape, a deeper bowl can be a game-changer. Experimenting with different sizes and shapes can help you discover what works best for your unique curl pattern and desired style.
2. Heat and Speed Settings: Customizing Your Drying Experience
One size doesn’t fit all when it comes to heat and speed. The best curl diffuser hair dryers offer multiple heat and speed settings, allowing you to customize the drying process to suit your hair type and the weather conditions. Lower heat settings are generally recommended for curly hair to prevent damage, dryness, and frizz. Higher heat settings can speed up the drying process, but they should be used sparingly and with caution.
Speed settings also play a crucial role. A lower speed setting helps to minimize frizz by gently drying your curls without disrupting their natural pattern. A higher speed setting can be useful for removing excess water quickly, but again, be mindful of potential frizz. Experiment with different combinations of heat and speed to find the sweet spot that delivers defined, healthy-looking curls without causing damage. Finding the perfect balance will help you achieve the style you crave while maintaining healthy, vibrant curls.
3. Hair Dryer Power (Wattage): Balancing Drying Time and Hair Health
The wattage of your hairdryer determines its power, influencing drying time. Higher wattage hair dryers generally dry hair faster, but they can also generate more heat, potentially leading to damage if not used carefully. Lower wattage hair dryers are gentler on the hair, but they may require more time to dry your curls completely. Finding the right balance is key.
For fine or easily damaged curly hair, a lower wattage hairdryer (around 1500-1875 watts) is often recommended. This allows for slower, more controlled drying, minimizing the risk of heat damage. For thicker, coarser curly hair, a higher wattage hairdryer (around 1875-2200 watts) may be necessary to effectively dry the hair in a reasonable amount of time. Consider your hair’s thickness, porosity, and overall health when selecting a hairdryer with the appropriate wattage.
4. Ionic Technology: Taming Frizz and Boosting Shine
Ionic technology is a game-changer for curly hair, especially if you struggle with frizz. Hair dryers with ionic technology emit negative ions that neutralize the positive ions present in your hair. This helps to break down water molecules more quickly, reducing drying time and minimizing frizz. The negative ions also help to seal the hair cuticle, resulting in smoother, shinier, and healthier-looking curls.
If frizz is your biggest enemy, investing in a curl diffuser hairdryer with ionic technology is a must. You’ll notice a significant difference in the smoothness and manageability of your curls after just one use. While not all ionic technology is created equal, even a basic ionic dryer can provide noticeable benefits. Look for dryers that boast “tourmaline” or “ceramic” components, as these materials are known to enhance ionic output.
5. Material and Build Quality: Investing in Longevity
The material and build quality of your curl diffuser hairdryer directly impact its durability and longevity. Hairdryers made with high-quality materials are more likely to withstand daily use and last for years to come. Look for dryers with sturdy housings, durable attachments, and well-insulated cords. Avoid flimsy plastic that can crack or break easily.
Ceramic and tourmaline components are not only beneficial for ionic technology, but they also contribute to even heat distribution, preventing hot spots that can damage your hair. Consider the weight of the dryer as well. A lightweight dryer is easier to handle, especially if you have long, thick hair that requires extended drying sessions. Investing in a well-built dryer may cost more upfront, but it will save you money in the long run by reducing the need for frequent replacements. The best curl diffuser hair dryers are built to last.
6. Cold Shot Button: Setting Your Style for Lasting Hold
The cold shot button is an often-overlooked but essential feature for curly hair styling. This button blasts a stream of cool air, which helps to set your curls and lock in your desired style. The cold air seals the hair cuticle, reducing frizz and adding shine. Using the cold shot button after diffusing your curls can significantly improve the longevity of your style.
After you’ve diffused your curls to your desired level of dryness and definition, blast each section with cold air for a few seconds. This helps to close the cuticle and prevent your curls from drooping or becoming frizzy throughout the day. The cold shot button is particularly useful in humid climates where frizz is a constant battle. It’s a simple yet effective tool for achieving salon-worthy results at home.
7. Price and Warranty: Balancing Budget and Peace of Mind
Price is always a consideration when purchasing any new styling tool. The best curl diffuser hair dryers range in price from budget-friendly options to high-end models with advanced features. Determine your budget upfront and research different brands and models within your price range. Don’t automatically assume that the most expensive option is always the best.
Consider the warranty offered by the manufacturer. A good warranty provides peace of mind, knowing that you’re protected against defects in materials or workmanship. Read the warranty terms carefully to understand what is covered and for how long. A longer warranty typically indicates that the manufacturer has confidence in the quality of their product. Balancing price and warranty ensures that you get the best value for your money and a dryer that will last.
FAQ
What exactly is a curl diffuser, and why should I use one?
So, a curl diffuser is essentially an attachment for your hairdryer. Think of it like a little bowl with prongs or fingers inside. It’s designed to disperse the airflow from your dryer, instead of blasting it all in one concentrated spot. This gentler airflow is the key to happy, defined curls!
Using a diffuser helps prevent frizz by minimizing disturbance to your curl pattern while drying. It allows your curls to dry evenly and retain their natural shape, resulting in bouncier, more defined curls with less of that dreaded frizz halo. Plus, it helps speed up the drying process compared to air-drying, which can take hours, especially for thicker hair.
How do I choose the right curl diffuser for my hair type and length?
Choosing the right diffuser really comes down to a few key things: your hair type, length, and the type of curls you have. For example, if you have long, thick hair, you’ll want a diffuser with a larger bowl and longer prongs to accommodate all that volume. Finer hair might benefit from a smaller diffuser with shorter prongs to prevent overwhelming your curls.
Also, think about your curl pattern. If you have tighter, coily curls, a diffuser with a deeper bowl and more defined prongs might be ideal for lifting and shaping your curls at the root. Experimenting a little is key, but paying attention to these basics will get you started in the right direction. Don’t be afraid to read reviews and see what other people with similar hair types are using!
What temperature setting should I use when diffusing my hair?
This is a super important question! Heat is generally the enemy of healthy, happy curls, so you definitely want to be mindful of the temperature setting you’re using. The best approach is to start with the lowest heat setting and gradually increase it only if necessary.
Ideally, you want to use a low or medium heat setting to minimize heat damage and frizz. High heat can dry out your hair, leading to breakage and a loss of definition. The lower the heat, the better, but you want to balance that with actually getting your hair dry in a reasonable amount of time! Play around with it and see what works best for your hair.
How do I actually use a curl diffuser? Any tips for beginners?
Using a diffuser might seem intimidating at first, but it’s actually pretty straightforward! Start by applying your favorite curl products to damp hair. Then, attach the diffuser to your hairdryer and turn it on to a low or medium heat setting (as we discussed!).
Now, the fun part: gently cup sections of your hair into the diffuser bowl, lifting the diffuser up towards your scalp. Hold it there for a few seconds (or even a minute for more volume at the roots) before moving on to the next section. Avoid moving the diffuser around too much, as this can create frizz. You can also try hovering the diffuser over your hair, using it to gently dry without direct contact. The key is patience and practice!
My diffuser keeps popping off my hairdryer. Is it the wrong size?
That’s a frustrating problem! It usually means the diffuser isn’t a perfect fit for your hairdryer nozzle. Check the diffuser’s product description to see what size nozzles it’s compatible with. Some diffusers come with universal adapters that help them fit a wider range of dryers.
If you’re using a universal diffuser, make sure the adapter is securely attached and that you’ve adjusted it to the right size for your dryer. If the problem persists, you might need to consider a different diffuser or even a new hairdryer with a more compatible nozzle. Sometimes a little trial and error is involved!
Can using a diffuser damage my hair?
While diffusers are generally gentler than direct heat from a hairdryer, overuse or incorrect use can still potentially cause damage. The key is to use a low heat setting and avoid over-drying your hair.
Always use a heat protectant spray before diffusing to create a barrier between your hair and the heat. And remember, it’s okay to let your hair air-dry sometimes too! Giving your hair a break from heat styling can help keep it healthy and strong in the long run.
How often should I diffuse my hair?
There’s no one-size-fits-all answer to this! It really depends on your hair type, how often you wash your hair, and your personal preference. If you have fine or dry hair, diffusing less frequently is generally a good idea to prevent over-drying.
If you wash your hair every day, you might want to alternate between diffusing and air-drying to minimize heat exposure. If you only wash your hair a couple of times a week, diffusing each time is likely fine. Pay attention to how your hair feels and looks. If it starts to feel dry or brittle, it’s a sign to cut back on the heat!
Conclusion
So, there you have it! We’ve explored some of the best curl diffuser hair dryers out there, highlighting their strengths and how they can cater to your unique curl needs. Finding the perfect diffuser might seem a little daunting at first, but remember, it’s all about understanding your hair and what works best for it. Experiment, play around with techniques, and don’t be afraid to embrace the journey of discovering your ultimate curl routine!
Now it’s time to take the plunge and invest in a diffuser that will unlock your curls’ full potential. Imagine the bounce, the definition, the sheer joy of consistently amazing hair days! You deserve to feel confident and love your curls, and the right diffuser can be a game-changer. Go forth, find your best curl diffuser hair dryer soulmate, and prepare to rock those gorgeous curls!